How to Build a Potting Bench with Reclaimed Wood the Easy Way
Have you always wanted to create your own potting bench? You’re in luck! Learn how to build a potting bench from reclaimed wood and windows here!

Hello everybody! I have an extra special surprise for you today! I’ve teamed up with the incredibly talented Ananda from A Piece of Rainbow and we’re going to show you How to Build a Potting Bench with Reclaimed Wood. I know, I know. I’m excited too!
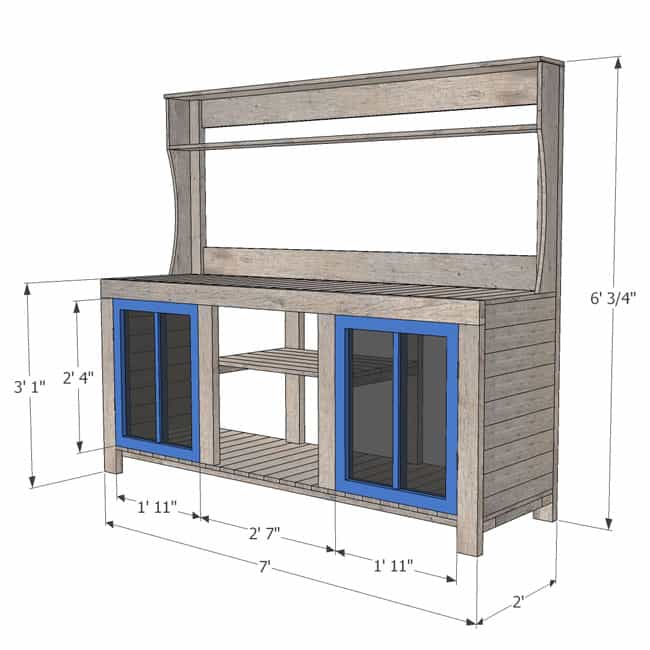
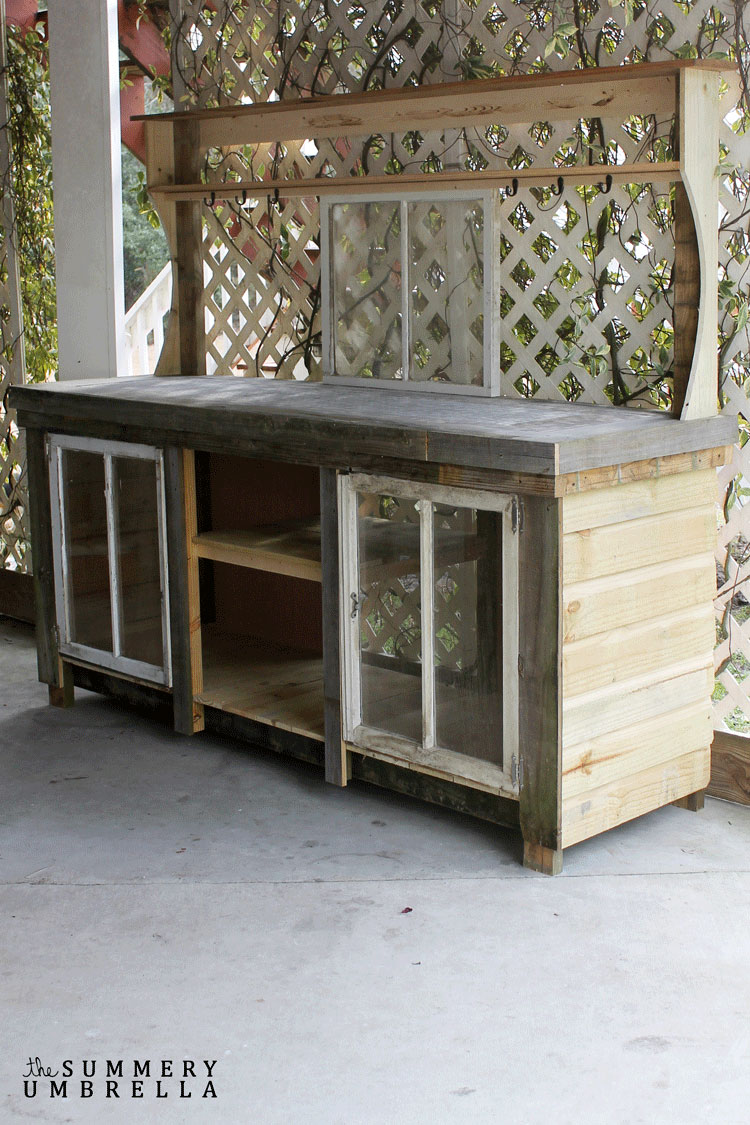
Here’s just a taste of what she can do and to give you a better idea of these overall dimensions: Isn’t she amazing?!?
How to Build a Potting Bench with Reclaimed Wood the Easy Way
What I absolutely LOVE about this collaboration is that I’ll be showing you the actual photos of the potting bench during its creation.
However, Ananda will be showing you in her post the nooks and crannies (that can be hard to see!) with her design software which will help clear up any confusion.
Like most of my projects, it all starts with a walk to the reclaimed woodpile that is hidden away on my husband and I’s property.
We typically have a nice selection to choose from, but it’s very important to have at least a decent idea in my head of what I would like to construct.
For instance, a quick sketch in my notepad or even on a computer program like Adobe Illustrator works out just fine.

How to Build a Potting Bench with Reclaimed Wood
As mentioned earlier, you can definitely customize this potting bench to any dimensions that you need for your space, but this particular bench measures out to be 6′ H x 7′ L x 2′ W.
Needless to say, we have been using this potting bench for anything and everything that comes our way, and couldn’t be happier! So, let’s get started:
Materials Used:
- 2×4’s (reclaimed wood)
- 1x 8’s (reclaimed wood)
- fence pickets
- 1/2″ plywood 4’x8′
- 1/4″ underlayment
- salvaged windows
- wood screws
- hinges
- hangers
- 12″ x 12″ mosaic tiles
- tile mortar (adhesive)
- tile grout
- exterior wood glue
- stain and polyurethane or primer and paint
**All lumber is pressure treated**
Tools Suggested:
- drill and bits
- 3/16″ v-notched tile trowel
- foam rubber grout float
- jigsaw
- sandpaper
- level
- table saw
- miter saw or circular saw
- pencil
- screw gun
- measuring tape
- framing hammer
- nail gun (brad)
- ruler or anything with a straightedge
Instructions
1.) First things first, go ahead and remove any old nails, screws, or other bits that aren’t needed. We used treated 2X4s for the framework so they may look old and weathered, but are structurally sound!
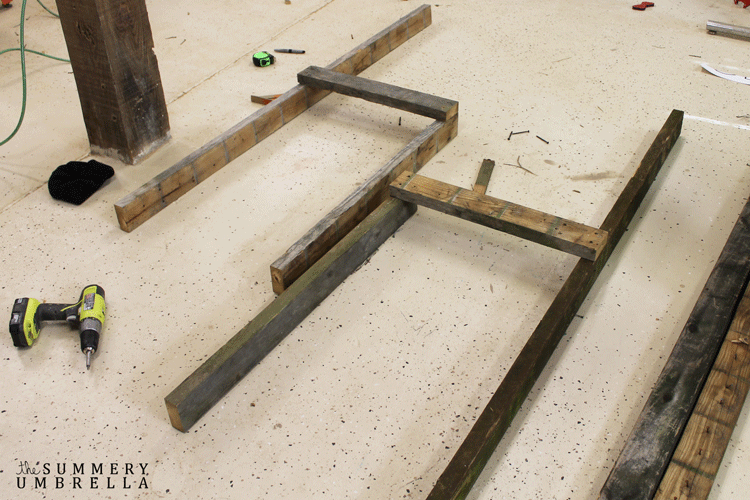
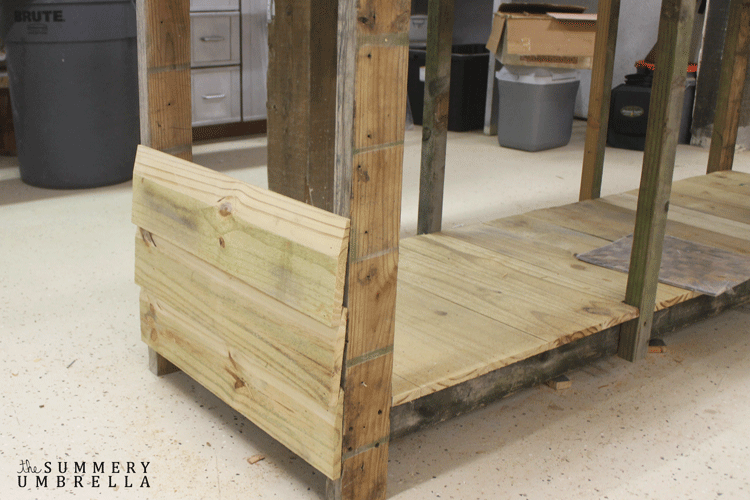
Frame it Up
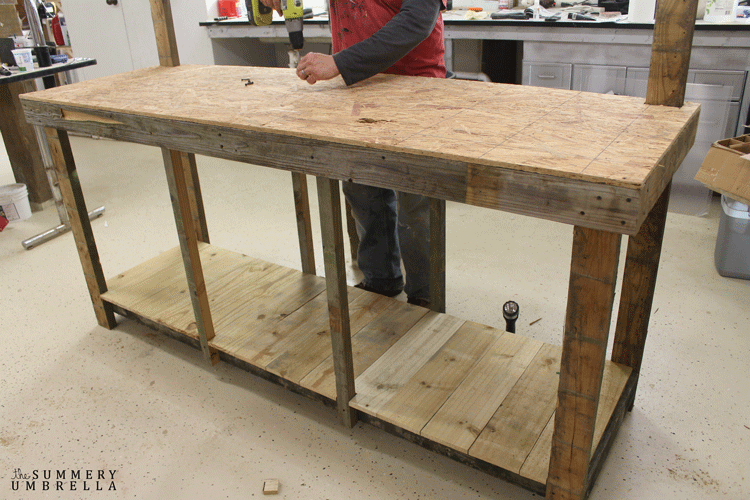
2.) Now it’s time to frame the potting bench. As you can see in the below picture you should begin with your legs. Measure and cut the backs, front, and support braces and assemble them with 3″ wood screws. If you’re working with reclaimed wood you may have to pre-drill all screw holes to avoid splitting your wood.
3.) Stand the frame up, and then install the top shelf and supports. Our inner supports were evenly spread out to 16″-20″ to disburse the weight of the countertop since the tile and mortar will be quite heavy! Not to mention all of the pots, dirt, and other items we may want to put on top.
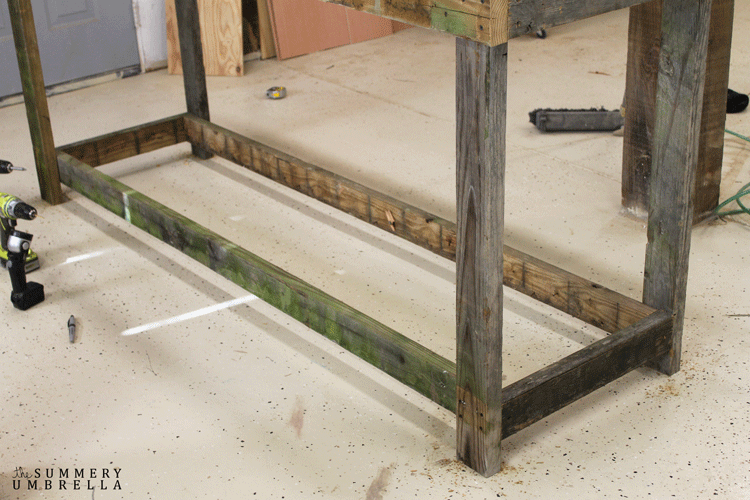
4.) Add the bottom frame which will also support the shelf. Again we used 3″ wood screws for this step.
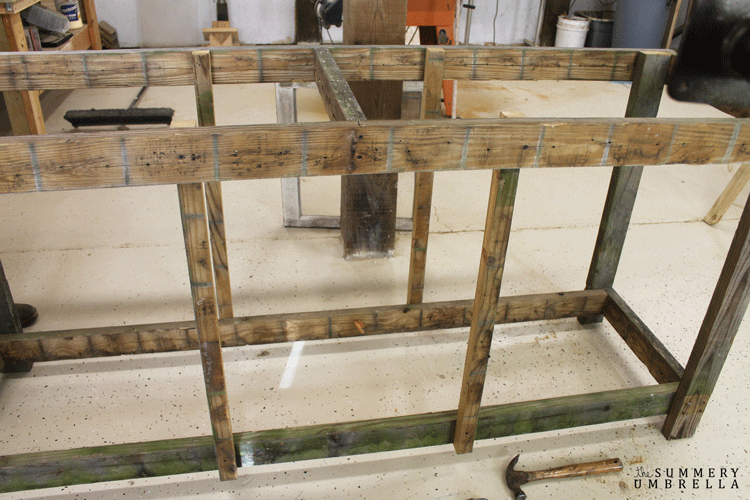
5.) At this point, we ripped 2x4s (split a 2×4 lengthwise) into 2×2’s and installed them to receive the middle shelf later on.
6.) For the baseboards of our bottom shelf, we used treated 1″ x 6″ fence pickets.
Like a deck or steps, the gaps between the boards would allow any spills to come through rather than saturate the wood.
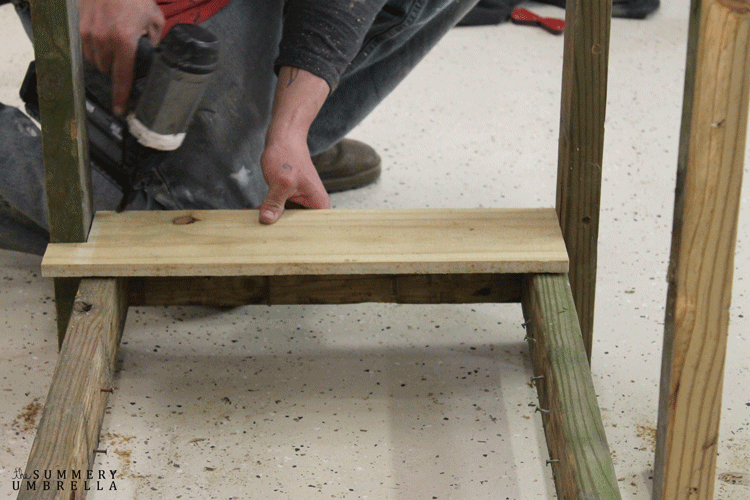
7.) Draw marks on all of your boards so you know where to cut out notches for your back legs.

8.) Start placing and nailing in all of your boards.
Installing the Countertop
9.) Then, it’s time to install your countertop/tile top. Cut a sheet of plywood to fit into place as a base to support the weight of the tile.
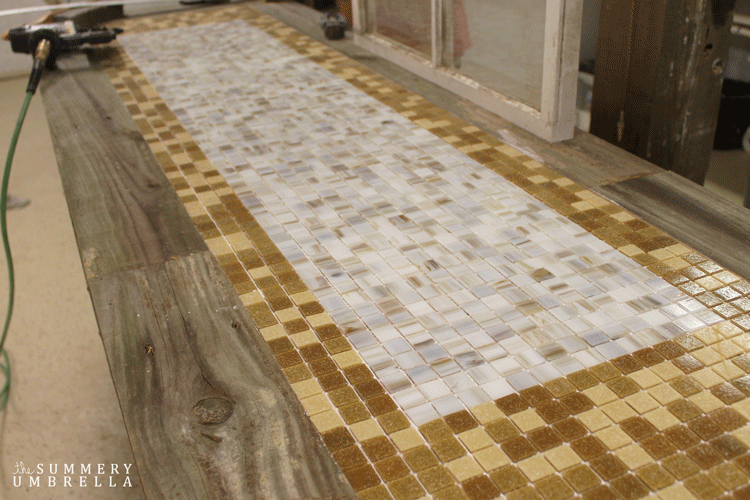
10.) A reclaimed weathered 1″x6″ was used as a border for the tiles.
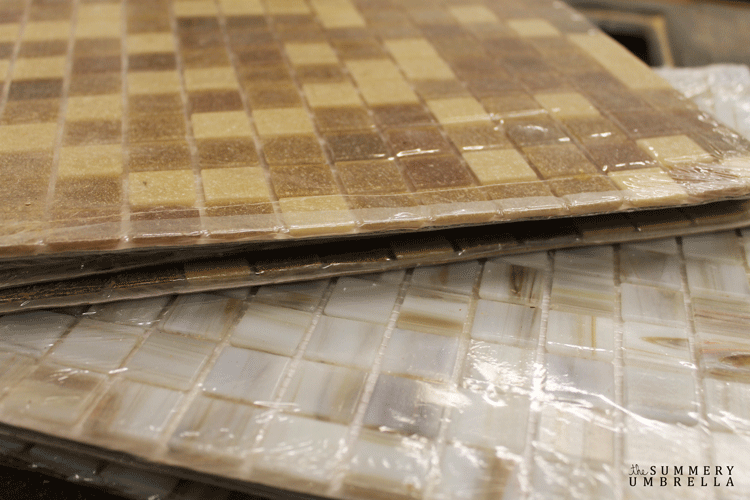
11.) Aren’t these mosaics just gorgeous?!? Can you believe they were only $5 apiece?
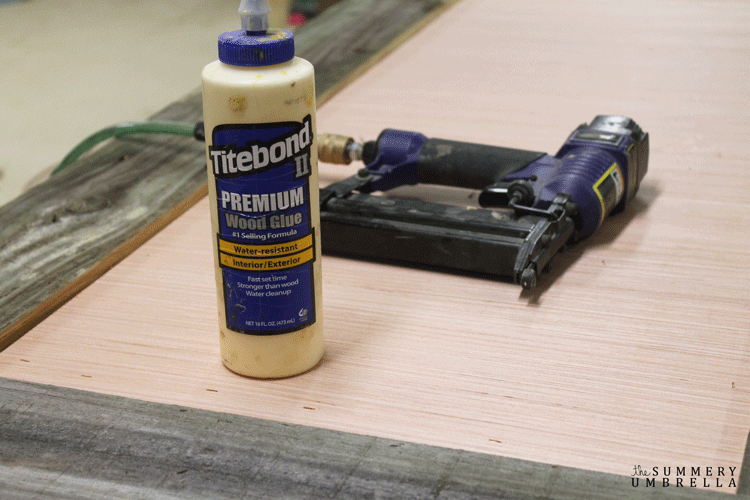
12.) To raise the tiles up to level with the top of the border a piece of 1/4″ underlayment was fit and installed by gluing and stapling into place.
However, it could also be screwed into place as well with 1″ wood screws.
13.) Use an acrylic adhesive that is recommended for small tiles that comes pre-mixed and ready to apply. Then apply with a 3/16″ V-notched tile trowel. Make sure your adhesive is applied evenly since it will affect how your tile lays.
How to Build a Potting Bench with Reclaimed Wood
14.) Layout your tiles to the pattern of your liking on top of the adhesive, and apply firm and even pressure to set them in place.
15.) Wait 24 hours to allow your tile to dry, and then mix up the grout to fill in all of the gaps to seal them into place.
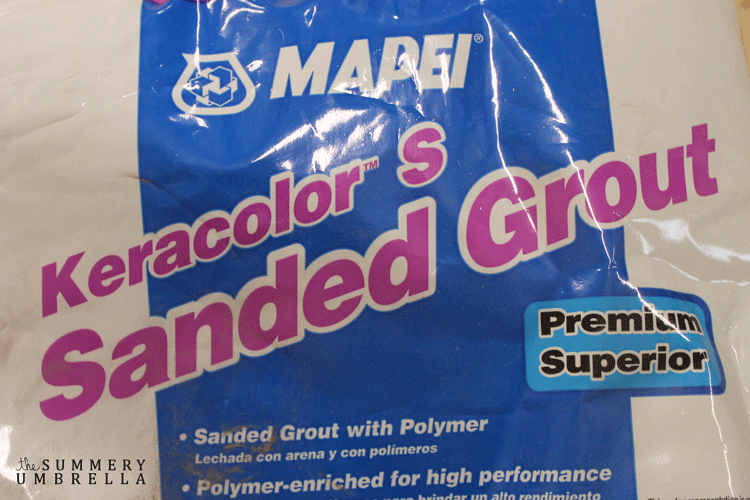 Mixing the Grout
16.) Mix the grout according to the instructions. Just make sure that your mix is well-blended without lumps and clumps.
Then apply the grout with a foam rubber grout float forcing it into the spaces and gaps. Make sure all the spaces are filled and even, and remove all the excess with a large sponge and a bucket of clean water.
17.) Next, we added the top shelf for support as well as our top window. The top is 1″x8″ and the shelf is 1″x6″.
18.) Once we added the top sides we decided to give it a little bit of curve. In order to do this put three screws in place, bend your metal yardstick, and trace the curve. Then use a jigsaw to cut it out and copy it onto the opposite side and repeat.
19.) Add your sides! Our favorite economically friendly fence pickets were used yet again, then cut to length, and beveled on top 10 degrees with the table saw. An alternative to doing this could be to actually use lap siding or plywood. The front face of the “lap siding” was covered by a reclaimed fence picket cut to fit and nailed in place.
How to Build a Potting Bench with Reclaimed Wood
20.) This next step is not required, but feel free to use plywood to add backing to both sides of the potting bench.
21.) Next, a middle shelf was installed using 2″x2″s and more cut fence pickets.
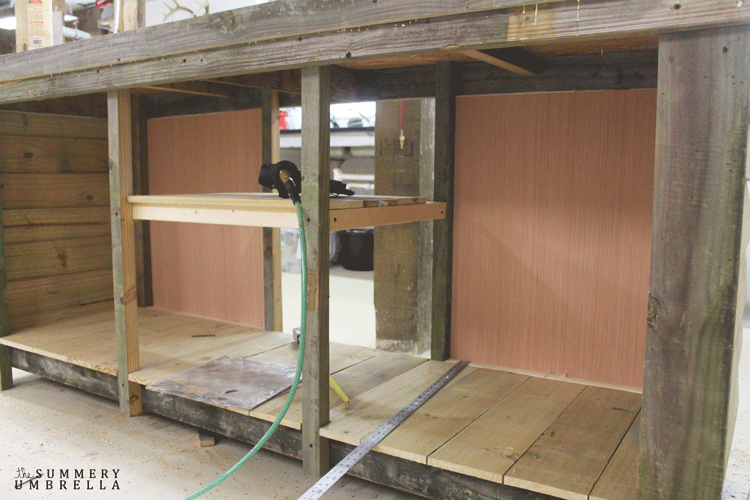
22.) Using a brad nailer we installed the shelf boards.

23.) Then, install your reclaimed windows as doors with simple hinges.
24.) Check for rough edges and then sand down anything you don’t like.

25.) Stain or Paint! I decided to keep a rustic look and used a small amount of gray paint mixed with a lot of water to achieve this particular color.
26.) YAY. Almost done!! All you need to do now is add the final touches to make it your own. Think hangers, containers, birdhouses, signs, etc.
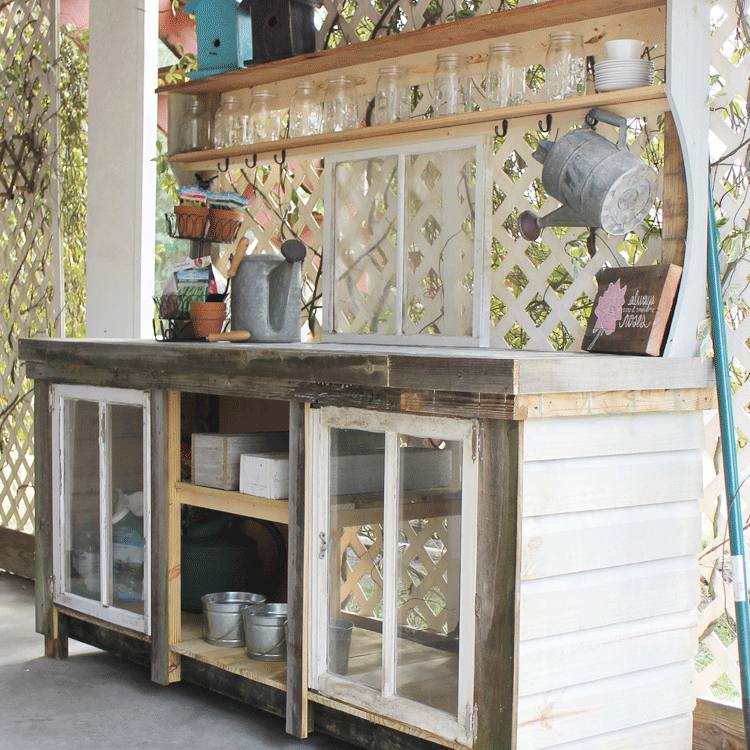
If you loved these ideas then you’ll definitely want to browse some of my other Gardening projects that are full of step-by-step tutorials as well as freebies galore! Can’t wait to see you again and happy planting!

Let’s be Social
This post was updated in October 2022.


LOVE LOVE this bench!! the storage ladder looks amazing too!! xoxo
Thank you so much, Ananda! Your drawings are simply amazing, and I truly enjoyed working with you on this project 🙂
OMG!! That potting bench is A WORK OF ART! I absolutely love it! Especially love the little windows put in as doors! I want this!
Hi Linda! Thank you so much for your kind words 🙂 I absolutely adore this little beauty too.
I absolutely LOVE this!!! I think I see a new project in my husband’s future 🙂
Hi Colleen and thank you! Just don’t tell him it’s my fault!! 😉
I love it, love it love it, I wish I had room for one this size. We certainly have access for the pallets at our warehouse but I would have to have a smaller version!! Pinned to share!
Thank you for sharing on the Oh My Heartsie Girls WW this week!!
Hope you have a beautiful week!
Karren
I LOVE your reclaimed wood potting bench and I’m swooning over the mosaic tiled top! I made one similar a few years ago but I’m loving your use of reclaimed wood and windows which gives it much more character. Pinning to share ☺
Thank you so much, Marie! The tiled top was a last minute idea for this project, but I have to admit it was the best decision 🙂
LOVE this idea! I saved it to my Build Projects Pinterest board so I have the plans later! I have several old windows I’ve been trying to figure out a use for, this is perfect, thanks!
Yay! So happy to help! You’ll definitely love it 🙂
Wow! So beautiful! I am not handy with a hammer but I am showing this to my husband! I love it. Hope to see you again at #HomeMattersParty
Aren’t husbands the best?! I definitely like to keep mine around when I need help with the bigger projects 🙂
This is amazing! I love how rustic it looks and that it’s made entirely of reclaimed wood. A piece like this is a must when the hubs and I buy a house. He doesn’t know it yet, but he is going to build one of these for us ; ). Thanks for sharing!
I would love it if you would share this on my weekly link party : )
http://www.twentysomethinginthe2010s.com/peace-love-linkup-005/
Yea… he doesn’t need to know about it yet! Let him find out later 😉 Thank you so much for dropping in again!
My pleasure! Stop by the next link party, tomorrow at 6 if you have anything you want to share! Heck, stop by if you don’t too ; )
Lol. Sounds like a plan! I’m a little late, but better late than never, right?!
OMGEEE! I have a ton of old windows and I need to make this, like yesterday!!
Thanks for linking up at Totally Terrific Tuesday!
Cant wait to see what you have up your sleeve next!
Jess
Get it, girl! Lol. I love windows too! Sooo many things to create with them 🙂
I fell in love with your potting bench, LZ!! I wish I had a garden big enough to make one for myself, your pictures are of great help as well as Ananda’s drawings, amazing!!
I am featuring this at our Two Uses Tuesday link up party later today, don’t forget to stop by and grab your button!!
Have a wonderful week!
Thanks so much, Pili! I had so much fun creating this gigantic beauty, and Ananda definitely is amazing artist 🙂
Extremely impressive. It really came out beautiful. I will be featuring this tonight at my Swing into Spring party that opens at 8pm EST. Please stop by and pick up an I’ve Been Featured button. Thanks. http://diybydesign.blogspot.com
Yay!! So happy that you love it, and it will be featured 🙂
I love this! Not only is it darling, but it is perfect!! I can see this in my yard!!
Thanks for linking up with us on Throwback Thursday!
Mollie
Hi Mollie, and thank you so much! 🙂
Love this tutorial. We have some wood laying on the side yard. I’d love to have one made. Thanks for the DIY! & joining the inspiration spotlight party. Pinned & shared.
You are so sweet, Theresa! Thank you so much for stopping by 🙂
That is amazing!! I would love one of those for my garden area. Pinning to try and talk my hubbie into building it! 🙂
I will cross my fingers for you, Jamie! Thanks so much 🙂
Pinned. Thanks for this fabulous diy garden bench. GORGEOUS! ave a great weekend, Linda @Crafts a la mode
Hi Linda, and thank you so much!!
This is just such a beautiful potting bench. I remember both my dad and granddad had their own home made potting benches but they were made for old kitchen units and were NO WAY as attractive as this.
This bench looks simply amazing and you people have done a neat job of using reclaimed wood. It has certainly provided that rustic appeal to the bench. I’ve also just started my woodworking blog, hope you visit it some day. Thanks for sharing such a fabulous post.
Hi and thank you so much! Best of luck, and have a great weekend 🙂
I had someone make this beautiful potting table for me. I added a small sink and faucet. Unfortunately there’s not much reclaimed wood here in my area so we used new lumber. I love it!
Would love to send you a picture but I don’t see a place to add it.
Hi Mary! Thank you so much for the sweet comment. I bet your potting bench is absolutely beautiful!! Please feel free to send to: [email protected] Have a wonderful week!! 🙂