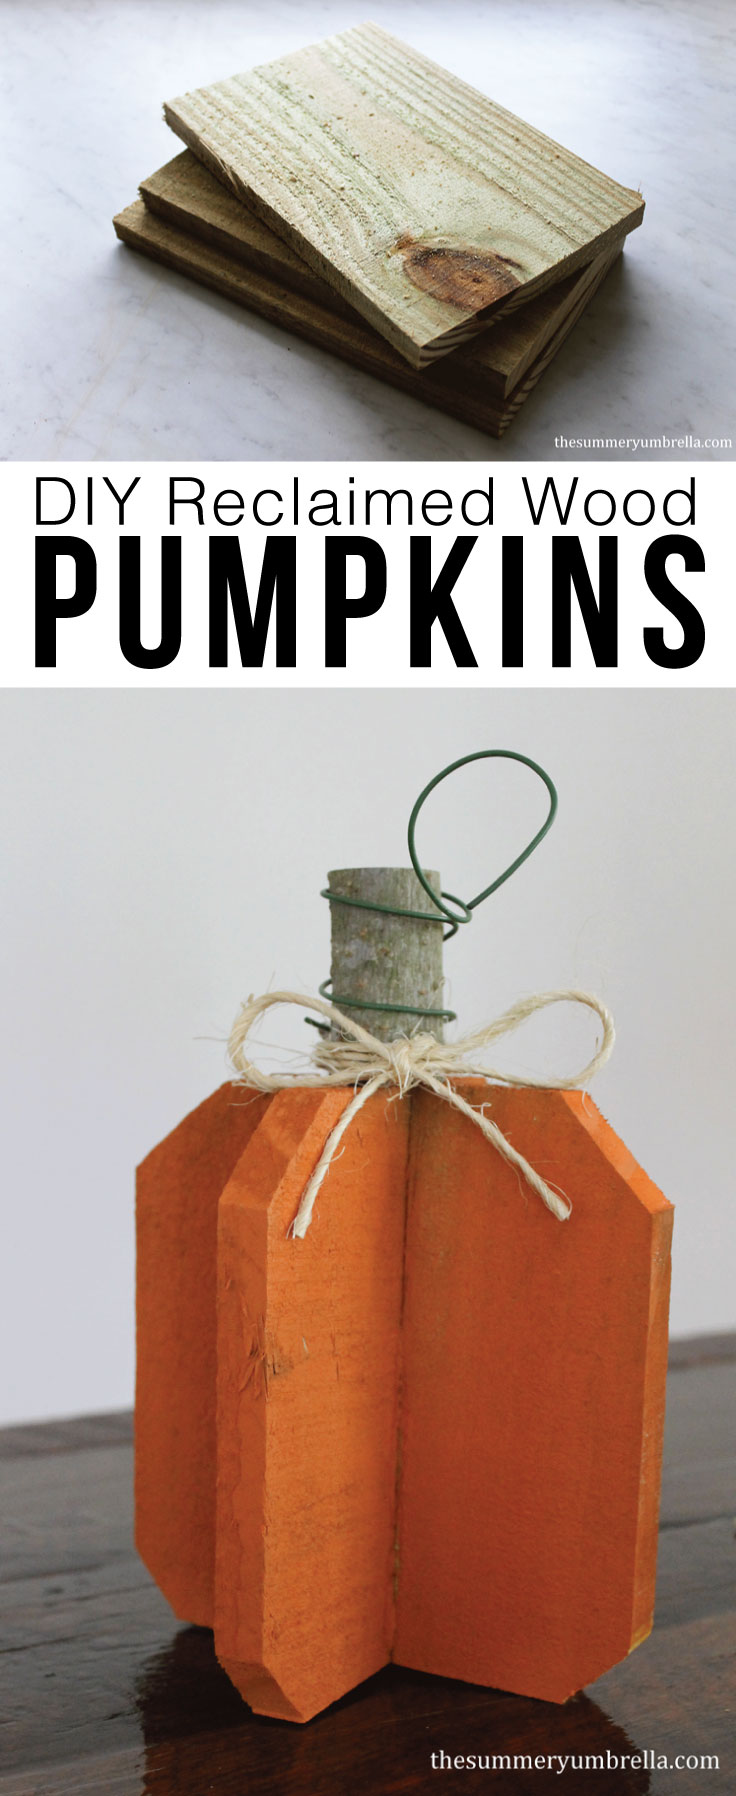
• About
  • Artist Resources
    • Classes
  • Blog
    • Crafts
    • Decor
    • Holidays
    • Living
    • SVG Files
  • Portfolio
    • Illustrations
    • Surface Pattern Designs
    • Typography
  • Work With Me
    • Disclosure & Privacy Policy
  • Contact

LZ Cathcart

Delightful designs and illustrations.

  • My Account
    • Shop Policies
  • Apparel
    • Baby & Kids
    • Women
  • Art Prints
  • Mugs
  • Phone Cases
  • Pillows
  • Stickers
  • Tote Bags
  • SVG Vector Art
  • Freebies
  • 0 items

Holidays Living

How to Make Rustic DIY Reclaimed Wood Pumpkins

This post may include affiliate links. If you purchase something through the link, I may receive a small commission at no extra charge to you. Please read my disclosure policy for more details.

Tweet
Pin8K
Share22
8K Shares

DIY reclaimed wood pumpkins are not only incredibly festive for Fall, but super simple to make as well. Check out this step-by-step tutorial to see how!

Fall is by far my favorite season. When I was younger I loved it because I knew that my birthday was just around the corner. Now however, I enjoy that the weather will allow me to wear hoodies, thick boots and drink hot coffee without getting overheated. Oh yea, and then there’s my little obsession with pumpkins! 🙂
 

Learn how to create GORGEOUS signs with
my FREE guide!

    We respect your privacy. Unsubscribe at anytime.
    With being said, today I’m sharing a super easy way to make a few of your own DIY reclaimed wood pumpkins for around the house during this holiday season. It honestly requires no special skills, and can even be accomplished in a variety of ways. It just depends on what tools you have at home.

    DIY Reclaimed Wood Pumpkins

    Materials:
    • Orange Spray Paint
    • Twisted Sisal Rope
    • Hitachi Sliding Dual Compound Miter Saw
    • Wood glue
    • Wire
    Create your own DIY reclaimed wood pumpkins with just a few simple materials. Let me show you how now!
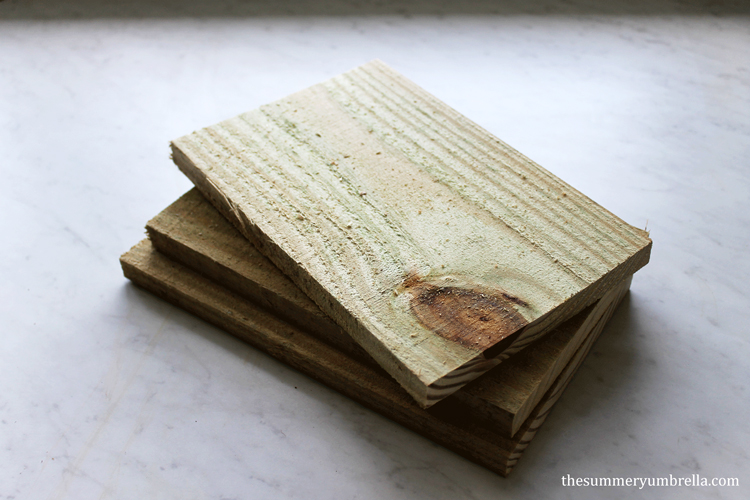
    Let’s talk wood first. Yesterday I shared the beginning stages of the clubhouse that Mike and I are creating for our little birthday girl (she turns 3 tomorrow!). We’re using “new” wood for the frame to ensure the stability, and like any project there’s a lot of glorious scrap pieces. Yay for me!
     
    For this project you can pick any type, shape, size, etc of wood. Just make sure you have two pieces for each pumpkin that you would like to make.
     
    Next, cut one of the wood pieces in half using a miter saw (or you can use a hand saw). Using wood glue place each piece that you cut on the whole wood board directly in the middle like in the below picture.
    All you need is a few pieces of scrap wood to create these gorgeous DIY reclaimed wood pumpkins!
    Note #1: You do not have use a clamp to get these boards to dry/stick together, but it will help. This  particular pumpkin I was creating wasn’t very even so there were gaps in between them.
     
    Note #2: The wood in the below image that I was using had notches cut out of them already at the top, but on a few of the other pumpkins that I created I had to cut them out myself. Also, after I put my pumpkin together I realized that the notches look great on the bottom as well. To save yourself time cut the notches out of your wood prior to glueing them together.
     
    After your wood is good and dry go ahead and spray paint your little pumpkin any shade of orange you would like (or really any color!).
    Isn't this DIY reclaimed wood pumpkin adorable? Learn how to create your own now!

    Looking for more Fall inspired DIY projects?

    • How to Create a Rustic Fall Wreath
    • Rustic and Colorful Fall Porch
    • DIY Fall Rake Decor
    • 20 DIY Fall Crafts
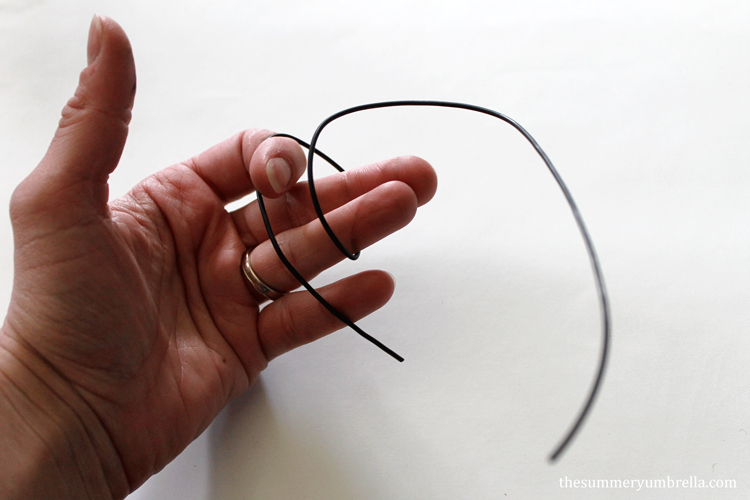
    While I was waiting for my pumpkins to dry I cut a piece of wire for the “vine/leaves”. I didn’t measure this piece out, but it’s probably around 12″-14″ long.
     
    As shown in the below image I twisted the wire around my fingers to give it a swirly shape.
    All you need is a few basic supplies, and you too can create this cute DIY reclaimed wood pumpkin!
    After you have shaped the wire to your liking (it doesn’t have to be exact at this point) I went ahead and spray painted this cute little thing as well.
     
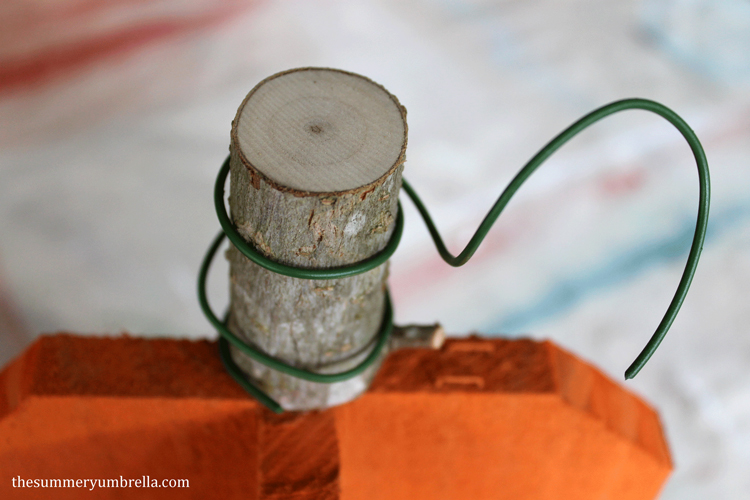
    Once everything was good and dry, and I was satisfied with the color I cut a little stump off of my tree branch. Again, I don’t really think it matters what size it is. Just as long as you like it! Then, go ahead and wood glue it onto the top of your pumpkin.
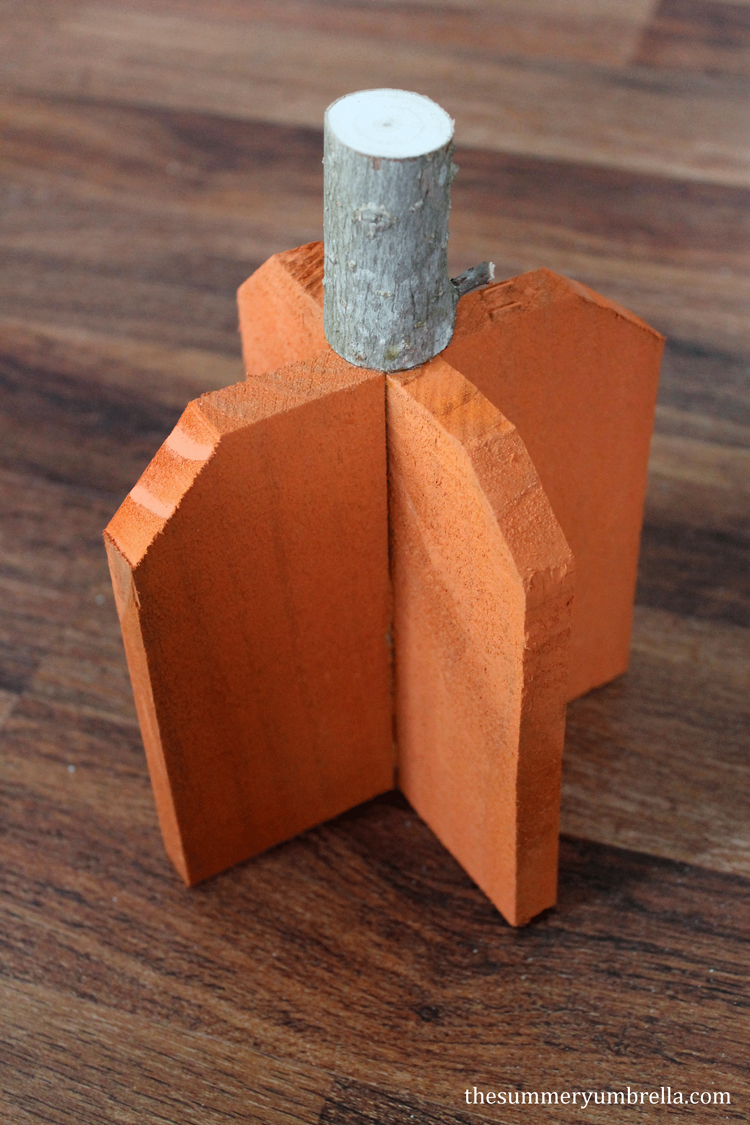
    Finally, after your tree branch stump has dried go ahead and twist your wire all around your DIY reclaimed wood pumpkins to your liking.
    Create a cute DIY reclaimed wood pumpkin for your next crafting adventure. Learn how now!
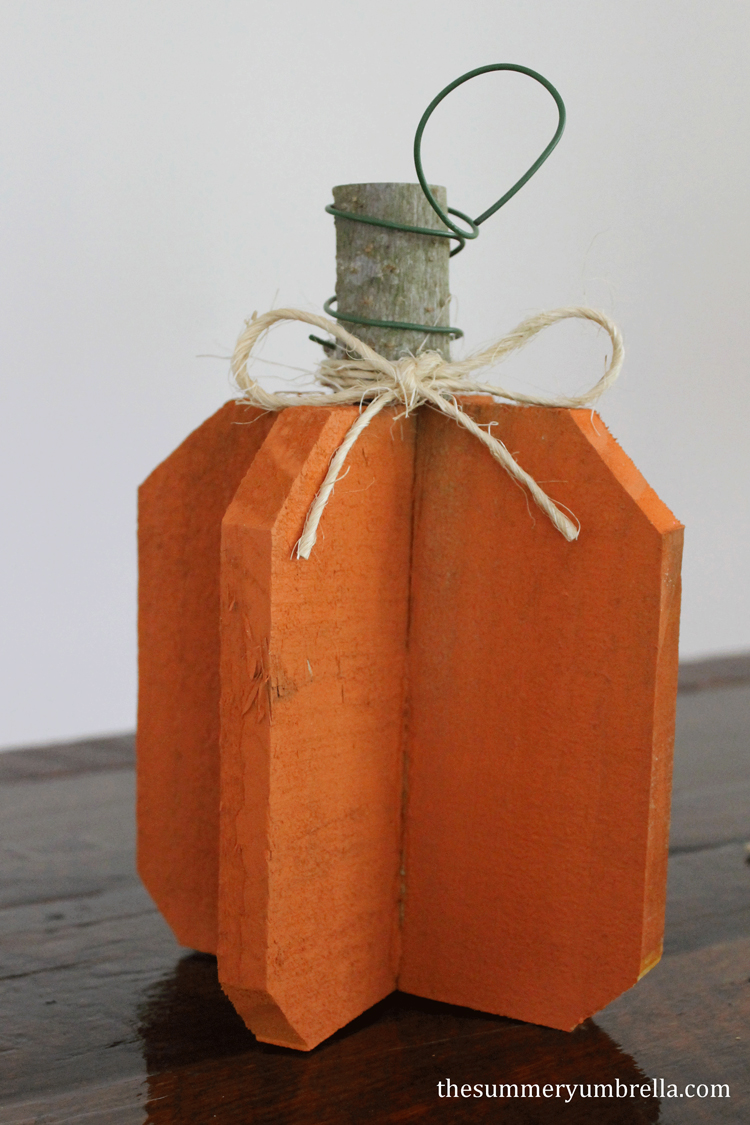
    Viola! A beautiful wooden pumpkin! If you’d like you can even add a twisted rope/twine bow on top to add a little bit of flair.
     
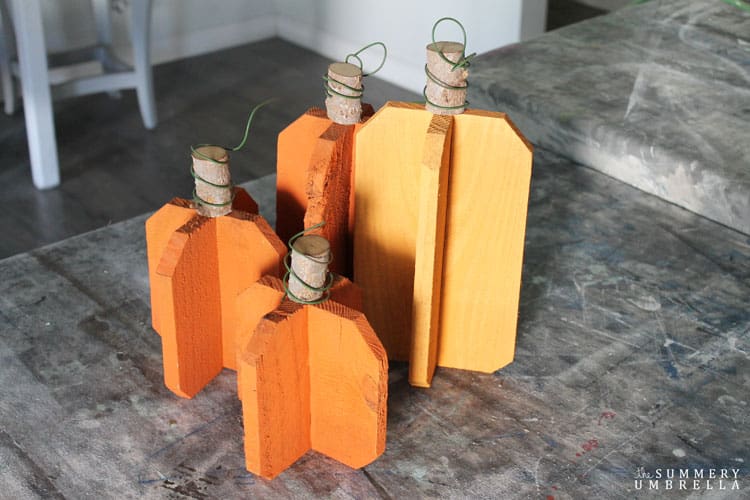
    Aren’t these DIY reclaimed wood pumpkins adorable?!?Mix and match the sizes as well as the shades of colors, and they’ll look great as a table centerpiece, outdoors, in the bathroom or wherever you need a little color in your home.
     
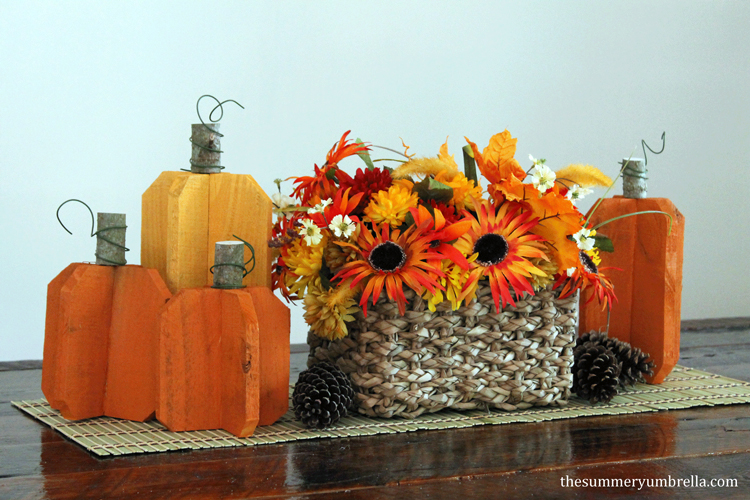
    So cute! 🙂 I hope you have a great weekend, and see ya next week!
     
    Linda Zahora-Cathcart The Summery Umbrella
    Pssttt…. Don’t forget to check out my DIY projects page chocked full of DIY and decorating goodness!
    Create your own DIY reclaimed wood pumpkins with just a few simple materials. Let me show you how now!

    Let’s be Social

    • Instagram @thesummeryumbrella
    • Facebook The Summery Umbrella
    • Pinterest summeryumbrella 
    • DIY Flowers Quote Wood Sign
    • we still do svg
      We Still Do Wood Sign
    • funny laundry room sign
      DIY Laundry Sign
    • How to Paint Your Metal Front Door
    • how to paint metal bar stools
      How to Paint and Distress Metal Bar Stools
    • How to Create a Pretty and Functional Chicken Coop
    • Easy Hand Lettered DIY Wood Sign
    • diy mason jar pendant light
      DIY Mason Jar Pendant Light
    • DIY Nightstand

    This post was originally created in September 2015, and then updated in September 2020.


    22 Comments

    About LZ Cathcart

    LZ is an artist who loves creating illustrations, custom hand lettering and patterns for gifts, home decor, fabric, and wallpaper. She is also the creative mind behind The Summery Umbrella where she shows you how to make handmade signs, various DIY projects and gorgeous home decor.

    When she’s not dreaming up new projects and designs you can typically find her drinking her fair share of coffee, hanging out with her super handy husband and her sweet and sassy daughter. They all have a hard time sitting sit so this family is constantly on the go!

    Don’t Miss Out!

    Learn how to create GORGEOUS signs with my FREE guide. It's the perfect source for getting started and moving forward!

    « How to Clean and Prepare Wood for DIY Signs
    How to Make a DIY Wire Mesh Basket »

    Comments

    1. Kim @ Nest Number 4 says

      September 6, 2014 at 9:16 pm

      Adorable!! I’ve never seen these before, love them.

      Reply
      • LZ Cathcart says

        September 20, 2014 at 11:38 am

        Thank you so much Kim! They are also so easy to make. Always a major plus 🙂

        Reply
    2. Mississippi Mrs. says

      September 7, 2014 at 10:48 pm

      This is SOOO cute!

      Reply
      • LZ Cathcart says

        September 8, 2014 at 4:13 am

        Thank you! 🙂

        Reply
    3. Our Pinteresting Family says

      September 26, 2014 at 12:27 pm

      These are so adorable!

      Reply
      • LZ Cathcart says

        October 14, 2014 at 10:00 am

        Thank you so much 🙂

        Reply
    4. LZ Cathcart says

      September 26, 2014 at 9:03 pm

      Thank you for the compliment and stopping by!

      Reply
    5. Anonymous says

      October 14, 2014 at 7:54 am

      Do you happen to know the measurements of the wood when you started on the small orange pumpkin?

      Reply
    6. LZ Cathcart says

      October 14, 2014 at 9:59 am

      Hi! The small pumpkin (without the branch stem) is approximately 10″ tall.

      Reply
    7. Wendy says

      September 15, 2015 at 3:56 pm

      Hi Lz…really like the pumpkins…can you please tell me if you trim some off the vertical sides of the 2 pieces that you have cut apart? As in, do the pieces that you glue on stick out a little further than the centre uncut piece? Thanks!

      Reply
      • LZ Cathcart says

        September 17, 2015 at 8:26 pm

        Hi Wendy! Honestly, I did both methods to change it up a little bit. Pumpkins aren’t perfect in size or shape so I thought it would be fun to use both ways. Thanks so much for stopping by 🙂

        Reply
    8. Emily, Our house now a home says

      October 22, 2015 at 9:49 am

      This is so cute!

      Reply
      • LZ Cathcart says

        October 26, 2015 at 7:00 pm

        Thank you so much, Emily 🙂

        Reply
    9. Kate Olson says

      September 27, 2017 at 6:08 pm

      Hiiii love these and am making one as we speak!! You don’t happen to know what yellow paint you used?…same brand as the orange?

      Thank you so much!

      Reply
      • Linda Zahora-Cathcart says

        October 13, 2017 at 11:34 am

        Hi Kate! I hope they turned out beautifully, and they are the same brand. Have a wonderful weekend 🙂

        Reply

    Trackbacks

    1. 20 Festive DIY Fall Decor Ideas | The Unlikely Hostess says:
      July 29, 2018 at 11:04 pm

      […] are a million DIY tutorials for wooden pumpkins.  I like this one from The Summery Umbrella best.  It won’t tip over like the tall and skinny 2×4 creations, and has a lovely […]

      Reply
    2. 15 Creative Wooden Pumpkin Ideas - The Handyman's Daughter says:
      September 27, 2018 at 4:21 pm

      […] Reclaimed Wood Pumpkins – The Summery Umbrella […]

      Reply
    3. Learn How to Create a Custom DIY Wood Slice Clock says:
      January 25, 2019 at 10:04 am

      […] DIY Reclaimed Wood Pumpkins […]

      Reply
    4. DIY Corn Husk Wreath Fall Decor says:
      January 25, 2019 at 10:36 am

      […] DIY Reclaimed Wood Pumpkins […]

      Reply
    5. Super Simple DIY Reclaimed Wood Paneled Door Tutorial says:
      February 7, 2019 at 11:04 am

      […] DIY Reclaimed Wood Pumpkins […]

      Reply
    6. FREE August Calendar Download: Desktop and Smartphone Backgrounds | LZ Cathcart says:
      April 13, 2020 at 5:59 pm

      […] Yes, I am one of “those” that gets all giddy about pumpkins showing up in every recipe, home decor project, and designs galore! I can’t help it. Fall is my season. It’s when I shine, shimmy, and […]

      Reply
    7. How to Create Your Own DIY Fall Rake Décor for the Front Porch says:
      January 18, 2021 at 2:02 pm

      […] DIY Reclaimed Wood Pumpkins […]

      Reply

    Leave a Reply Cancel reply

    Your email address will not be published. Required fields are marked *

    Recipe Rating


    This site uses Akismet to reduce spam. Learn how your comment data is processed.

    Hi! I'm LZ, and welcome to my humble abode! Don't be shy. Come on in! This is my happy place where I share my life, creativity as well as my quirky and country sense of humor on a daily basis. So, grab yourself a tall glass of something yummy, and let me introduce you to my realm. :)

    I want to find…

    Post Categories

    Featured On

    Let’s be social

    Why yes, yes I am. Any other plant ladies out ther Why yes, yes I am. Any other plant ladies out there?!⁣—⁣This beauty is now available as a sticker and don't forget! Purchase one or many and ... get FREE shipping.
    Potted plants! 🌿 These beauties were originally Potted plants! 🌿 These beauties were originally painted using watercolors, but in order to create the pattern, details, and all the extras, I added it into Procreate for the finalization portion.
    Do you like to change it up sometimes? Maybe with Do you like to change it up sometimes? Maybe with decor, your art, food, etc. As for me, I do it... ALL. THE. TIME. It's a force of nature, but it definitely keeps it interesting! ⁣—⁣For instance, my new favorite "change" is mixing up watercolor paints with oil pastels. Sigh. Soooo interesting and amazing!
    Don't worry, my friend. Just grow plants. ⁣—⁣Purchase one or many and ... get FREE shipping.⁣⁣#stickeraddict #stickers #decals #stickerlove #stickerart #watercolor #digitalart #homedecor #acrylic #canvas #mixedmedia #homedesign #interior #modernart #abstractpainting #painter #artstudio #abstractartist #interiors #acrylicpaint #decoration #floralpainting #creativeart #draw #instaart #instahome #homestyle #thesummeryumbrella #lzcathcart
    Stickers, stickers, and oh yea... more stickers! Y Stickers, stickers, and oh yea... more stickers! You could definitely say that I've caught sticker-fever. 🤒 ❤⁣—⁣Purchase one or many and ... get FREE shipping.
    I'm sooo loving on these summer-inspired fruit pop I'm sooo loving on these summer-inspired fruit popsicles. ❤⁣—⁣Purchase one or many and ... get FREE shipping.
    Follow on Instagram

    Copyright © 2021 · LZ Cathcart of The Summery Umbrella, LLC

    Log in