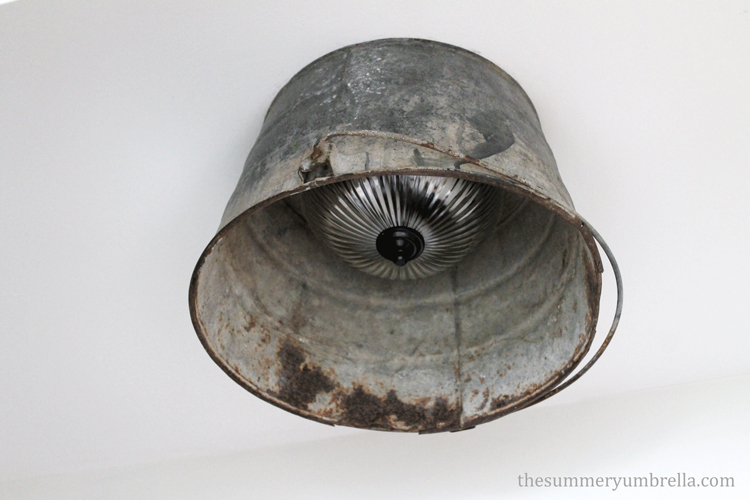
Say Goodbye to Boob Lights: How to Install an Industrial Bucket Light
Looking for an interesting way to update that old boob light? Try this DIY Rustic and Industrial Bucket Light tutorial for a unique look!
I really love DIY projects, and today’s post actually came about accidentally. I’ve had this beautiful, vintage bucket for about a year now, and I’ve been struggling to find the perfect solution for it. I’ve tried using it as a bucket for dog toys, flowers, and even in my studio.
However, it just didn’t work. Crazily enough though, while I was despising my hallway light it occurred to me that the bucket would make a better ceiling fixture than a container, and voila! The DIY rustic and industrial bucket light project was born.
Current situation:
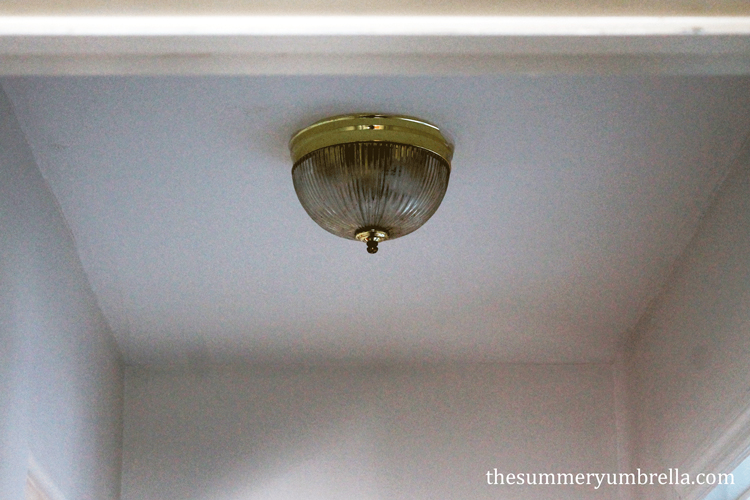
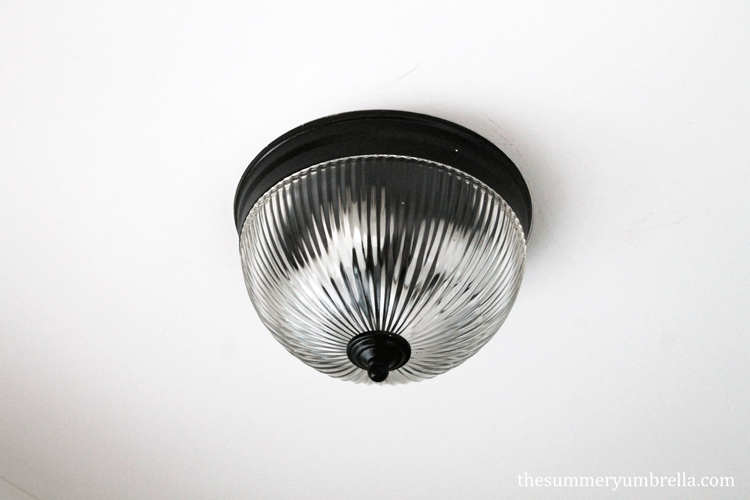
You can’t see it from these pictures very well, but the light fixture is coated with a film of tar from the previous owners smoking addiction. It’s crazy how much older it makes the fixture look than it really is!
How to Make a Light Fixture from a Bucket
DIY Rustic and Industrial Bucket Light
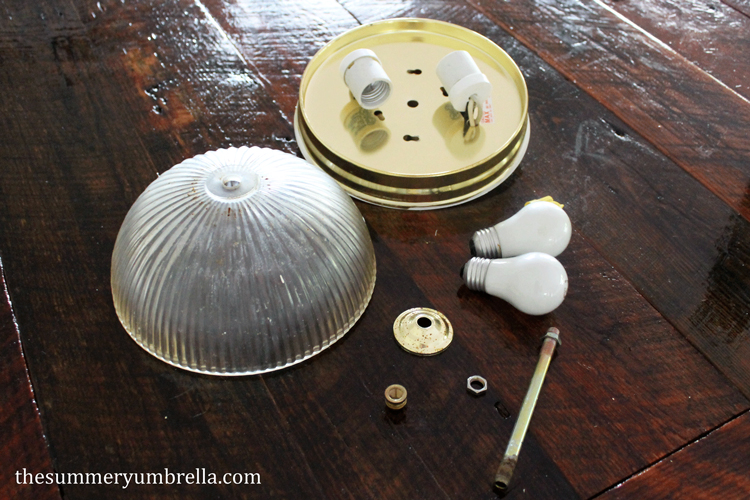
So, I started off by removing the glass fixture and hardware.
I was actually hoping that I could just remove the old fixture, install the bucket to the ceiling, and have a huge bulb dangling like a pendant light. Unfortunately, though, the way that it was installed on the ceiling made it a little more complicated than expected.
For this project, I had to enlist Mike to “assist” with the electrical debacle. If you also have a similar situation, PLEASE, please, please make sure to have someone help you remove the light if you do not have any experience in the electrical field.
Since I had to change my plans from my original idea I decided to paint the old fixture and hardware, and bleach/scrub the glass.
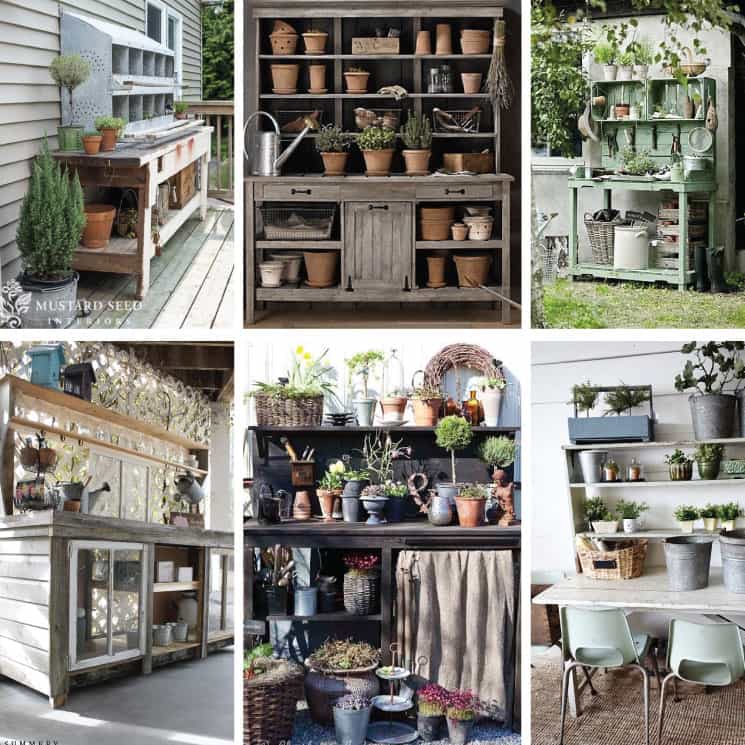
Looking for more DIY light projects?
I decided that the easiest and quickest way to change the color would be to pull out the handy-dandy spray paint. I absolutely love Rust-Oleum Oil Rubbed Bronze. It’s that perfect blend of a metal look plus a nice, dark color without being black.
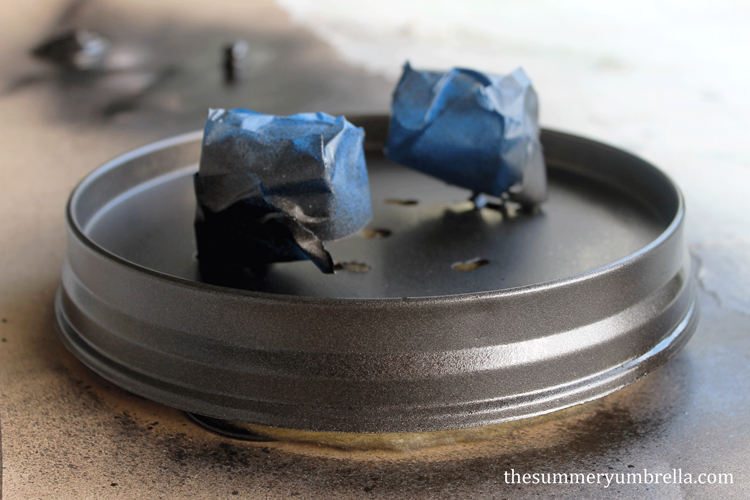
As always, make sure to do your spray painting outdoors, or at least in a ventilated garage/room. I also like to use an old canvas to protect my table from the paint, but you can easily use newspaper or cardboard as well. Then, tape off any areas that you do not want to get paint on.
The key to spray painting is to sand off any debris, old paint, etc from your item(s), and then do multiple light coats. When you do thick coats of paint that’s when you’ll have drips and peeling issues.
Once the light fixture was completely dry (depending on the spray paint that you use you might need to wait 24 hours) we outlined a circle to cut out from the bucket. This way, the bucket will fit perfectly around the light fixture when it is installed into the ceiling.

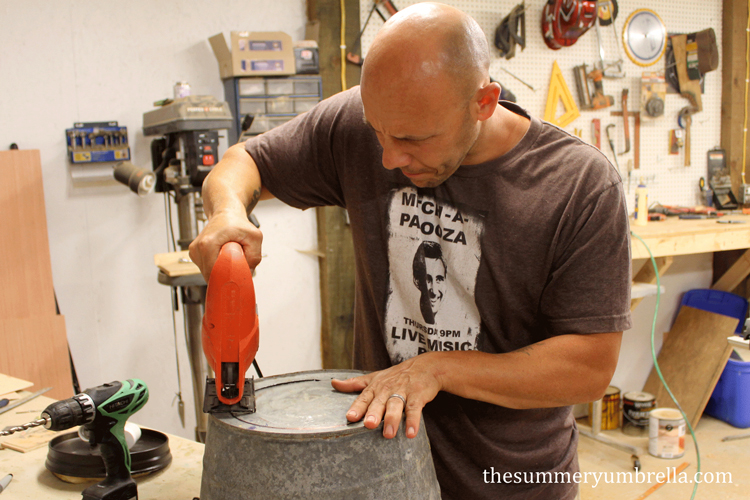
Since metal can be a little tough I had Mike cut out the circle for me. He first drilled a hole into the bucket so he would have a starting point to put the saw.
Since the edges were a little sharp he used a grinder to smooth them down a little bit.
DIY Rustic and Industrial Bucket Light
Then, we made sure the hole was indeed big enough to fit the light fixture. Bingo, we did it right!
Mike then put all of the pieces back together and installed the light as it originally looked. Doesn’t the paint job make it look amazing? It looks brand new!
I then put the bucket on the ceiling, drilled holes into the bucket and ceiling, and got ready to put in the screws.
I highly recommend using drywall hangers to install your bucket. Our bucket wasn’t that heavy, but I wanted to make sure that it was securely fastened to the ceiling so we wouldn’t have to wonder about it falling down on anyone in the future. Last, the bucket was installed!
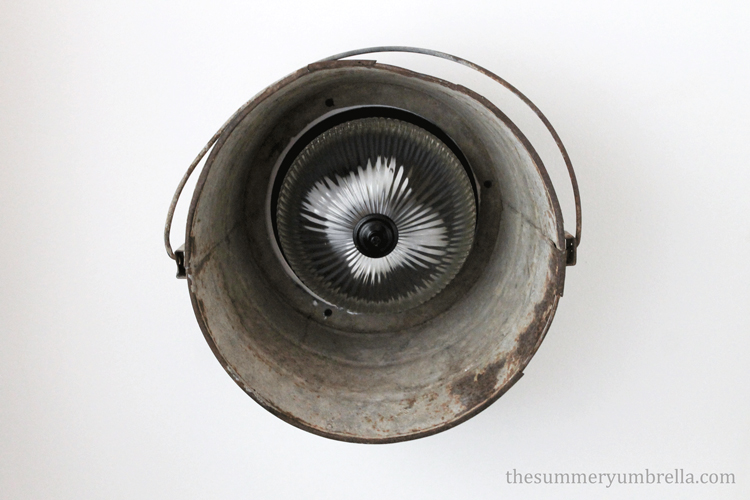
At first I was a little unsure, but I now LOVE the way this light fixture looks. It’s the perfect blend of rustic and industrial that we plan on decorating with throughout the entire house.
One DIY Rustic and Industrial Bucket Light down, 20 more to go… !

Pssttt…. Don’t forget to check out my DIY projects page chocked full of DIY and decorating goodness!
This post was updated in August 2022.


Visiting from Link Party Palooza – your repurposed light caught my eye! It looks so much better! I recently updated my dining room light with a repurposed egg crate and it seemed to change the look of the whole room. Nice job!
Hi Jenny! Thank you for visiting 🙂 I will definitely check out your page. What a great idea!
What a great way to cover up one of those “boob lights”! We have several in our house too. I’ll have to show this to my hubby.
Just one question – how much light do you actually get from your new fixture? I would be afraid that the bucket would block a lot of the light?
Found you at Remodelaholic 🙂
Kim @ PinspiredHome.blogspot.com
Hi Kim! Thanks for stopping by. You are correct. The bucket does tone down the amount of light that comes out of it. For us it’s perfect because it’s right in front of our 3 year olds bedroom so it makes checking on her at night ideal. I wish you the best of luck with your home remodeling 🙂