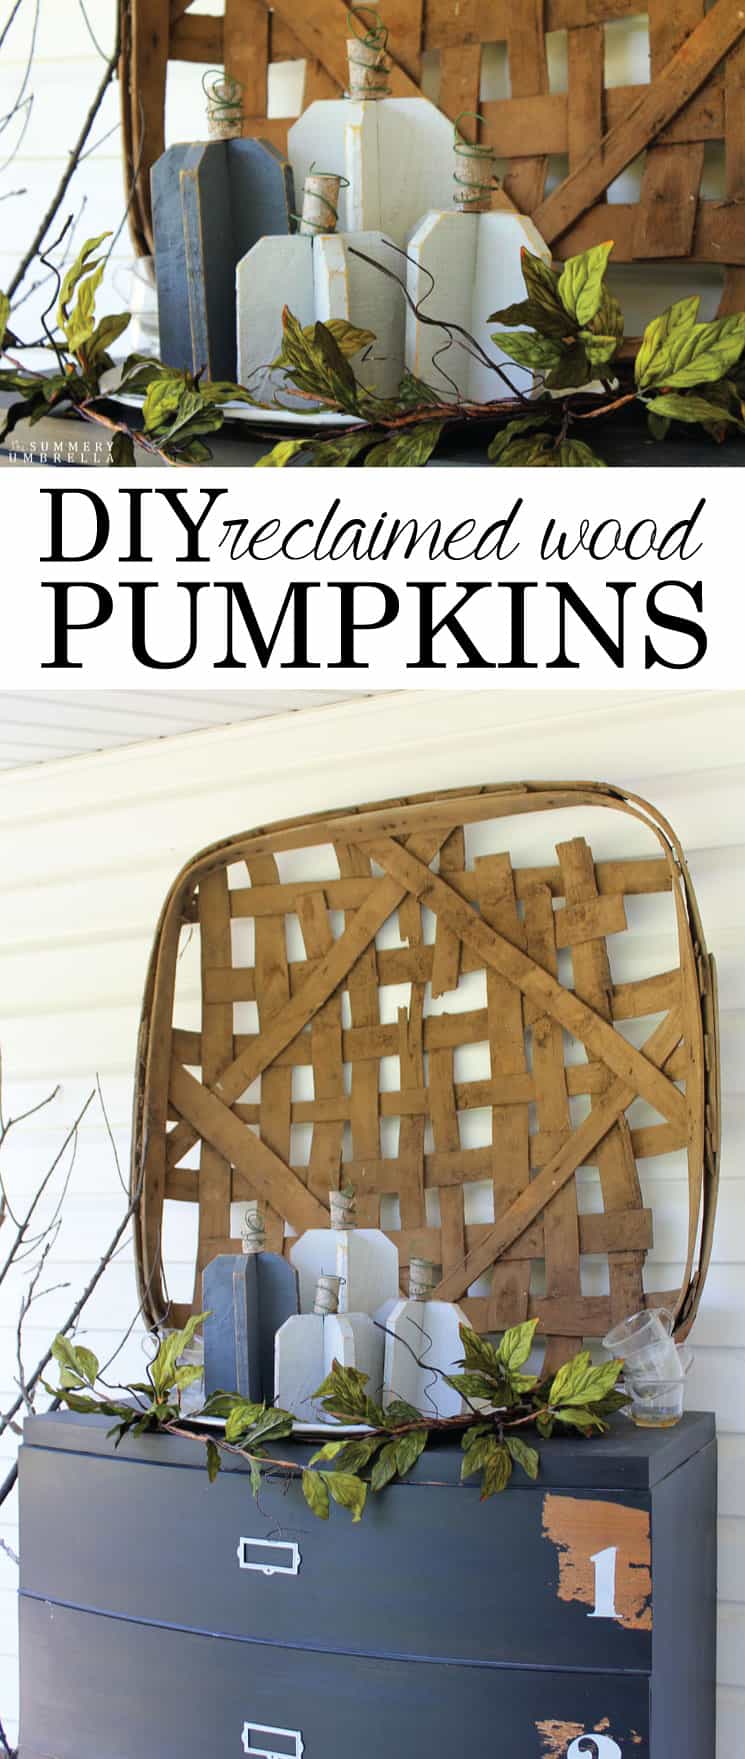
Crafting Autumn Charm: Your Guide to DIY Wood Pumpkins
Craft charming DIY wood pumpkins to embrace autumn’s rustic beauty. Unleash your creativity with our step-by-step guide!
As the leaves put on their vibrant coats and the air turns crisp, it’s time to bring the enchanting beauty of fall indoors. What better way to do that than by diving into a delightful DIY project – crafting your very own wood pumpkins?
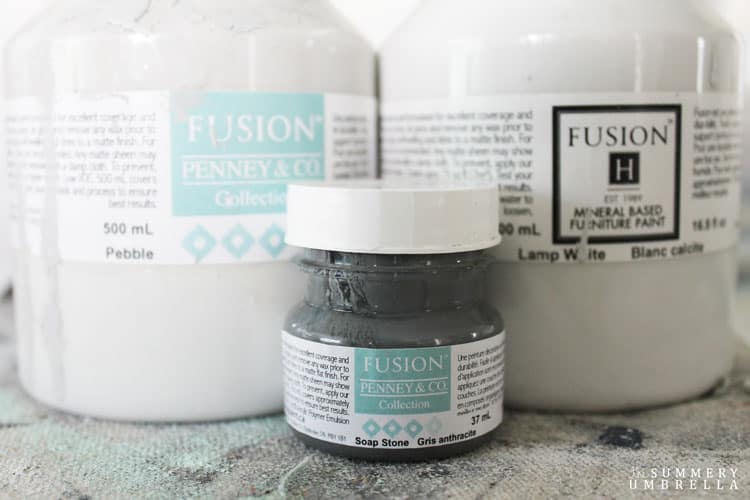
With a dash of Fusion Mineral Paint in Pebble, Lamp White, and Soap Stone, plus some creative flair, you’ll be adding a touch of rustic charm to your space in no time. So, let’s roll up our sleeves and carve out some autumnal joy with these unique DIY wood pumpkins.
Gathering Your Fusion Mineral Paint Magic
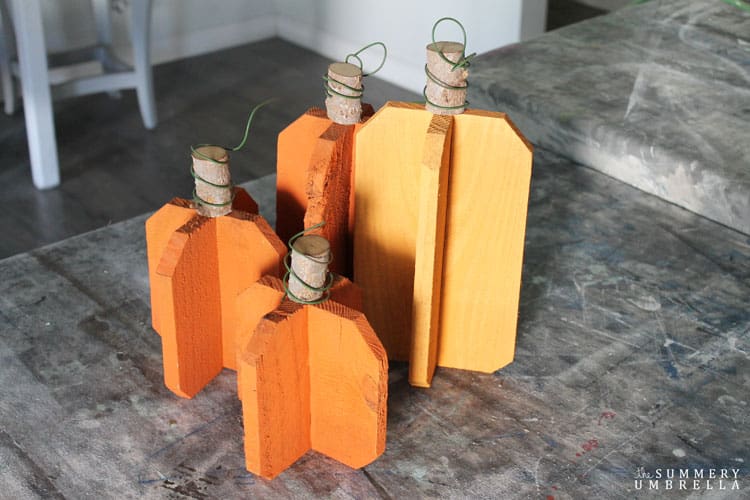
It seems like only yesterday that I was showing you how to make these beautiful DIY Reclaimed Wood Pumpkins.
Time flies when you’re having fun doesn’t it? And while I do still LOVE these pumpkins in their orangey hues I wanted to change up our front porch a little bit this fall season.
Instead of concentrating on pumpkins in their “normal” tones, I figured I’d give this whole white and gray accent trend a try.
Before we begin, make sure you have these materials ready:
Materials
- Wooden Pumpkins to Paint
- Fusion Mineral Paint in Pebble, Lamp White, and Soap Stone
- Ryobi Cordless Random Orbit Sander
- Paintbrushes in various sizes
- Wire
Since orange can be a tricky color to cover I decided to use the following Fusion Mineral Paint colors for these pumpkins’ new look in Pebble, Lamp White, and Soap Stone.
Step 1: Painting the Base
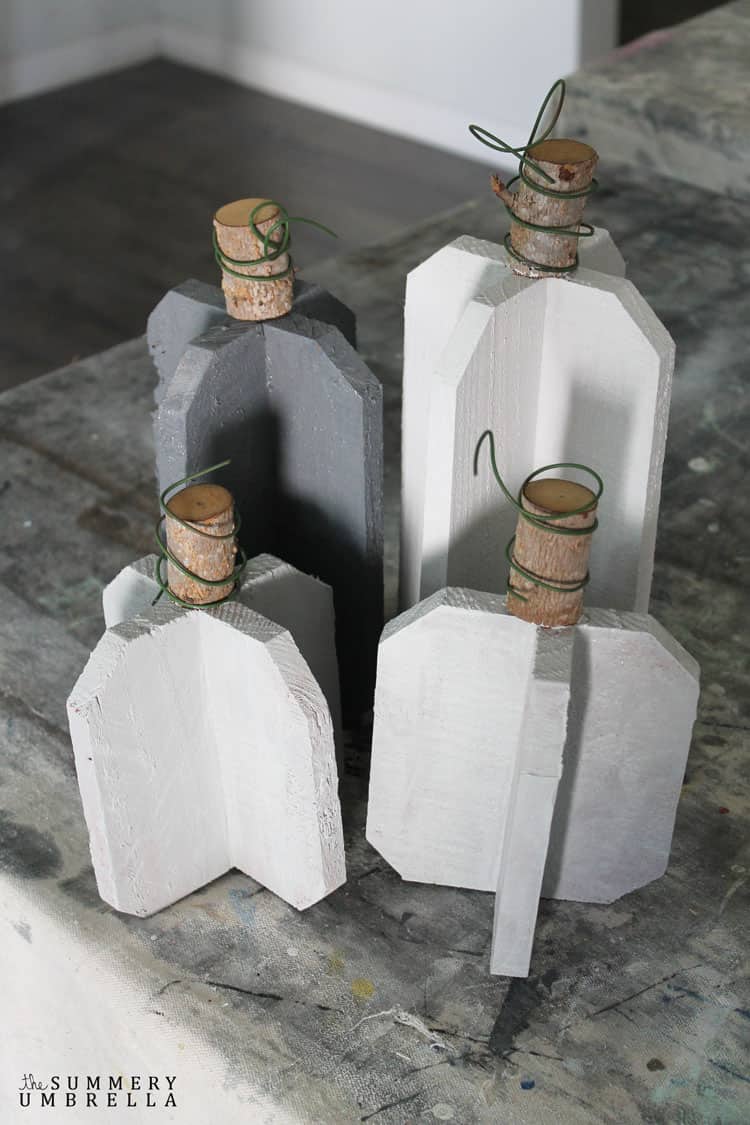
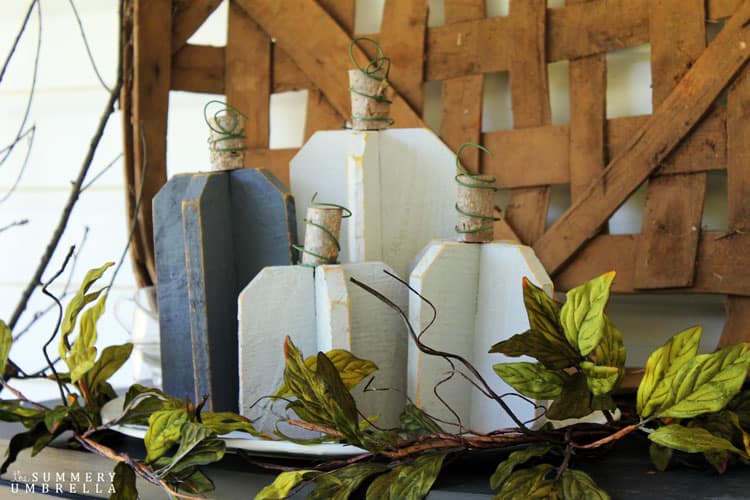
Apply a base coat of Pebble, an earthy gray, to your wooden pumpkins. This will create a beautiful foundation for the layers of color to come.
Step 2: Adding Depth
Next, layer on Lamp White and Soap Stone Fusion Mineral Paint in a dry-brushing technique. This will give your pumpkins depth and dimension, capturing the essence of real pumpkins with their subtle color variations.
Step 3: Wire Embellishments
Use wire to create charming pumpkin tendrils. Cut into short lengths and attach them to the tops of your pumpkins by twisting them around the stem of the DIY wood pumpkins. These little details add a touch of whimsy and rustic flair!
Step 4: Texturing and Aging
After you’re satisfied with the color of each of your pumpkins do a quick distress job (with my all-time favorite Ryobi Cordless Random Orbit Sander).
Fall in love with autumn all over again! Explore my Fall Decor Haven for a cornucopia of cozy ideas, from pumpkin-spiced DIYs to budget-friendly transformations. Your perfect autumn oasis awaits!
Step 5: Arrangement and Admiration
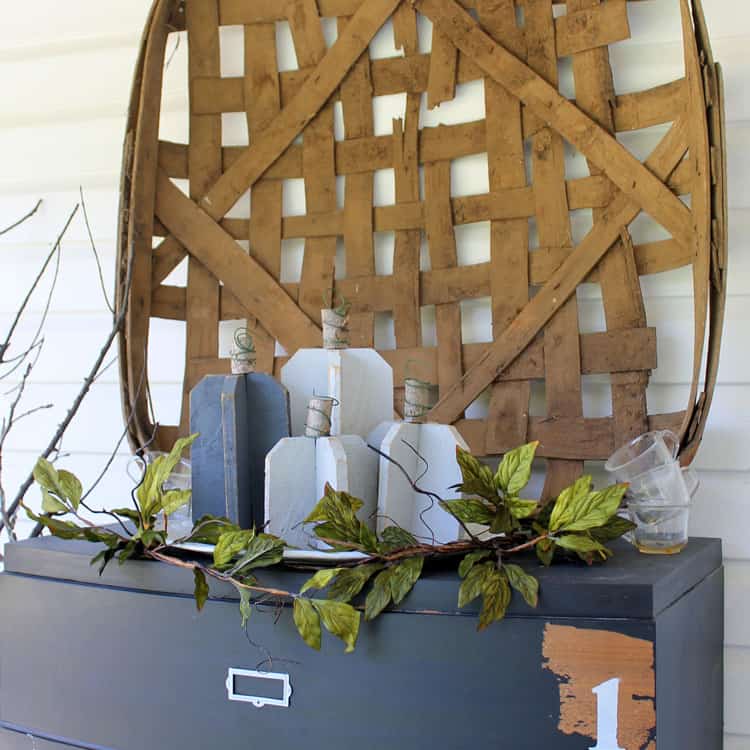
Now that your DIY wood pumpkins are ready, it’s time to arrange them. Place them on your mantel, tabletop, or front porch – wherever you want a dash of fall magic. Their unique colors, charming tendrils, and whimsical stems will draw the eye and heart alike.
Step 6: Share the Crafted Joy
Invite friends and family to share in your crafting delight. Host a cozy gathering where you can all create wood pumpkins together, sharing stories and laughter as you paint and sculpt your way to fall enchantment.
I can’t tell you how absolutely OVER-THE-MOON excited I am about the way these reclaimed wood pumpkins turned out. Don’t they just look amazing on top of my DIY flower planter dresser? Granted, I took out the flowers for the fall, but I’m still loving it outside!
DIY Reclaimed Wood Pumpkins in Gray and White
I’ve said it before, and I’ll say it again. The power of paint is a wonderful and easy way to fix just about anything!
Just in case you were wondering how to make these pumpkins you can check out the full tutorial over here. It’s honestly just a bunch of scraps I had lying around, a branch, some wire, and paint. Super easy!
I hope everyone had an absolutely wonderful weekend, and looking forward to another amazing week 🙂
Fall Decor You Won’t Want to Miss!
- Cheap Fall Decor Ideas: Create a Stunning Tablescape for Under $50
- 20 Rustic Thanksgiving Table Ideas
- 23 Amazing Decorating Ideas For Fall Tiered Trays
- 25 Fabulous DIY Wood Fall Decor Ideas For a Cozy Home
- Green Thanksgiving: Rustic Table Setting Ideas with a Natural Twist
- How to Create a Rustic Fall Wreath
- Wooden Pumpkin Decorations
- Rustic and Colorful Fall Porch
- DIY Fall Wreath Decor
LZ, these pumpkins are super cute!! I like them in orange, as well as in white and gray, great both ways! 🙂
Hi Keri and thank you! I agree. I like them both ways too 🙂