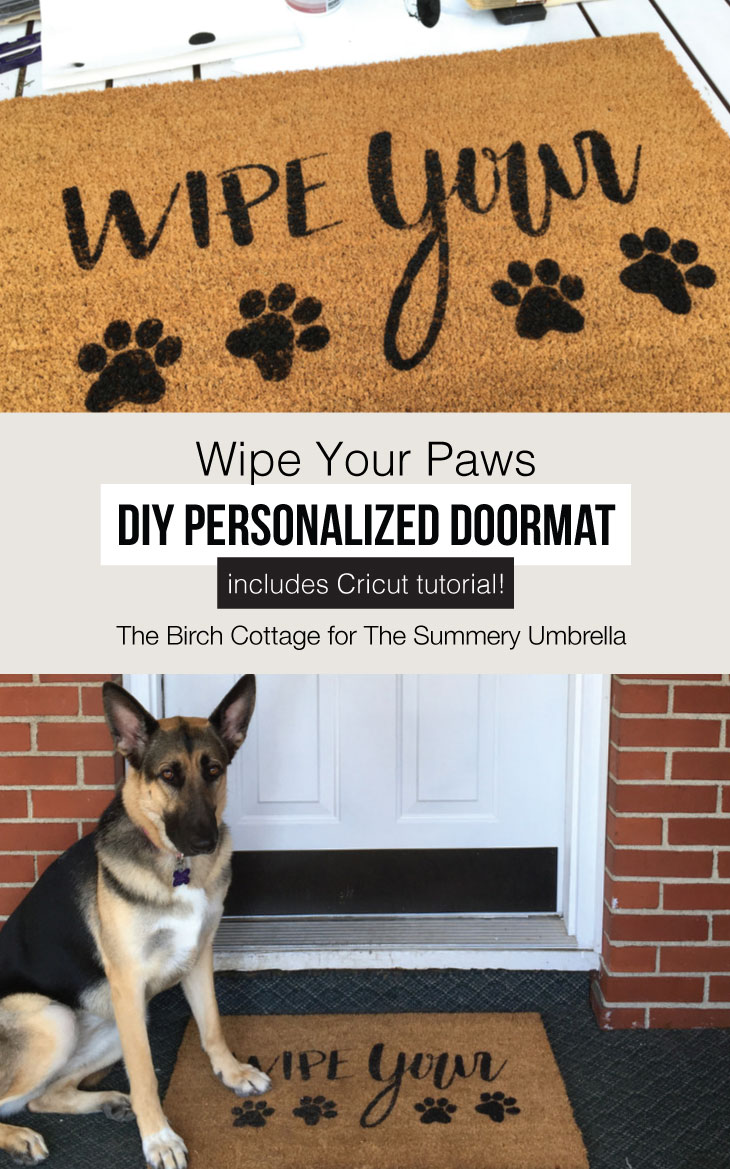
DIY Personalized Doormat: Adding a Touch of Charm with a “Wipe Your Paws” SVG
Create this easy Wipe Your Paws DIY Personalized Doormat to add some personality to your home. Come learn how to paint a coir doormat using a stencil and outdoor paint!
Hello, Summery Umbrella readers! My name is Pam and I blog at The Birch Cottage, where I share practical DIY tutorials, handmade gift ideas, family-friendly recipes, printables, and my love for all things homemade. I couldn’t be more excited to be here today sharing this DIY personalized doormat tutorial with you.
Want this freebie? Sign up for access to my resource library below.
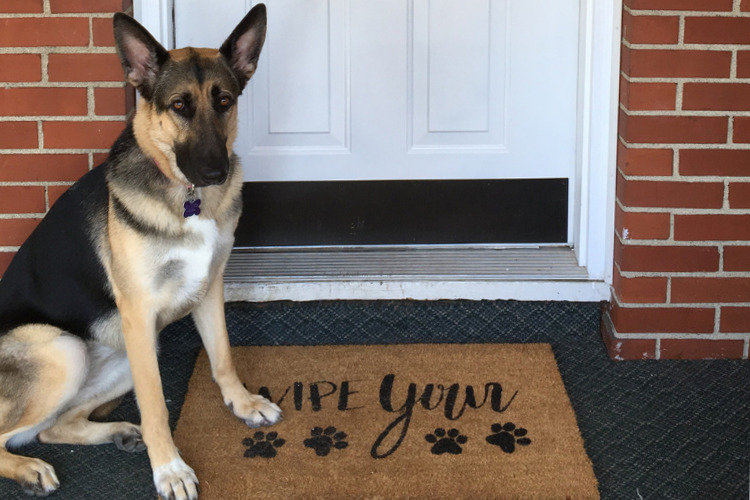
See, we have two German Shepherd Dogs named Remo and Zoey (you can follow them on Instagram #remozoey). They are quite amazing and loving members of our family. Remo is seven years old and Zoey is two. Both are full of personality and couldn’t be more different if they tried! (Let’s just not talk about all the shedding, okay?!) In fact, they are the motivation behind today’s DIY project.
DIY Personalized Doormat
Don’t be intimidated by this project. It is soooo easy! Seriously, I’m not kidding. I was a little concerned and felt quite intimidated before I started this project. Believe it or not, I’ve never worked with “coir” before and I wasn’t sure how to keep the stencil in place or how to keep the paint from bleeding.
I kind of experimented as I went and when all was said and done, I felt silly for being so uncertain and intimidated. By the way, the picture below is of our dog, Zoey. Wasn’t she a great model? She’s a little camera-shy, but we think she’s adorable.
There are just a few tools and supplies you’ll need to make a DIY personalized doormat:
Tools:
- Cricut Explore Air™ 2 (or your favorite cutting machine)
- Cricut® 12×24 StandardGrip Adhesive Cutting Mat
- Weeding Tool
- Computer, Tablet or Smartphone (to connect to Cricut Design Space™)
- Foam Pouncer
Supplies:
- Wipe Your Paws SVG File (sign up above for the resource library to get this freebie!)
- Adhesive Vinyl
- Outdoor Paint
- 18×30 Coir Doormat (You can also pick these up at your local hardware store.)
- Protective Sealant (optional)
Instructions
Before I get into the tutorial on how to paint the coir doormat, I want to first share with you how to modify an SVG image using Cricut Design Space. You can, of course, simply use the file as-is. I just want to make sure you know how to complete this project from start to finish. It’s really not difficult at all!
How to Modify an SVG File in Cricut Design Space™
If you already know how to modify and resize an SVG file, feel free to skip ahead to the tutorial. These instructions are written for a Windows PC.
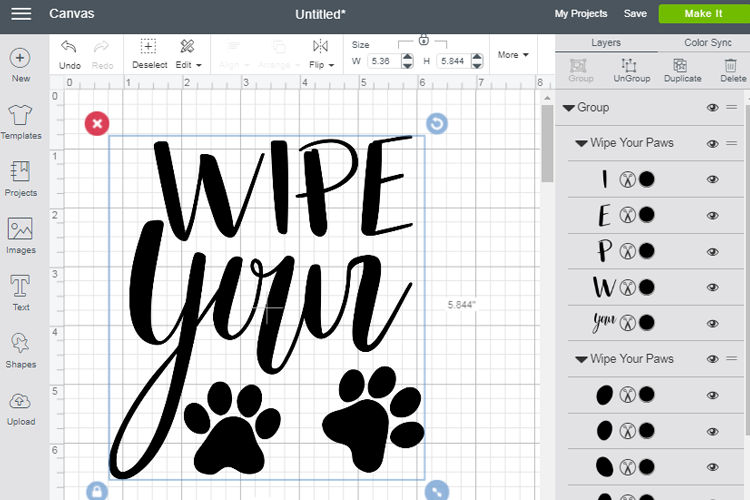
- However, if you haven’t already, you’ll want to sign up for LZ’s newsletter above to upload this file into Cricut Design Space. Then, create a New project by selecting the uploaded Wipe Your Paws SVG file and clicking on Insert Image. The SVG file will load in your new project design space. Be sure to save your project so you don’t lose your work!
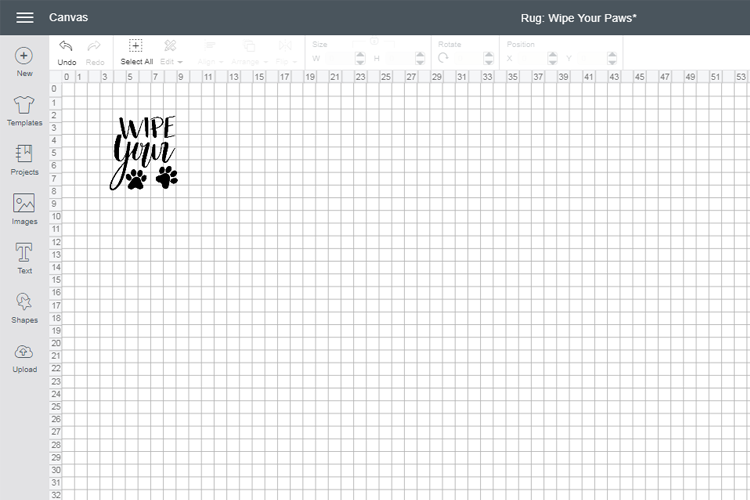
- We are going to change the layout slightly and resize the image to fit onto our 18”x30” coir doormat. First, we need to ungroup the image. While holding down the shift key on your keyboard, click to select the letters “W I P E” and the word “your”. Then click on UnGroup.
- Now select the letters “W I P E” and click on Group to rejoin the letters (excluding the word “your”).
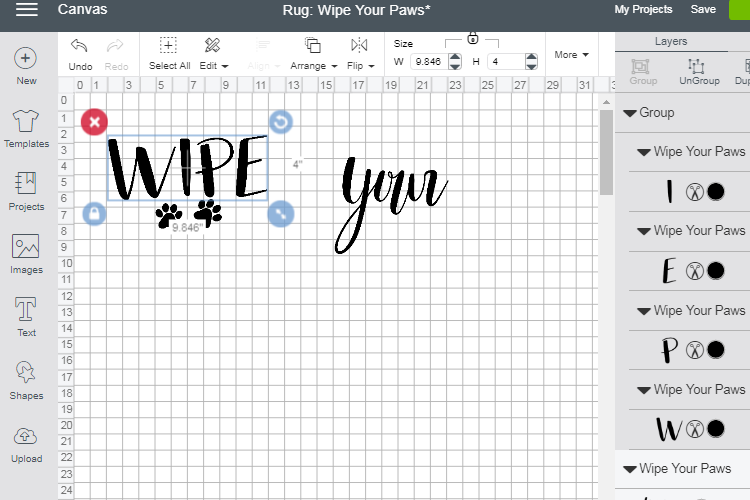
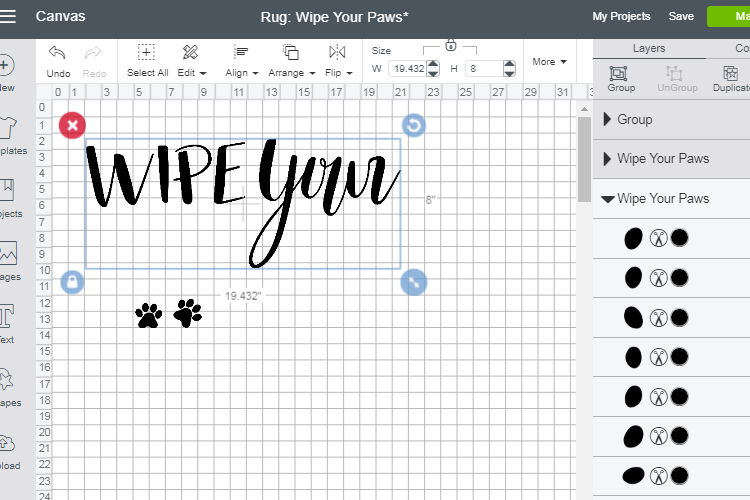
- Next, resize the word WIPE by selecting it and then entering a value of 4 in the Height field.
- Resize the word Your by selecting it and then entering a value of 8 in the Height field.
- Resize the paw prints by selecting it and then entering a value of 4 in the Height field.

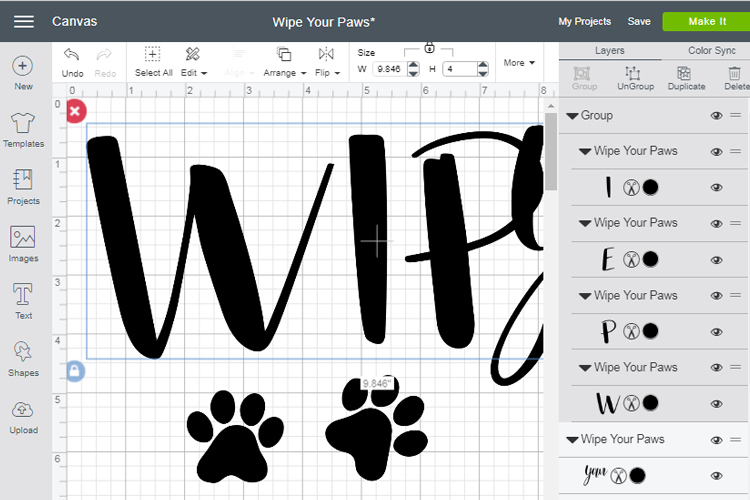
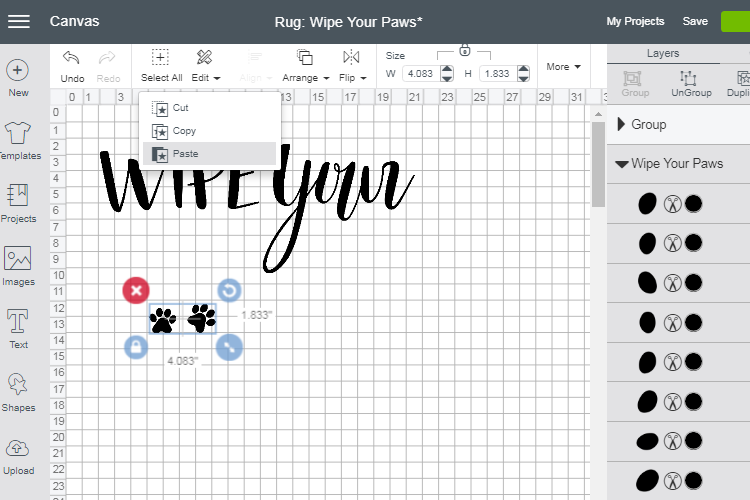
- Now we’re going to duplicate the paws. Select the paws then click on Edit > Copy, then Edit > Paste. Drag the paws to position them where you want them. (I chose to do this because we have two dogs and I wanted both of them represented on this doormat.)
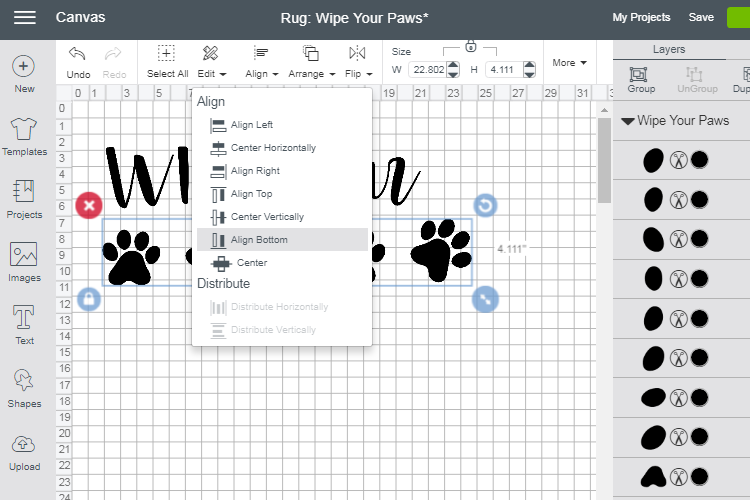
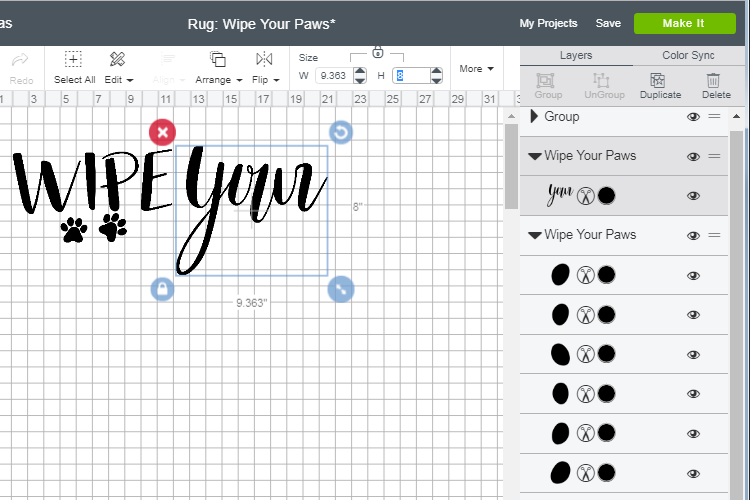
- Position or align the words WIPE and Your where you want them. Remember the doormat is 18” high by 30” wide.
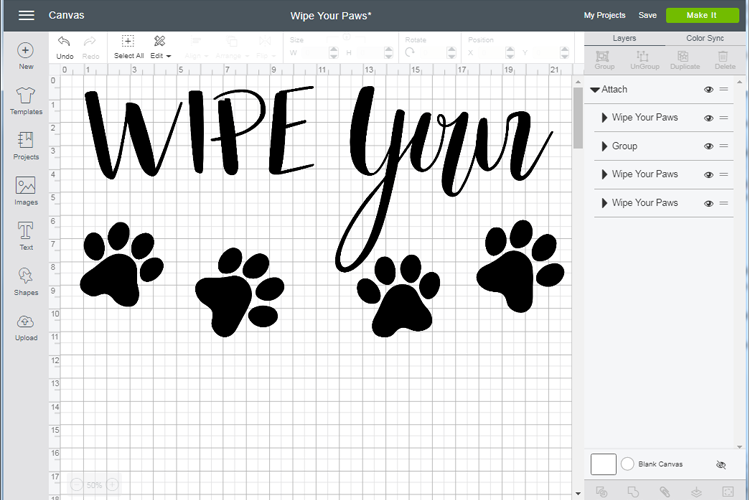
- Select all the objects by clicking on Select All. Then right-click somewhere on the image and click on Attach. You want to attach all the layers so that they cut as one layer.

- You are now ready to print your image.
How to Print an SVG File in Cricut Design Space
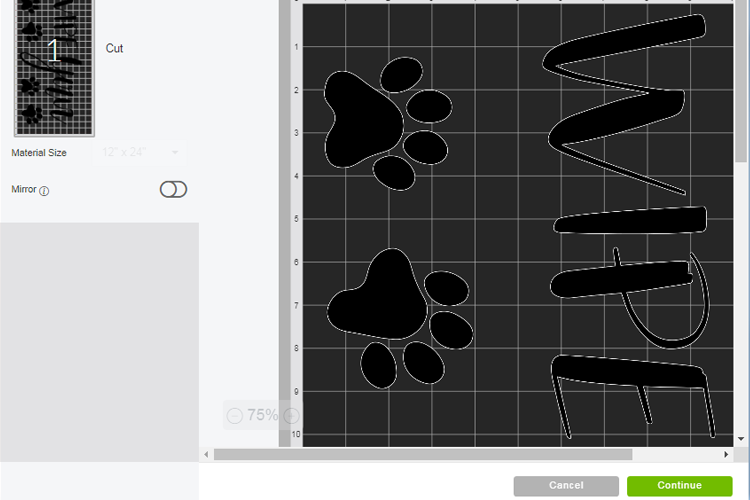
- With your design loaded and ready to print (be sure to save your work), click on Make It.
- The design will load and you may see a message across the top of the screen that says, “At least one of your images is larger than 11.5” in height or width. Please click OK to continue with a larger mat or click Cancel to go back to the canvas to reduce the size.” Click on OK. Click on Continue.

- You’ll be prompted to select your device from the Select Cricut device drop-down menu. Select your device.


- Design Space will then attempt to connect to your Cricut machine. Once connected, you’ll be prompted to load your mat. With a piece of vinyl cut 12”x24” (or the appropriate size for your project) and placed vinyl side up on the 24” long mat, load it into your machine, making sure to place the top edge of the mat under the guides on the machine and so the top is touching the wheels. Press the Load/Unload button.
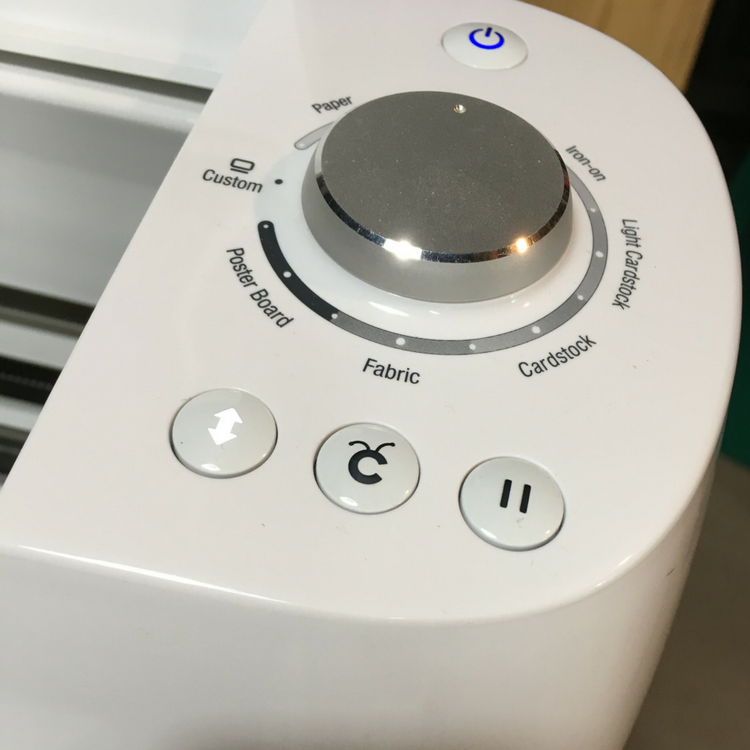
- Once Design Space detects you have loaded the mat, you’ll be prompted to press the Go button (button with the Cricut logo). The Cricut machine will now cut your design.

- After the design has been cut, you’ll be prompted to unload the mat. Press the Load/Unload button.
How to Make a DIY Personalized Doormat
Finally, it’s time to work on your personalized doormat!
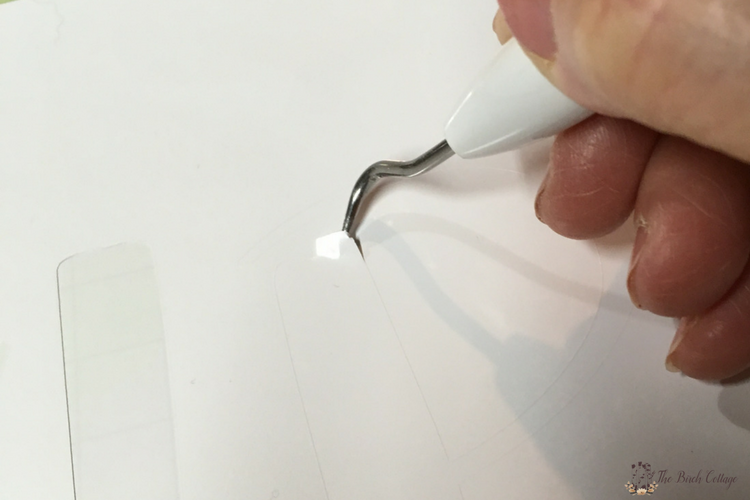
So, you should have uploaded the SVG file to Cricut Design Space, resized it, and cut it out using your Cricut. Once you have the SVG file cut, it’s time to weed the vinyl. I like to weed it while still attached to the mat, but you can also remove it from the mat first. After that, weed the vinyl letters and paws from the vinyl.
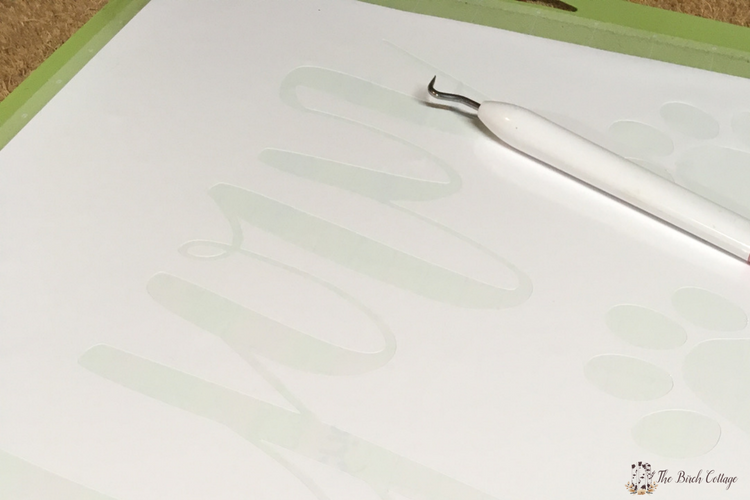
Remember, we are using the adhesive vinyl as a stencil, so we just need the outline.
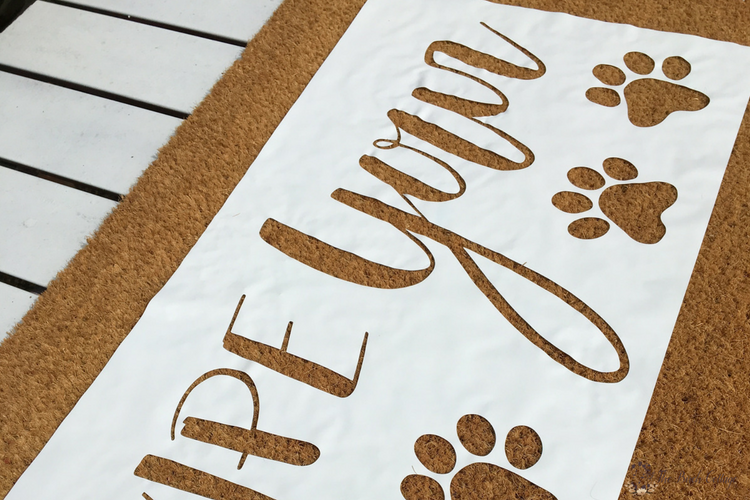
Now, it’s time to apply the vinyl to the coir doormat. So, grab your coir doormat and make sure you have everything moved out of the way and ready to apply the vinyl. CAREFULLY, remove the backing from the adhesive vinyl. I found that laying the vinyl side down and kind of rolling the backing at an angle works best for removing the backing from the vinyl without the use of transfer tape.
Carefully, pick up your adhesive vinyl and gently lay it down on top of the coir mat, sticky side down. Align the design upon the mat exactly where you want it and then apply gentle pressure with your fingers all over the vinyl, paying special attention to the outline of the words and paws. Also, don’t forget about the piece of vinyl in the tail of the letter Y and the top of the letter O.
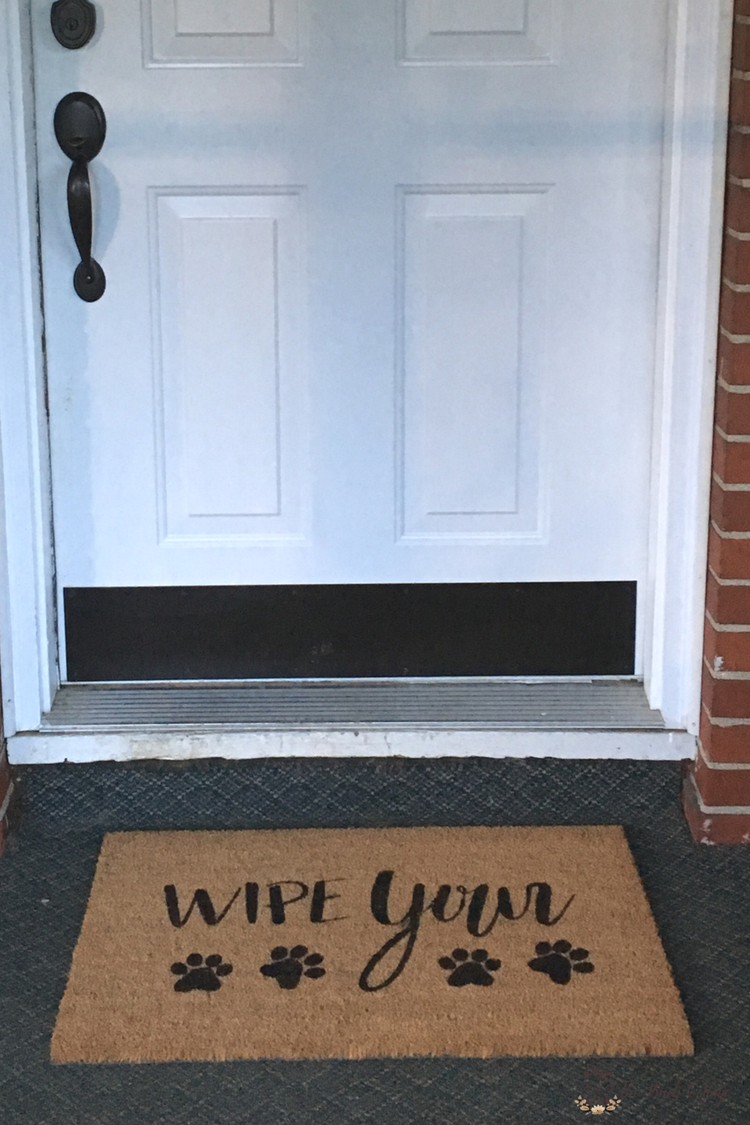
Easily Make This Wipe Your Paws DIY Personalized Doormat
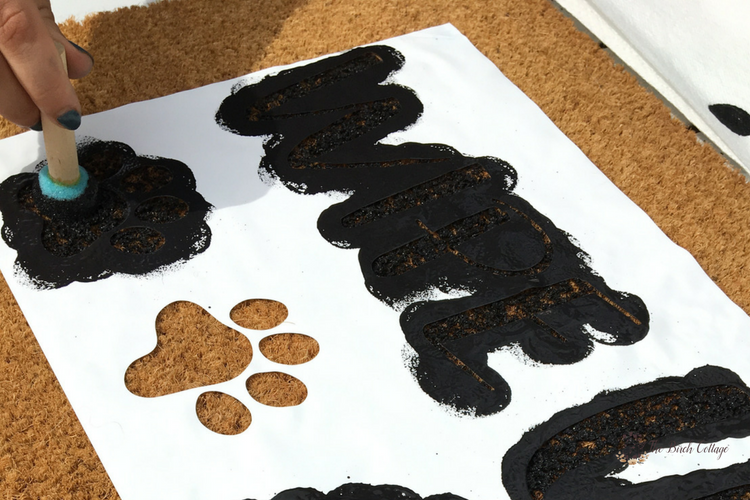
With your vinyl in place on the mat and smoothed out, it’s time to paint! Using a foam pouncer, dab paint onto the mat, following your stenciled design.
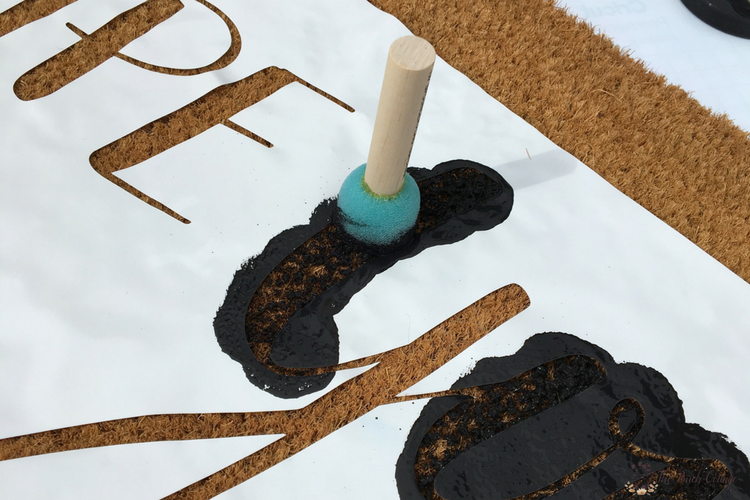
I found that I did not need to wipe off excess paint from the pouncer. Just dip the pouncer in the paint and dab it onto the mat. Be sure to bounce up and down on the mat. No twisting or brushing. Just use a nice up-and-down motion. Dip. Pounce. Dip. Pounce. Pounce. Dip…… You get the idea.
More of What You Love: Check Out These Recommended Posts!
- Treat Your Dog With This Easy DIY Dog Treat Jar
- DIY Natural Flea Repellent: The Safe and Effective Way to Protect Your Dog from Fleas
- The BEST 3 Ingredient Peanut Butter Dog Treats
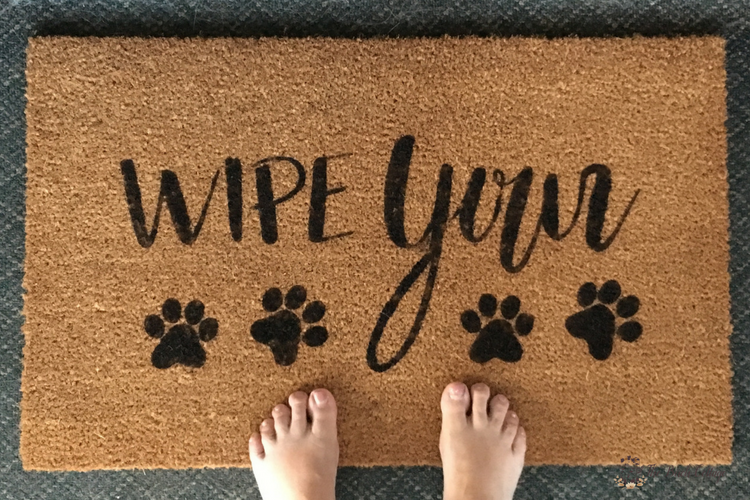
When you are happy with the painting, it’s time to remove the vinyl and admire your work! You’ll want to allow the paint to dry completely before actually using the doormat. Also, if you’re going to use your mat outdoors, you may want to apply a protective sealant to help extend the life of your painted masterpiece.

Love SVG projects and need some inspiration?
This DIY project really was a lot of fun. One of my daughters actually joined in on the fun and helped me paint the mat. We were both pleasantly surprised by the results. I had expected there to be a lot of bleeding, but there really wasn’t. I just might have to buy one of these mats for every season and paint a different-themed DIY personalized doormat. With so many designs to choose from on The Summery Umbrella, why not?!
Here are a few that I think would make adorable customized mats:
Trick or Treat SVG (also available for free when you sign up for the resource library above!)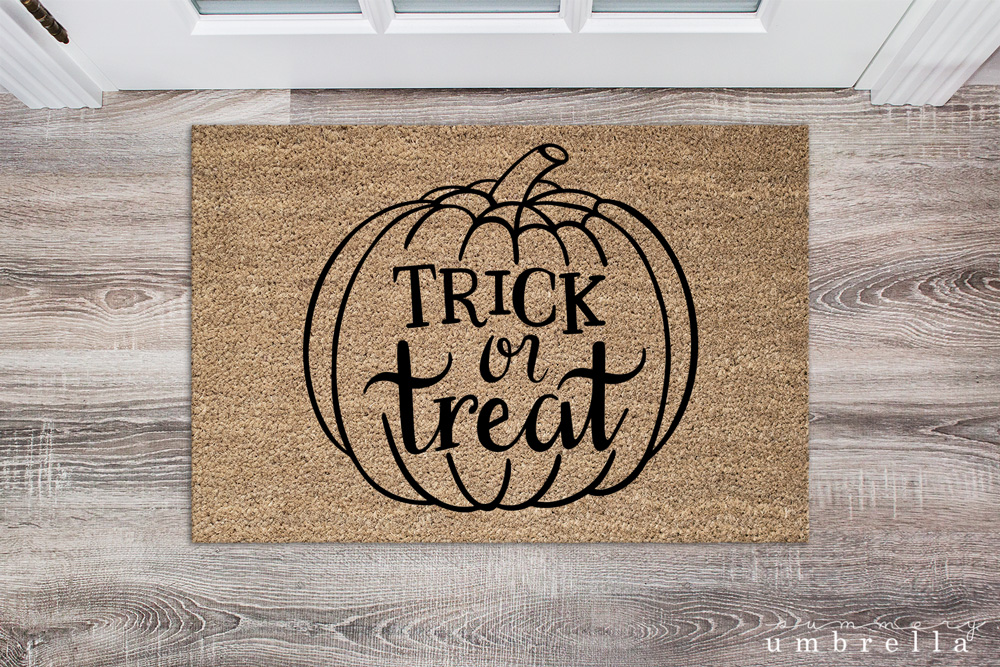
Fresh Flowers SVG (Yup! This one is for free too when you join the resource library 😉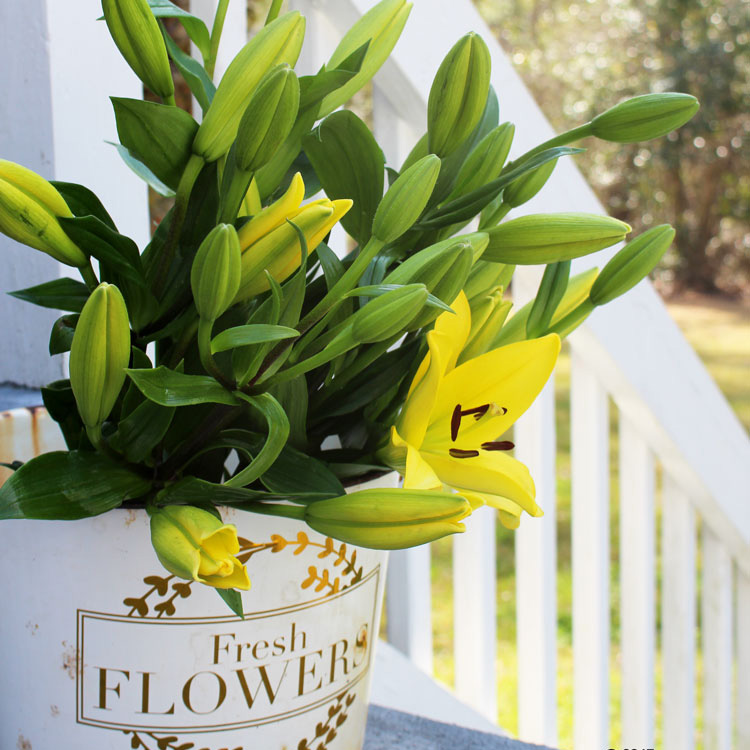
Easily Make This Wipe Your Paws DIY Personalized Doormat
Inspiration from The Birch Cottage
Likewise, I hope you have enjoyed this DIY personalized doormat tutorial. If you like this project, you might also like this DIY project and free printables on The Birch Cottage blog. I’d be thrilled for you to come to visit!
If you paint a customized doormat, we’d love to hear about it! Simply leave a comment below. Meanwhile, if you have any questions, please don’t hesitate to ask!

Most importantly, I look forward to sharing another project with you next month! Til next time…

This post was updated in October 2022.


Could you tell me what kind of outdoor paint you used? The link isn’t working.
Hi Cindi! Sorry about that! I’ve fixed the link above, but it’s https://www.homedepot.com/p/BEHR-Premium-Plus-Ultra-8-oz-ECC-10-2-Jet-Black-Satin-Enamel-Interior-Exterior-Paint-and-Primer-in-One-Sample-UL22316/304770882?MERCH=REC-_-nosearch2_rr-_-NA-_-304770882-_-N. Thanks for letting us know!
I loved your project so much i included it in my 5 Free Cricut Projects Post..
https://makesbyclaire.com/5-free-projects-to-makes-with-your-cricut/
Love your blog and all your inspiration
Claire
Thank you so much, Claire! I’m so happy you liked it and included in your post. Have a great day!
Stencil the doormat with some colorful paints
I agree! Colorful paints would definitely be gorgeous too! Thanks for stopping by 🙂