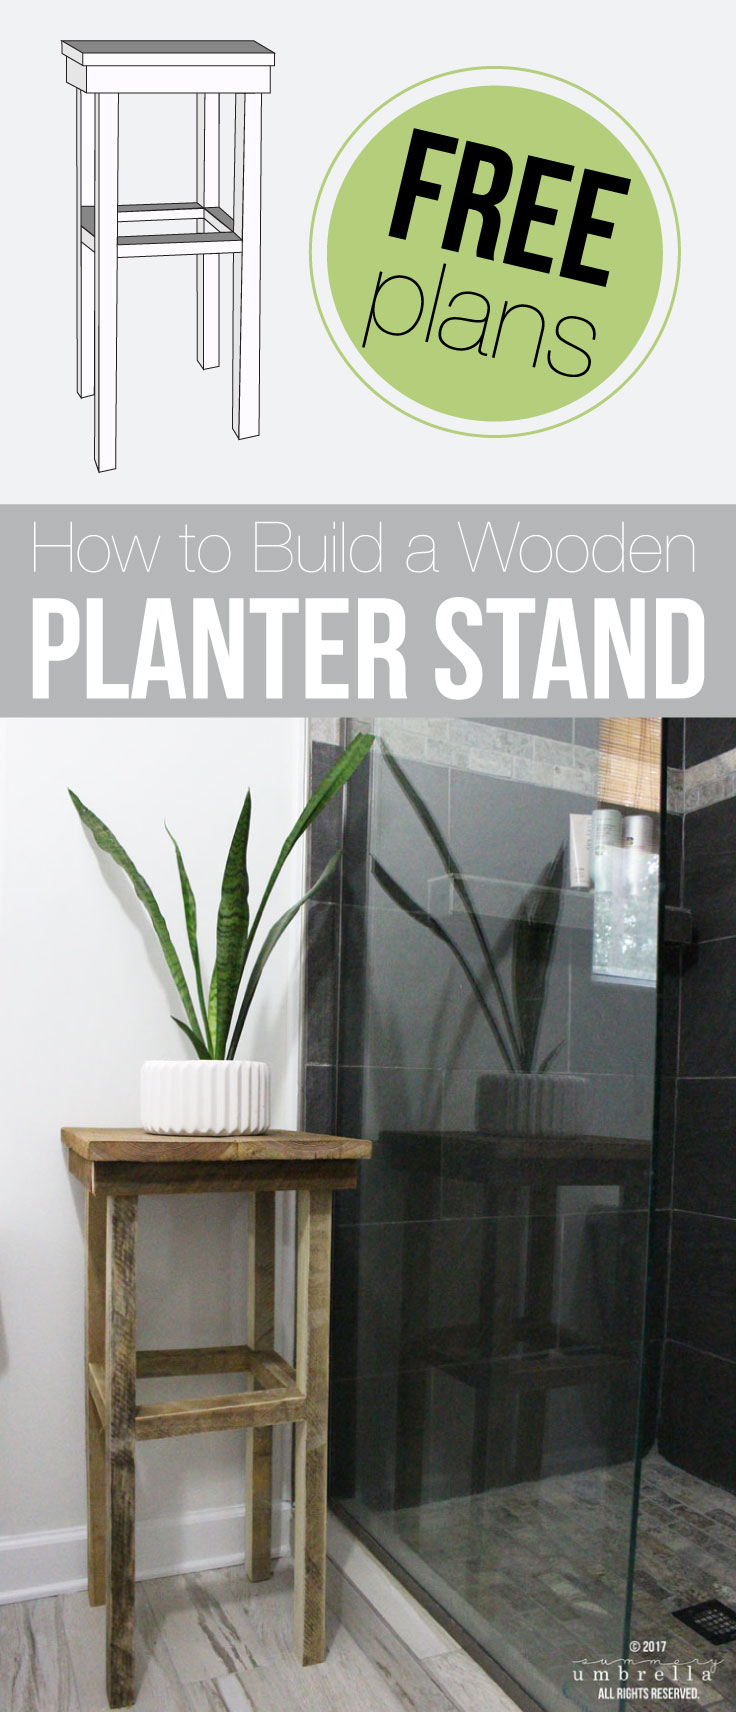
From Wood to Wow: How to Build a Stylish Wooden Planter Stand for Your Plants
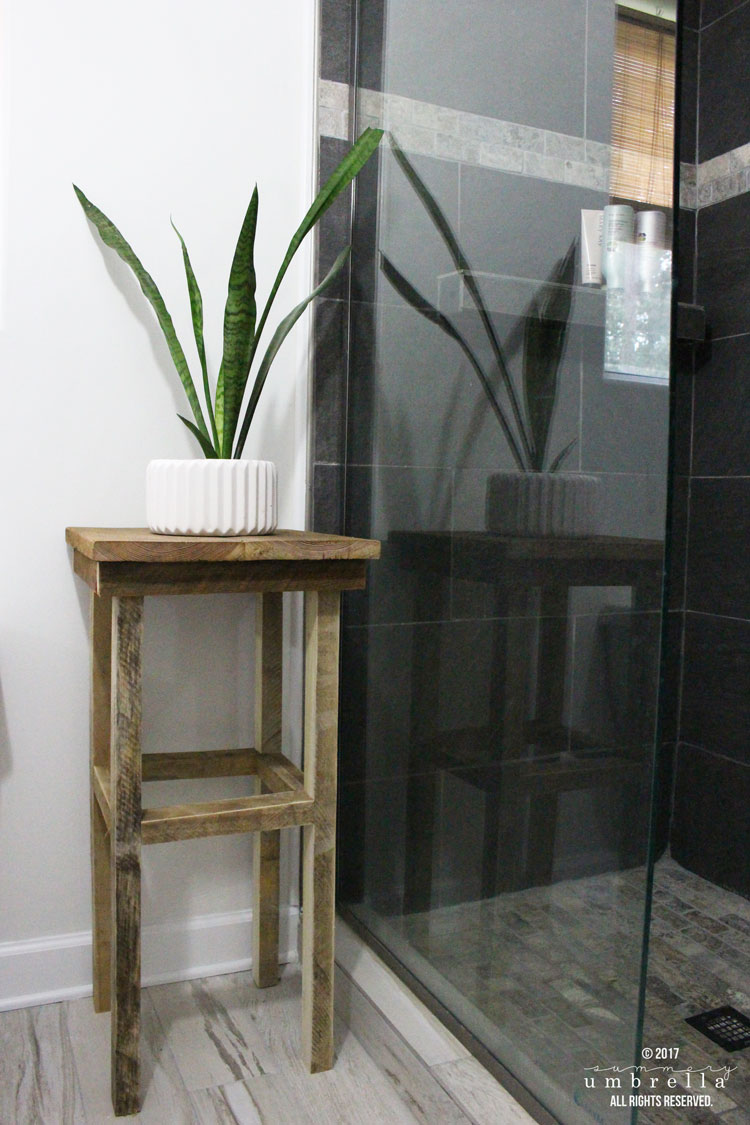
Create your own wooden planter stand that’s perfect for any room of the house, or even display it outdoors! My favorite place? The bathroom! Learn how to make your own with these free plans now!
If you must know the truth, here it is. I would guesstimate that around 98% of my DIY projects are actually accomplished by my husband. I know, I know. Shocker.
However, in my defense… I do all the leg work. Here’s what typically happens:
- I come up with a BRILLIANT idea.
- I’ll draw it up, find the items I need, and even start putting it together.
- Then…. I’ll soon realize that I’m missing some piece to the puzzle. For example, my table won’t stand, or even something as simple as determining what size nails I need to use.
And that, my friends, is when my Super Talented Hubby needs to get involved. You see, he’s an expert in the field of… well, everything!
He is the Chip to my Joanna.
The butter to my bread.
The shot of whiskey to my glass of wine…
Ok, you get the point. I just figured I should give him a little credit since he did help me put it all together. Now, onward to making this gorgeous wooden planter stand!
Supplies & Tools
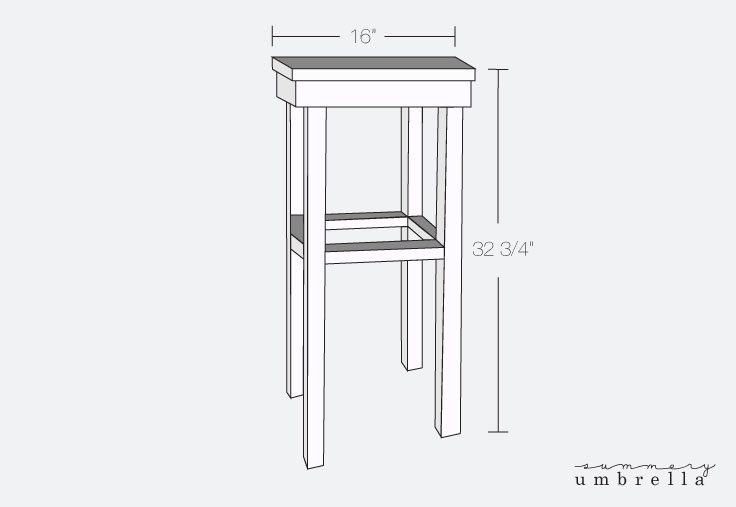
- 4: 2″x”2 at 30″L (your legs)
- 4: 2″x 2″ at 10″L
- 2: 2″x 2″at 14 3/4″ L
- 2: 2″x 2″ at 12 1/2″ L
- Table saw
- 2: 1″x 8″ at 16″ x 7 3/4″ (your top piece)
- Wood glue
- Nail gun and 2 1/2″ finishing nails
- Screwdriver
- Drill
- Drywall screws
- Kreg joiner
STEPS
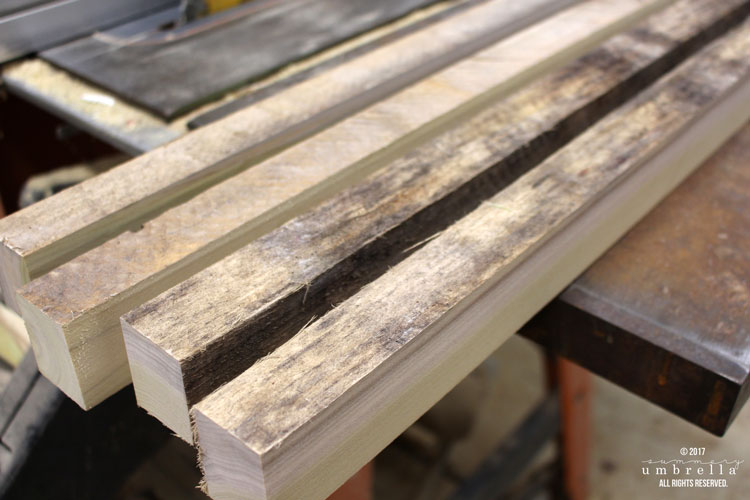
- Cut your 2″x 2″ and 1″x8″ boards to the above lengths. We used barn wood to create this wooden planter stand, but you could just as easily use new wood as well.
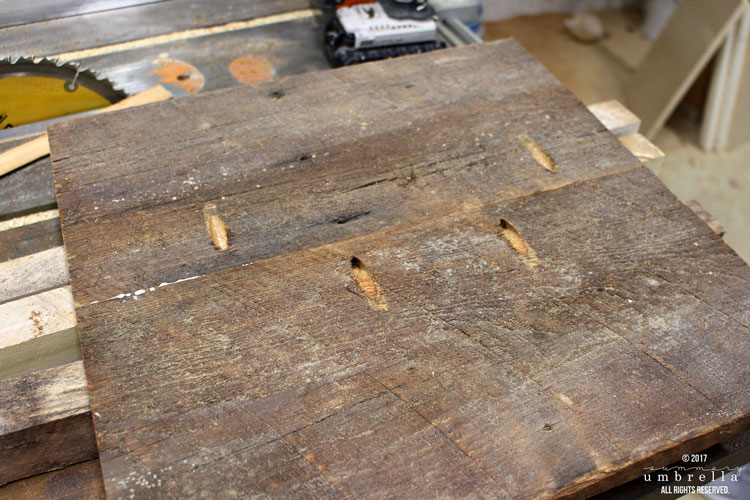
- Next, it’s time to connect your two 1″x 8″ boards together. You’ll be using your kreg joiner and wood glue to do this.
- First, lay your two boards flat and drill two holes on each of the sides using your kreg joiner.
- Then, connect the boards together with wood glue and your drywall screws in the holes you just made (see photo below).
Need a better visual? Check out the video below!
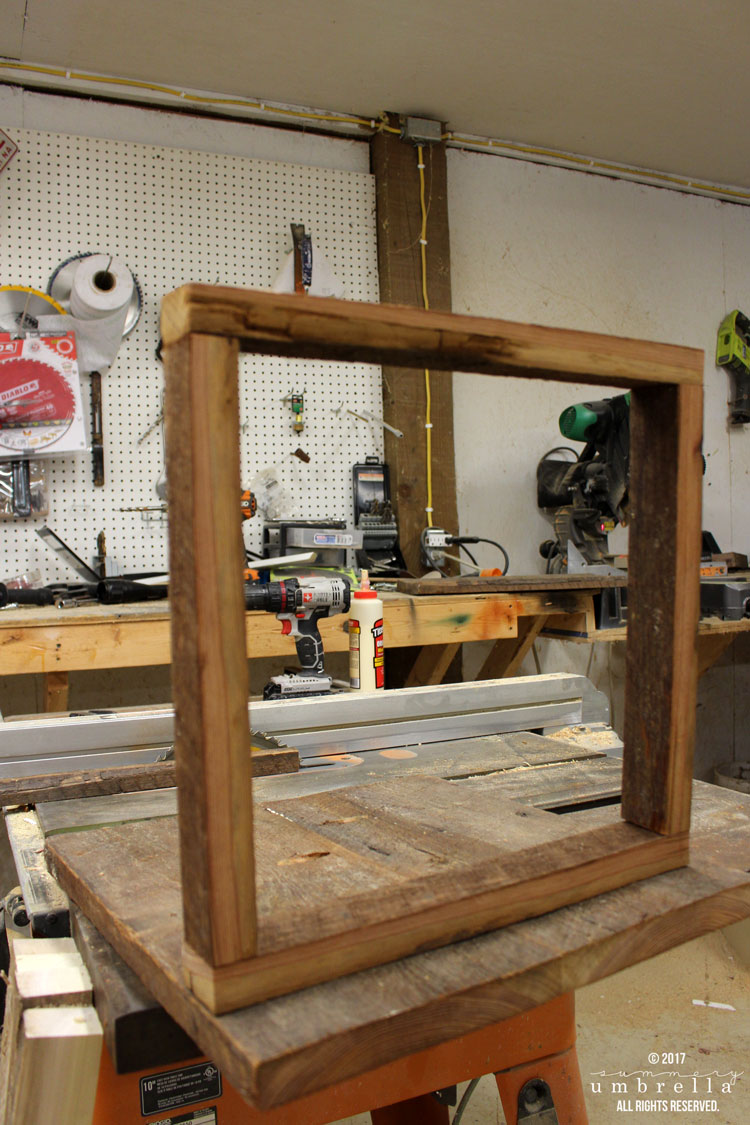
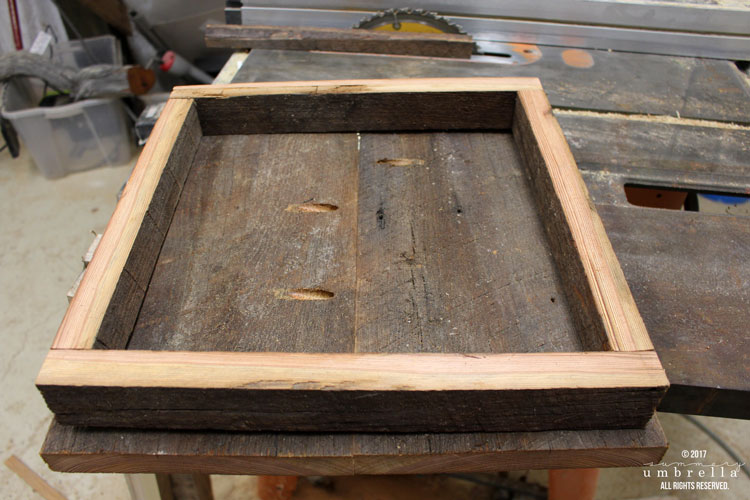
- Now, it’s time to build the frame that will go underneath your top piece. Once attached it will allow you to connect your legs securely so your wooden planter stand can stand up by itself.
- Using your two: 2″x 2″ at 14 3/4″ and your two: 2″x 2″ at 12 1/2″ L create a square frame as shown below. Attach your sides with wood glue, and secure them with your nail gun and finishing nails.
- Once your frame is complete you’ll attach it to your completed top piece with wood glue and finishing nails. Make sure it is equally distributed on your top piece.
- You’ll then attach your legs inside your frame with wood glue and your nailing gun.
- Last, but certainly not least, you’ll attach your four: 2″x 2″ at 10″L pieces inside each of your legs. Mine are approximately 12 1/2″ from the bottom of my frame to the top.
Looking for other DIY project inspiration?
- Clean and Prepare Wood for DIY Signs
- How to Make a Mason Jar Pendant Light
- How to Paint Furniture with Minimal Prep Work
- How to Paint and Distress Metal Bar Stools Like a Pro
- How to Paint Your Metal Front Door the Easy Way
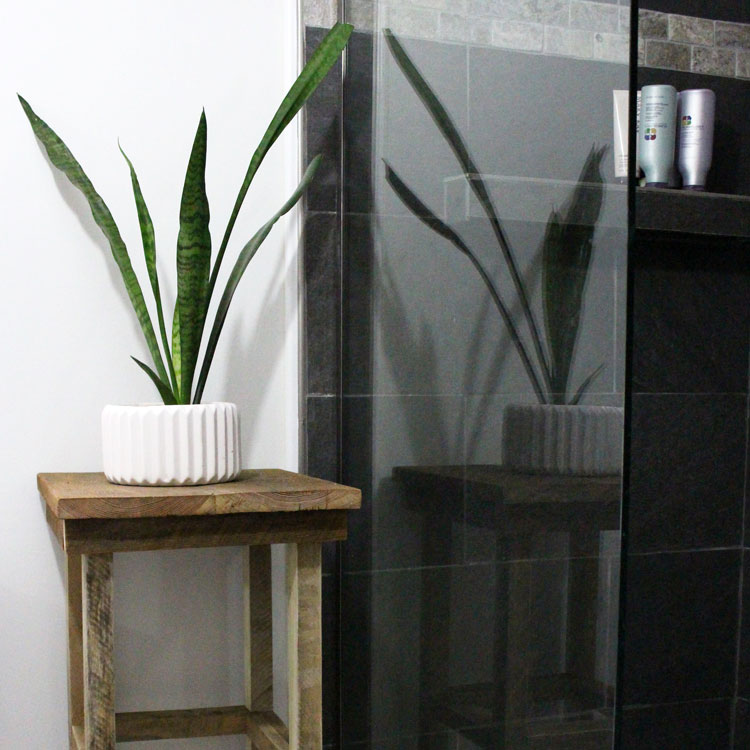
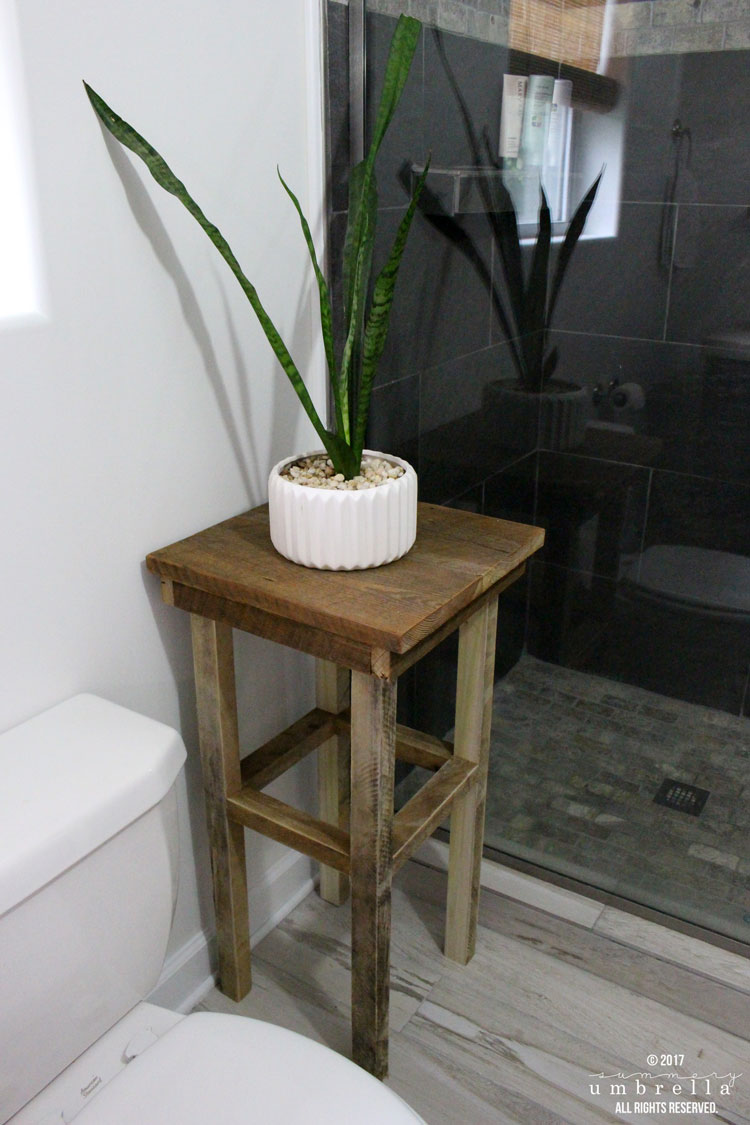
How to Build a Wooden Planter Stand
If you loved these ideas then you’ll definitely want to browse some of my other Gardening projects that are full of step-by-step tutorials as well as freebies galore! Can’t wait to see you again and happy planting!