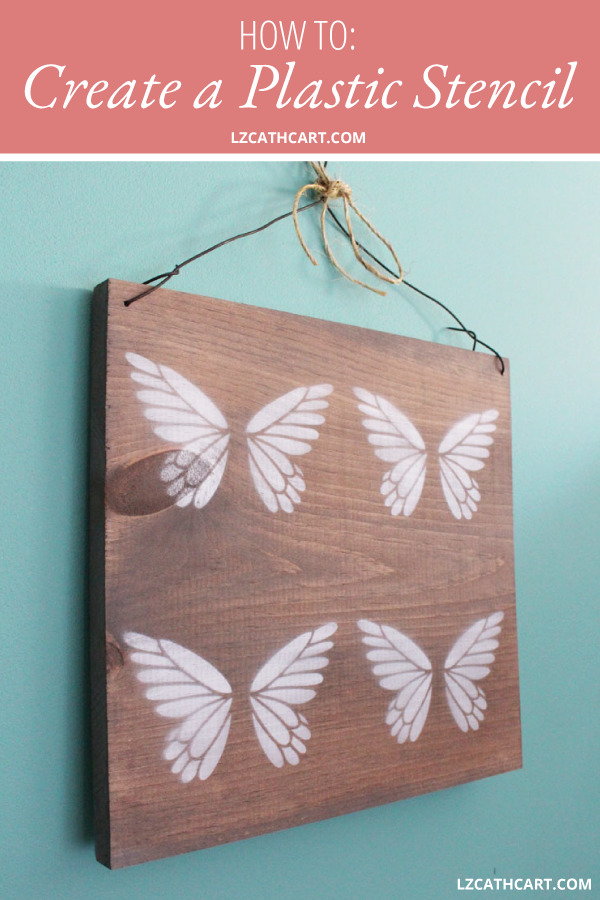
Crafting Tips: How to Make Your Own Plastic Stencil for Wood Signs
Sometimes you just need a plastic stencil for a project, but how do you make one? Learn how with this step-by-step video tutorial!
Have you created any wood signs using my vinyl stencils from previous tutorials? For instance, this DIY Chicken Coop Sign for “The Ladies” is a perfect example!
It’s super easy to cut out, but unfortunately, it’s only for one-time use. Boo. So, how can you fix that?
With a plastic stencil, of course! Now granted, there are some designs that are incredibly hard to turn into a plastic stencil due to all the little bits inside of the letters. However, with a simple image or pattern, it shouldn’t be too difficult.
With that being said, let’s start this stenciling party!
Want this freebie? Sign up for access to my resource library below.
How to Make Your Own Plastic Stencil for a Wood Sign
Steps
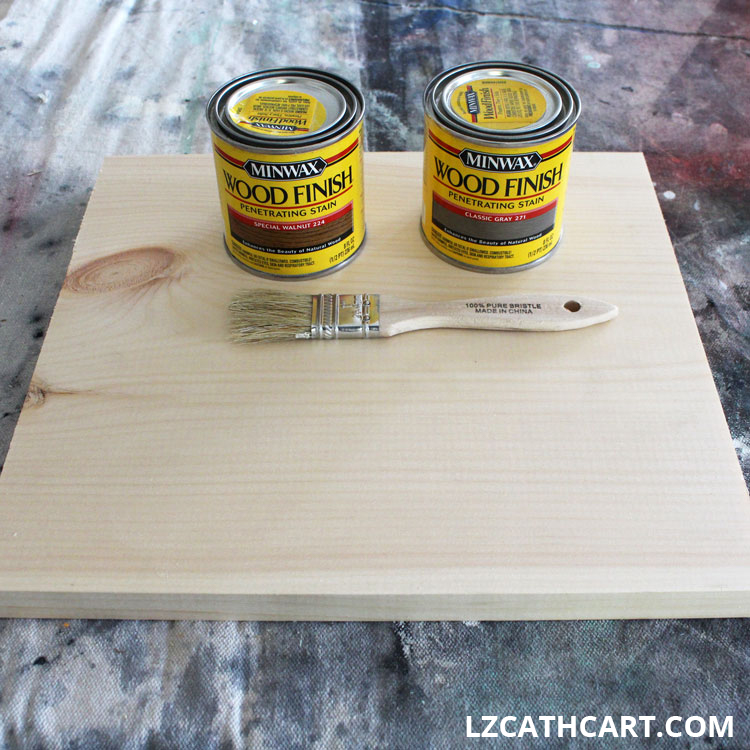
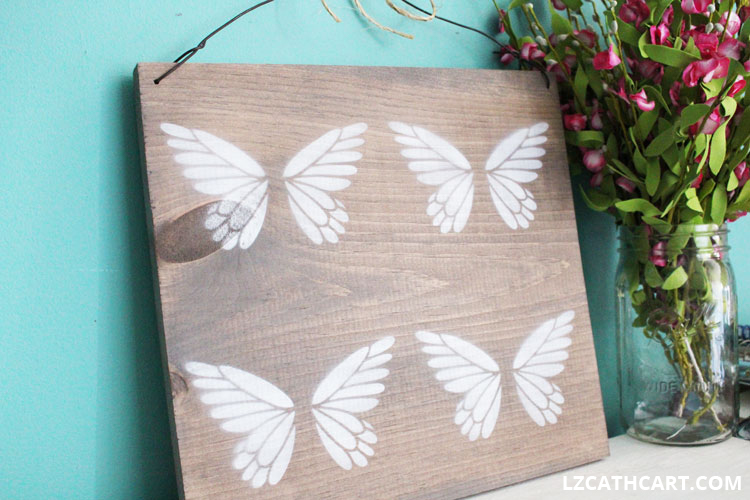
1. Cut your pine board to 11″ x 11″, and stain it to your favorite color. Then, make sure to let it dry overnight before applying your stencil!
NOTE: My sign board was stained using a combination of Minwax Classic Gray and Ebony colors.
2. Download the template by signing up for my resource library above (aka. freebies galore!!).
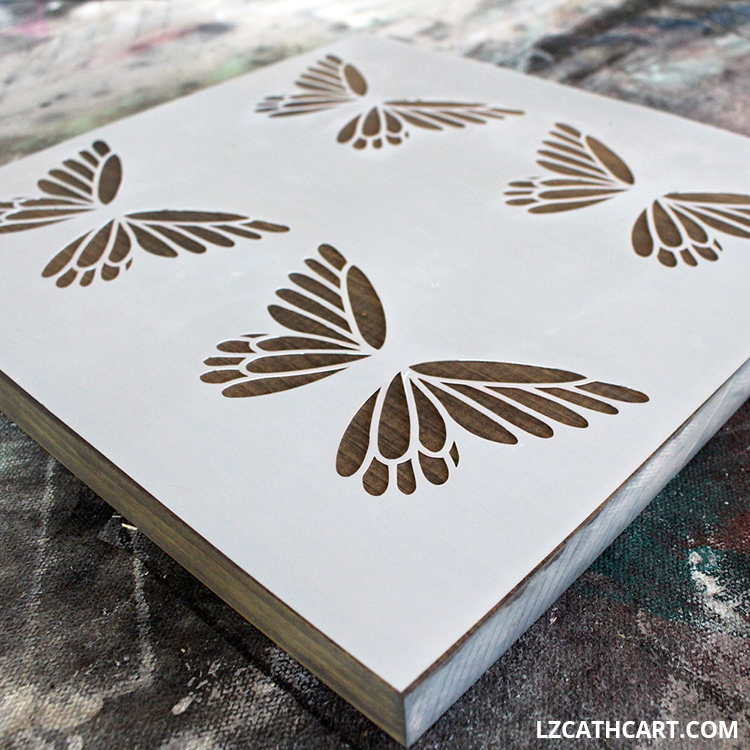
3. Using your stencil blank and cutting machine cut out the template for this project.

You’ll need to make one change when you cut your stencil blank.
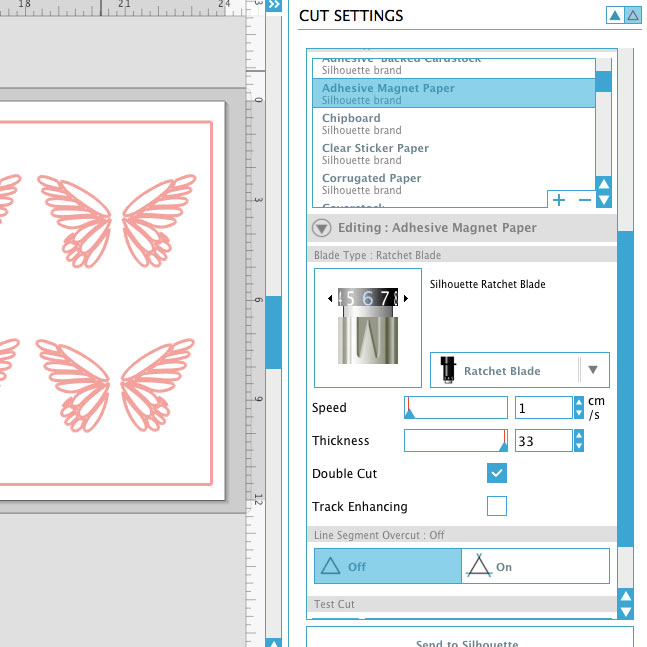
For instance, for the Silhouette CAMEO, in the “Send to Silhouette” tab click the button marked “Advanced Cut Settings”. Under Material Type select Adhesive Magnet Paper. This will then tell you that you will need to change your Silhouette Ratchet blade setting to 6 (see below).
TIP: Feel free to change the blade setting to whatever you’d like, but you’ll ultimately want to customize it to be equivalent to the thickness of your stencil blank.
4. After you’ve cut your stencil carefully take out the plastic pieces of your design that you will be painting.
5. Place it onto your sign where you would like it to be. You can hold your stencil in place with your hand, or use painter’s tape to hold it down.
5. In a ventilated area, evenly apply a light coat of spray paint to your vinyl.
Allow it to dry and then apply your next coat. Repeat this step until your desired color has been achieved, and carefully pull your stencil straight up. Then, let it dry.
6. Last, add a light layer of your top coat spray paint for protection, let it dry, and frame it up, add twine, or even wire. Your choice!
How to Make Your Own Plastic Stencil for a Wood Sign
Woo hoo!! And that’s another sign tutorial under your belt! Wasn’t that super easy AND fun? Plus, think of the numerous other ways you can use this same stencil for other signs. The ideas are endless!
If you loved this project then you’ll definitely want to browse some of my other Wood Signs that are full of step-by-step tutorials as well as freebies galore! Can’t wait to see you again, and Happy Crafting!

Psstt… don’t forget to download this free SVG file by signing up for my resource library above!
Let’s be Social
This post was updated in September 2022.