Free Vintage Inspired DIY Vinyl Decal for a Flower Pot
This DIY Vinyl Decal for a Vintage Bucket tutorial is so easy you’re going to want to make one for all your friends & family! Plus, a free SVG Cut File too! It’s so easy you’ll have a DIY flower pot in no time at all.
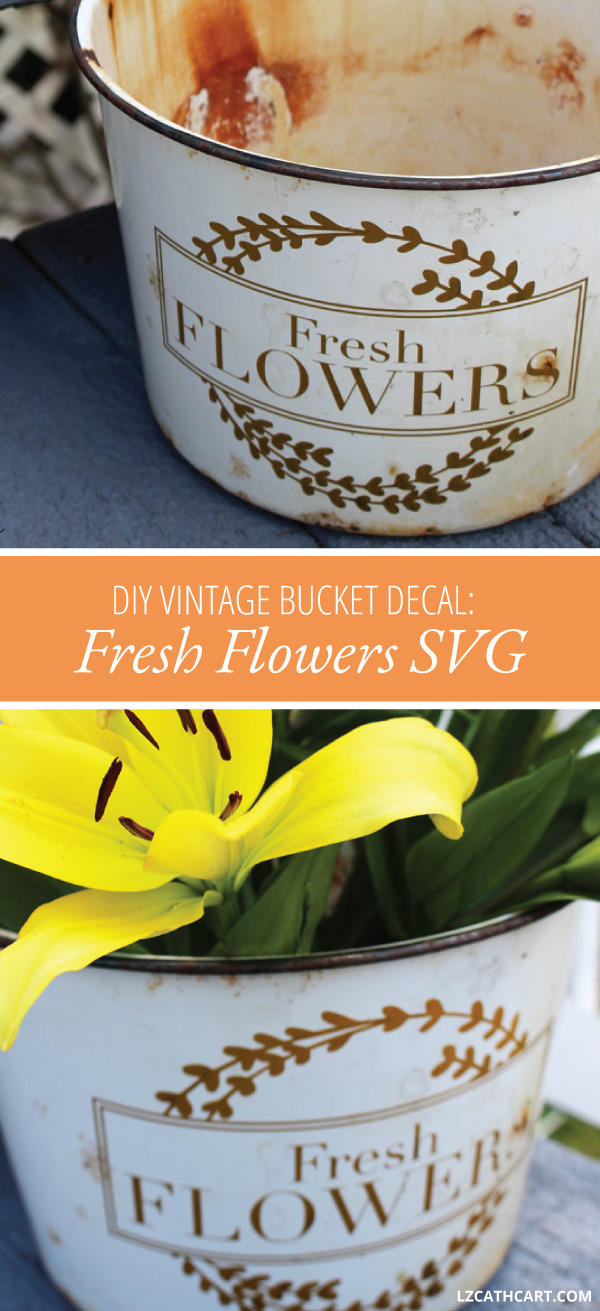
Fresh Flowers DIY Vinyl Decal Idea
Happy Friday! I have to admit… I’m really excited about this post! Yes, it is about a bucket, BUT hear me out. This Fresh Flowers design is so versatile and can be used on
Not to mention, this DIY Vinyl Decal for a Vintage Bucket is super easy to put together PLUS it includes a Free Fresh Flowers Cut File that was hand-drawn by yours truly. So you know it’s one of a kind design that will look amazing in your home 😉
Want this freebie? Sign up for access to my resource library below.
How to Make a DIY Flower Pot
This post is sponsored by Silhouette. However, I will still be providing my amazing readers with opinions that are 100% my own, and based on my personal experience using their AWESOME products.
Ready to get started?
Materials
- Bucket of Your Choice
- Transfer Tape
- Fresh Flowers SVG (join my newsletter for this free file!)
- Squeegee (a sturdy credit card will work great too)
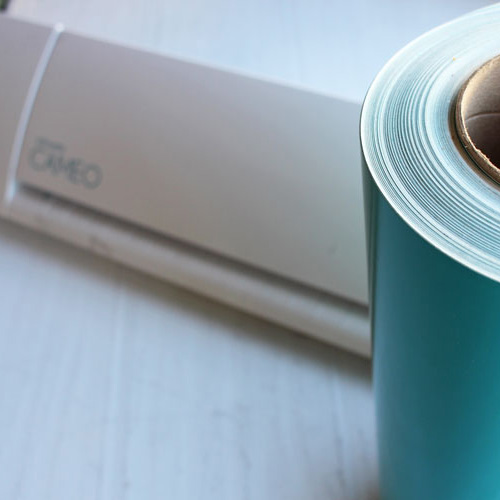
- Cutting Machine (Silhouette or Cricut — your choice!)
- Metallic Vinyl (in Gold) AND/OR Matte Vinyl (in White and Black)
Steps
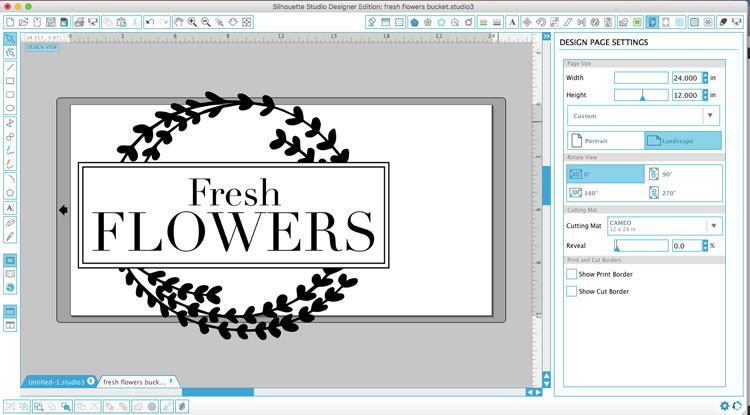
1. Open up Silhouette Studio.
2. On their Welcome screen or from the File dropdown at the top you will select “Open”.
3. Then, select the design file you would like to cut out.
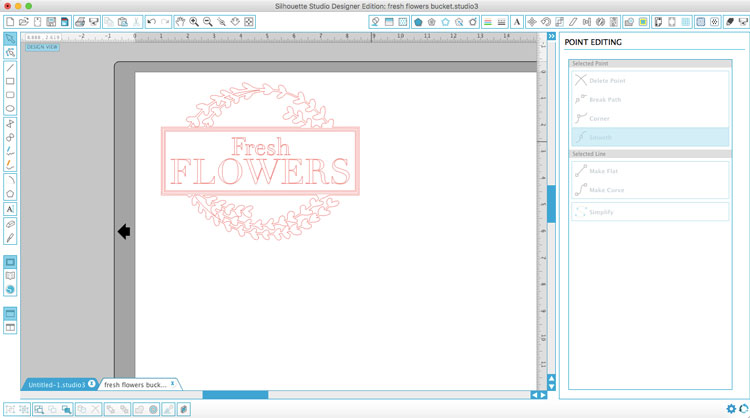
4. Once your file is placed on your blank page you will need to click on the “Open the Trace Window” button in the top right-hand corner. It looks like a blue and yellow square with an aqua butterfly within it.
5. For this next step you will be tracing your image so it will be recognized by Silhouette with its own cut lines. Click on the “Select Trace Area” button and create a large box around your design. Essentially you will be clicking and then dragging the box to create a square.
6. Next, under the Trace Method section on your right sidebar click the “Trace” button.
7. Then, click on your design again and drag your image to the right. You should see your original design, and then also a red outline (the cut version) of it as well. Delete the original.
Free Vintage Inspired DIY Vinyl Decal for a Flower Pot

TIP: While you can use a variety of files to import an image into Silhouette Studio I highly recommend purchasing their Designer Edition upgrade so you can import SVG files (they are typically included when you purchase custom hand-drawn vector files), and come out with cleaner edges and are more user-friendly for cutting purposes.
However, you can also import the following as well without the Designer Edition: STUDIO, DXF, PNG, JPEG, PDF, GIF, BMP, and TIFF.
8. Don’t forget to measure your bucket to make sure your design is the correct dimensions for your desired end result.
9. Click on the “Design Page Settings” icon/tab on the top right corner of your screen.
10. On this tab you’ll find the ability to change your page dimensions (width and height), rotating views, mat size, and also options to turn on print and cut borders.
DIY Vinyl Decal for Bucket PLUS Free Fresh Flower SVG Cut File
11. Then, send it to your CAMEO machine to be cut. In the upper left-hand side of the page, you’ll see an “A” on a small design that looks like your machine. Click this.
12. On the right-hand side of your page your “Send to Silhouette” icon/tab will open. Click on the button at the bottom that is labeled Advanced Settings.
13. In this tab you can change your Cut Mode, Cut Style, and Material. My recommended settings for each are: Cut Mode -Standard, Cut Style – Cut, Material Type – Vinyl
14. Click on the “Send to Silhouette” tab to actually cut out your design.
NOTE: I always use my mat when I’m cutting my designs out. Personal preference I suppose, but I swear by it. It always turns out better for me.

15. After you’ve cut out your design go ahead and add your transfer tape to the vinyl side and smooth it out with your squeegee.
16. Then, weed/pull out all the pieces that you will not be using.

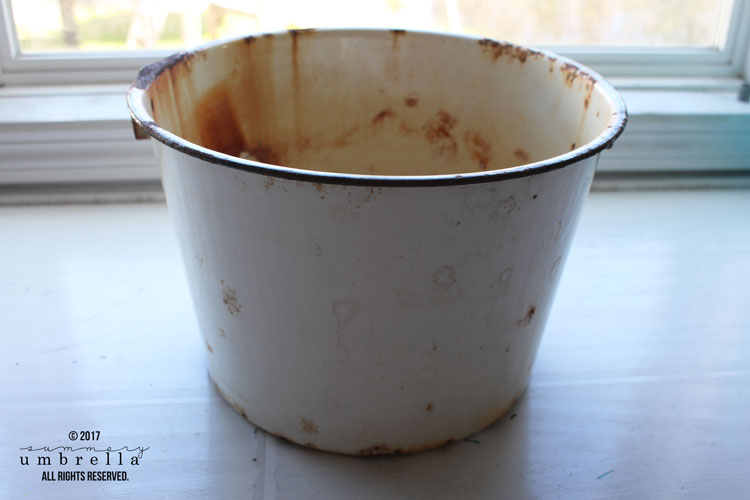
17. Then, clean off the surface of your bucket (or whatever item you will be using). Since I was using an old, rusty bucket I used some household cleaner and paper towels to get rid of any dirt and also to make sure my vinyl would adhere to it.
18. Last, add your DIY vinyl decal onto your bucket, smooth it on with your squeegee, and slowly remove your transfer tape.

That’s all! Super simple, right?
I wanted to give you an idea of what it would look like in a variety of colors so you’ll notice that I used gold, white, and black vinyl with the same design.
I have to say though… the gold vinyl is definitely my favorite!!


DIY Vinyl Decal for Bucket PLUS Free Fresh Flower SVG Cut File
What do you guys think? Gold, white, or black?
I’d love to see your own DIY projects with this design so make sure to send them my way!
And guess what? Next week, I’ll be sharing ANOTHER vinyl project (like the ones below!) with a free cut file. So, take care, and see you soon 🙂

More of What You Love: Check Out These Recommended Posts!
Let’s be Social
This post was updated in June 2022.


This turned out great! Love that you added it to a vintage bucket. So charming!
Thank you so much, Shauna!!
LZ, I love your beautiful designs, but I don’t have any of the machinery needed for your vinyl projects. I don’t even have a desktop computer or printer, much less the vinyl machine. Do you sell any of your designs in a ready-to-use format, like decals or stickers? Please keep sharing on Hometalk. That’s my favorite source. Best wishes
Hi Jewell–you are so sweet!! Unfortunately I do not sell these designs. I keep telling my husband I wish I had a way to clone myself. I could get so much more done 😉