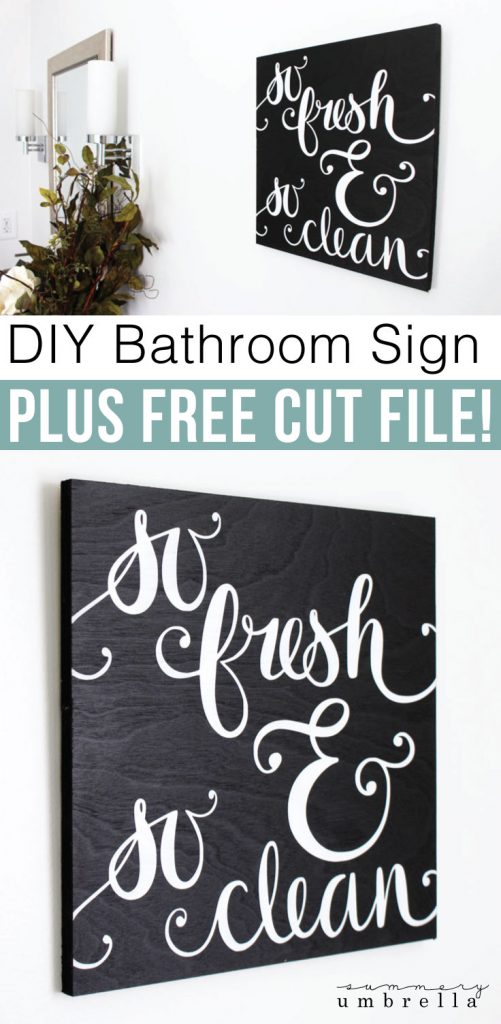
So Fresh and So Clean DIY Bathroom Sign
This DIY Bathroom Sign is so easy you’ll be wondering why you haven’t been making all of your signs this way. Plus, a FREE SVG cut file included!
Easy DIY Bathroom Decor Ideas
Mike and I recently finished up remodeling our already remodeled bathroom. Just when you think you’re done with a project you realize that it’s just not what you’re looking for. It’s a bummer, right?
Nevertheless, in our defense it was the first room that we “fixed” when we moved into our current home.
Why?
Because it was bright pink. Clearly, I do not need to say anymore!
Want this freebie? Sign up for access to my resource library below.
Obviously, it had to go, and let’s be honest, our first attempt was a quick job. However, you know what’s even quicker to make?
This DIY Bathroom Sign that I’m going to show you how to create all by yourself!
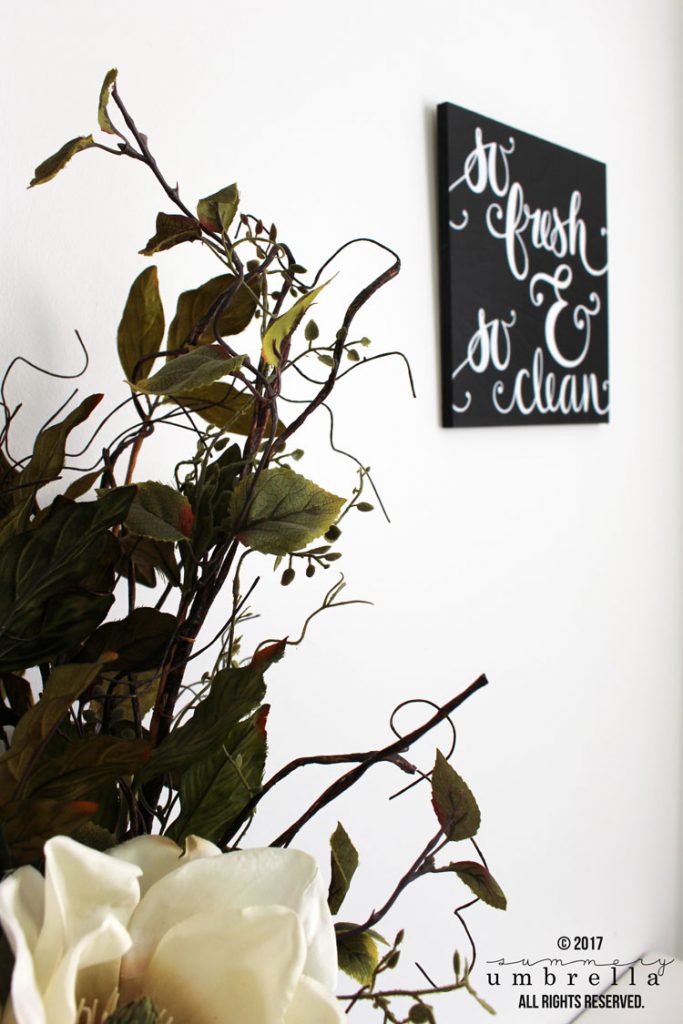
So Fresh and So Clean DIY Bathroom Sign
This sign is so ridiculously easy to put together you’re going to wonder why you haven’t been making signs for the past few years, months or whatever.
It’s really that simple!
As you can see below, there’s a little bit of space above my toilet in my bathroom.

{Check out my Before and After Guest Bathroom Remodel}
Nevertheless, I have a tendency to overdecorate. Like, really, really.
It’s a bad habit, but I figure that since I know what the problem is then it should make the solution easier to figure out, right?
Well, at least that’s the philosophy that I’m going with for the moment! I decided it would be best to use the KISS method, and keep it simple with my obsession with DIY bathroom decor.
Let’s get started!
Supplies and Tools
- 1 – 1/2″ Cabinet Grade Plywood (8”x10”)
- Sponge
- Silhouette CAMEO and Mat
- Spray Paint (or Airbrush and Lacquer Paint)
- Vinyl
- foam roller cover
- Transfer Tape
- Squeegee (or a Credit Card)
Instructions
1. Download SVG Cut File.
First, download the So Fresh & So Clean SVG Cut File by signing up for the resource library above (aka. freebies galore!), and put it into your Silhouette Studio to be cut out on your Silhouette CAMEO. If you need help with this particular step head on over to this tutorial that will assist you.
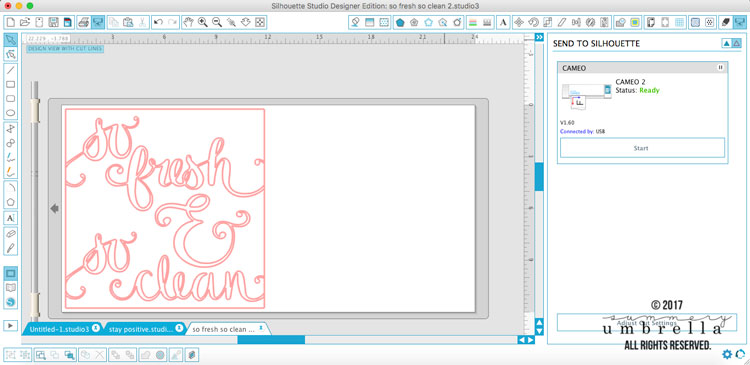
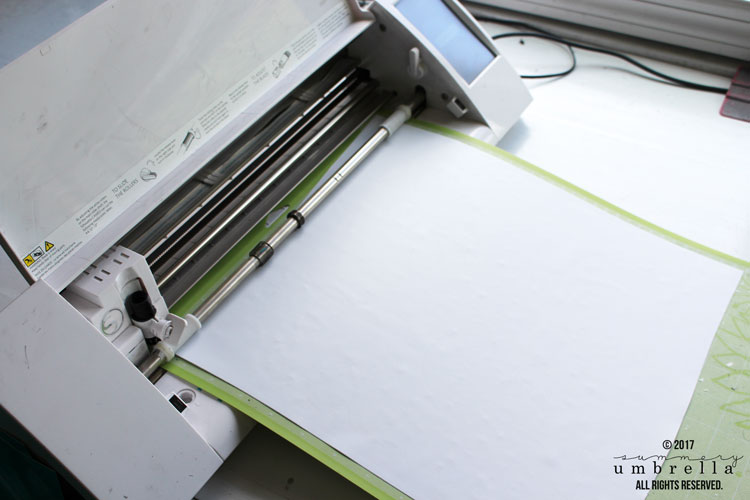
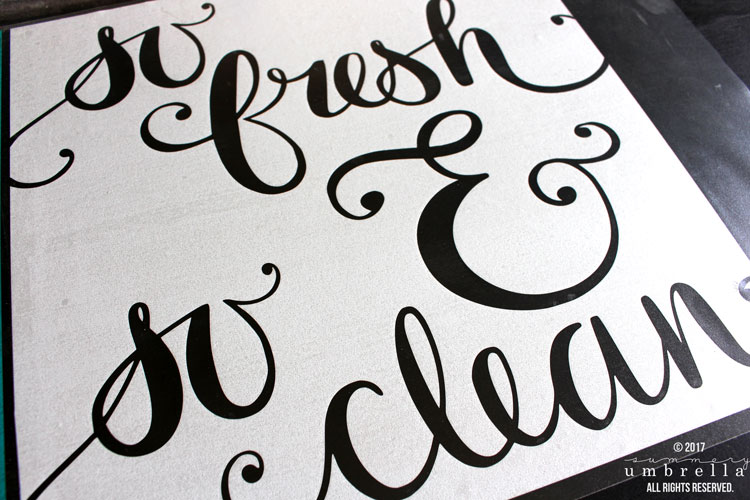
2. Cut out your stencil.
Next, cut your file out using your Silhouette CAMEO, vinyl and mat.
3. Paint your board and let it dry.
I like to have a variety of sizes of painted black and white 1/2″ cabinet grade plywood available at all times.
Why? Well, for one, I do create a crapload of signs for my shop.
Second, I truly believe that when you paint a board you should let it “cure” for a week prior to putting any vinyl on it. This will tremendously help you when you go to pull off your vinyl from your board.
However, as you’ll see below sometimes peeled paint does happen. It’s just the nature of the beast when you create wood signs, but don’t worry. I have an awesome video that’ll show you how to fix it!
Just in case you haven’t painted your 1/2″ cabinet grade plywood make sure to use a foam roller cover and multiple layers to achieve the color you desire.
TIP: Let each layer dry before putting on the next.
4. Apply your transfer tape.
Be very careful with this step.
5. Remove the backing on your vinyl.
At this time, go ahead and pull the “innards” out from your vinyl, add your stencil to your board, and spray paint or airbrush this design to your board.
If you’ve been following me for any length of time you know that my number one method is to airbrush. LOVE IT.
In fact, I wrote an entire book about my love for signs!
Want to learn more about making your own home decor signs? Check out my new eBook, The Ultimate Guide to Making Your Own Signs, which includes 170 pages, 27 techniques, 35 projects, and 46 video tutorials (which is over 2+ hours of instructions)!
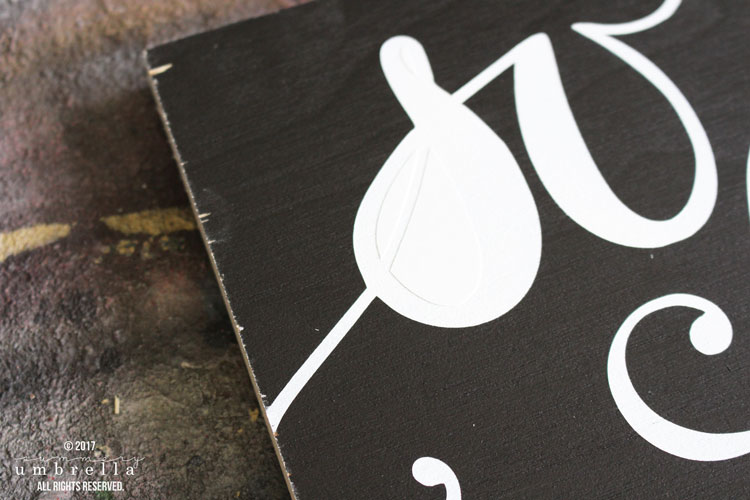
6. Remove your vinyl.
After your paint has dried, and you’re ready to pull off your vinyl, you’ll want to remove it very slowly. Even so, nobody’s perfect though and sometimes it will pull away.
Let me show you how I fix this common mistake with my video tutorial below:
7. Fix any mistakes.
Don’t worry if you mess up a little. This project is very forgiving.
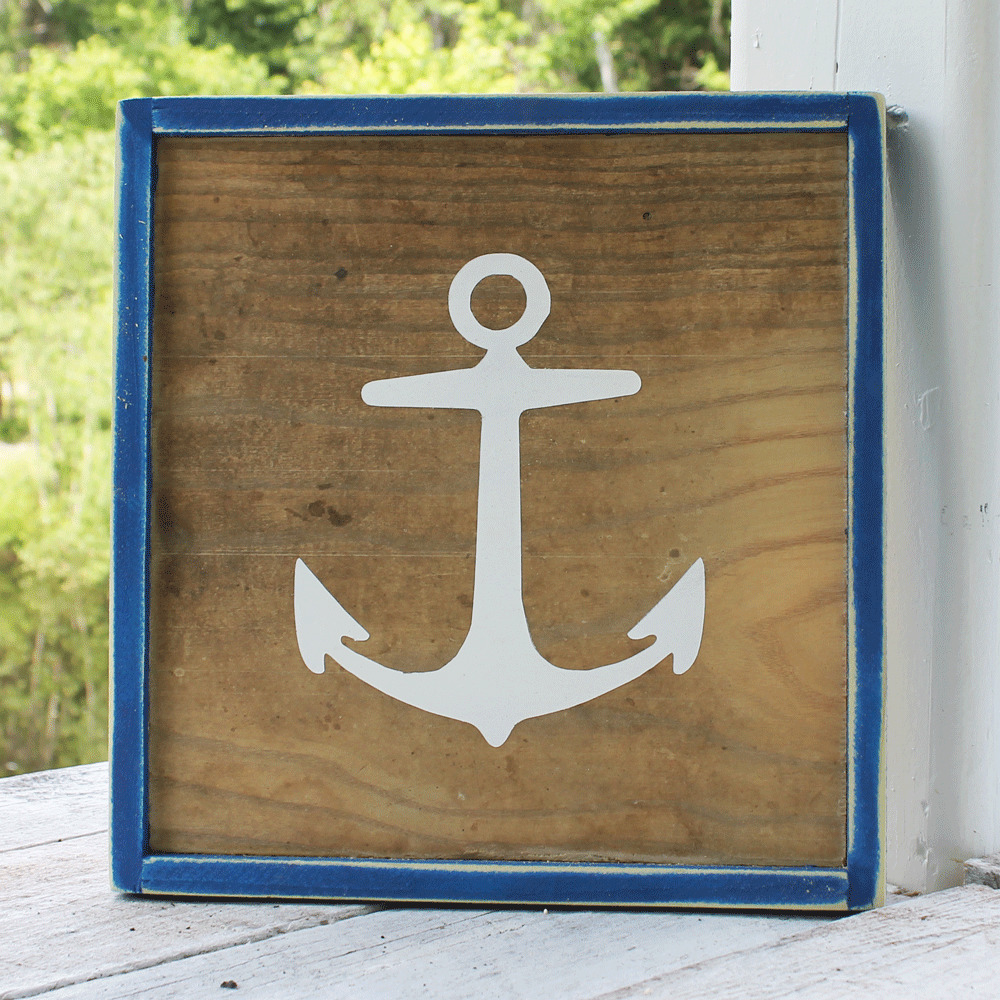
8. Add a frame or paint the sides of your sign.
Then, fix any mistakes you’ve made.
Finally, you can add a frame, distress the edges, or do like I am and paint the edges. Whatever floats your boat!
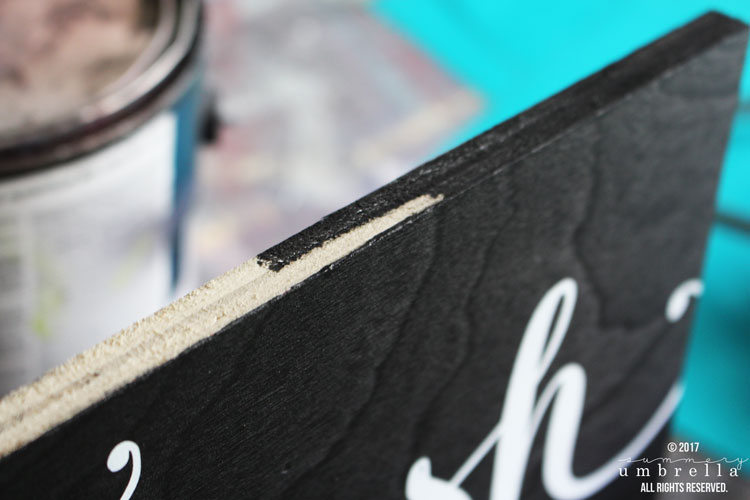
Ultimately it’s up to you and the look you’re going for. I like to change it up every once in awhile just to keep it interesting as well as to give myself the ability to try new techniques.
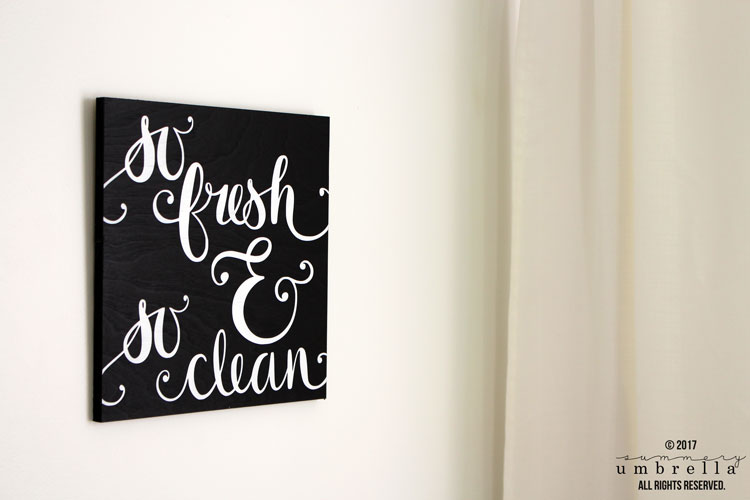
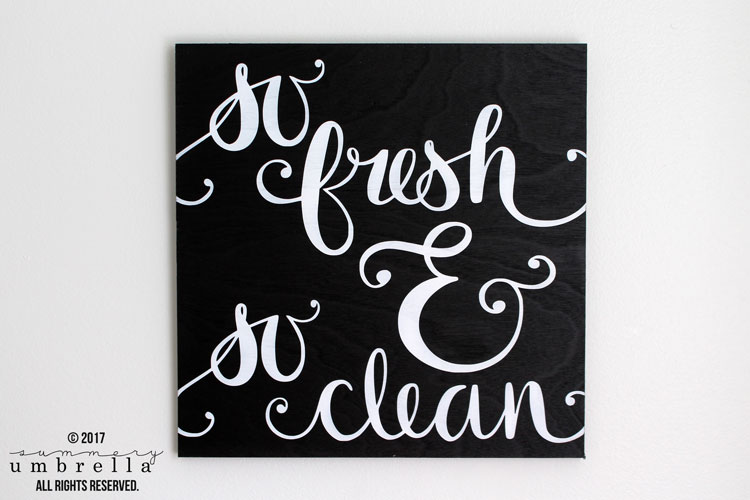
Didn’t it turn out absolutely stunning?!
I’m just over the moon with this DIY bathroom sign, and couldn’t be happier with how well it turned out. Can’t you just see this in your own bathroom or laundry?
Maybe even on a tea towel with this heat transfer vinyl technique.
Looking for a slightly more industrial-looking DIY bathroom sign? Funnily enough, I recently came across this other cute sign that’s made with a wooden plaque that you may want to check out.
So Fresh and So Clean DIY Bathroom Sign
What do you think of my new DIY bathroom decor, and what would you use this design for?
I hope everyone has a wonderful weekend, and don’t forget to get inspired by my DIY projects page chocked full of DIY and decorating goodness! -LZ
Psstt… don’t forget to download this free SVG file by signing up for my resource library above!
Looking for more DIY sign inspiration?
- Create Your Own Beach Towels and Suits Sign
- How to Make an Easy DIY Glass Sign
- How to Clean and Prepare Wood for Signs
Let’s be Social
This post was originally created in April 2017, and then updated in December 2020.