Learn How to Create a Rustic DIY Bathing Suit Rack for Your Pool!
Need a way to dry your bathing suits and beach towels? Make this DIY beach towel and bathing suit rack! It’s easy and you can customize it.
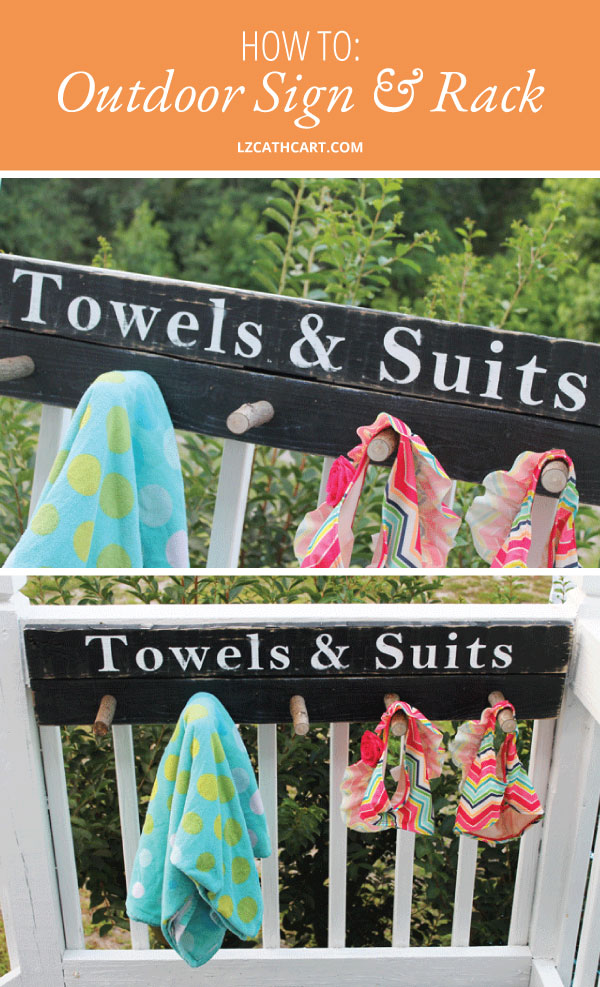
How to Make Your Own Towel Sign for Pool
Hello again! I am most delighted to see you! 😉
Today I have an absolutely useful sign-turned-hanger that you’ll probably be using all season long.
I’m not sure about you, but in my household, one of us always has wet clothes, bathing suits, towels, and other random items that usually (let’s be honest!) end up on the floor of the porch.
I’ve tried encouraging my fellow roommates (aka. the daughter and the husband) that there are better locations for these items.
However, here I am picking them up yet again!
Want this freebie? Sign up for access to my resource library below.
Does anybody else have this problem? Well, let me help you out, and let’s get started!
Beach Towel and Bathing Suit Rack Wood Sign
This tutorial will walk you through every step so you can make your own wood sign and bathing suit storage solution.
Materials
- Pallet Board Sign (40″L) and 2 – Wood Pieces (2″W x 8-10″L for back support)
- Vinyl (this is my favorite brand!!)
- Transfer Tape
- Squeegee (a sturdy credit card will work great too)
- Cutting Machine (Silhouette or Cricut — your choice!)
- 1-3/16″ Brad Nails (or finish nails)
- Brad Nail Gun (or hammer)
- Sander or sandpaper
- Black Paint
- White Spray Paint
- Matte Top Coat Spray Paint
- Branches (approx. 1″ thick & 5-6″ long)
- Screws
- Screwdriver
How to Make Your Own Bathing Suit Rack Sign for Your Pool
Steps
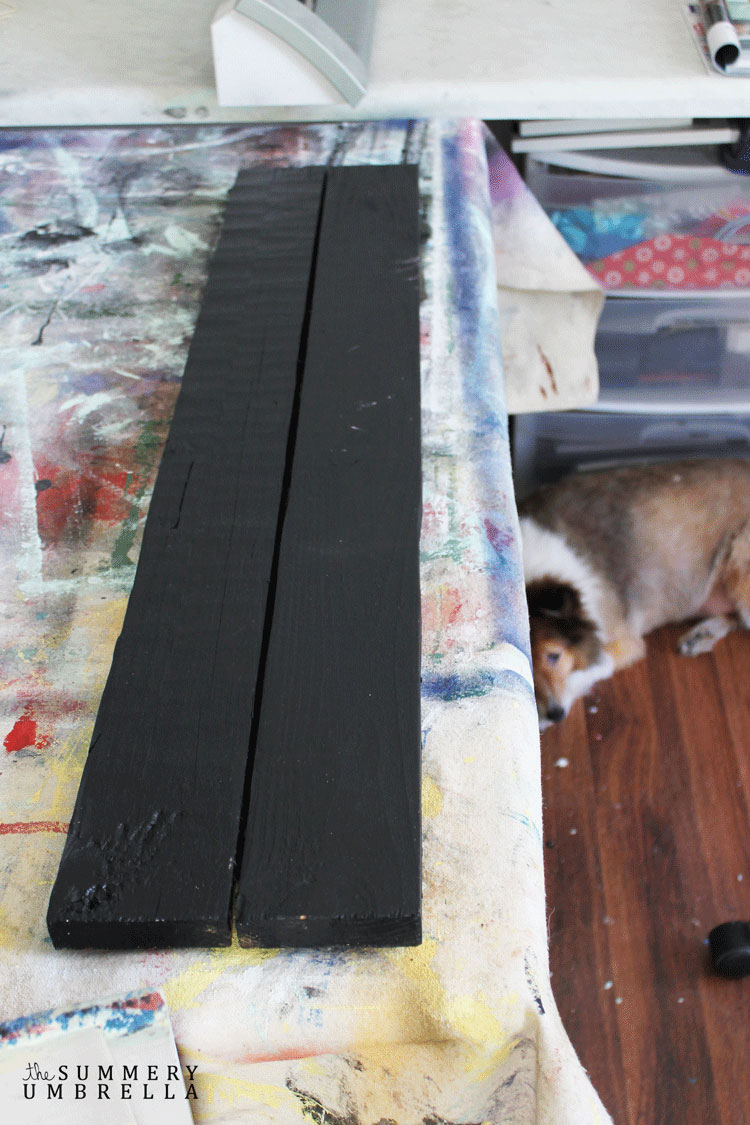
1. First, you’ll need to clean and sand off your pallet boards. I like to brush off all of the dirt from my surface after sanding them. This will help ensure that you have not missed any random debris.
2. Line up your two boards on a flat surface so they sit evenly next to each other.
3. Next, take your two back support pieces and place them evenly away from each other on the backside. Nail into place.
4. Paint your pallet board. I just used leftover black acrylic paint, but feel free to use whatever you’d like!
5. Download and cut out the stencil by signing up for my resource library above (aka. freebies galore!!).
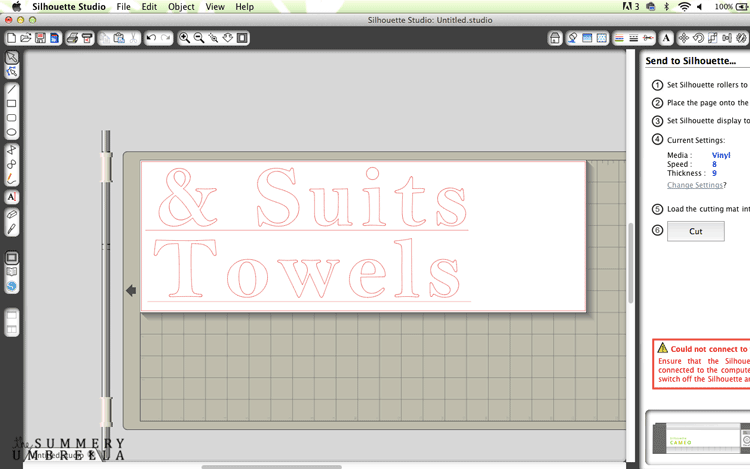

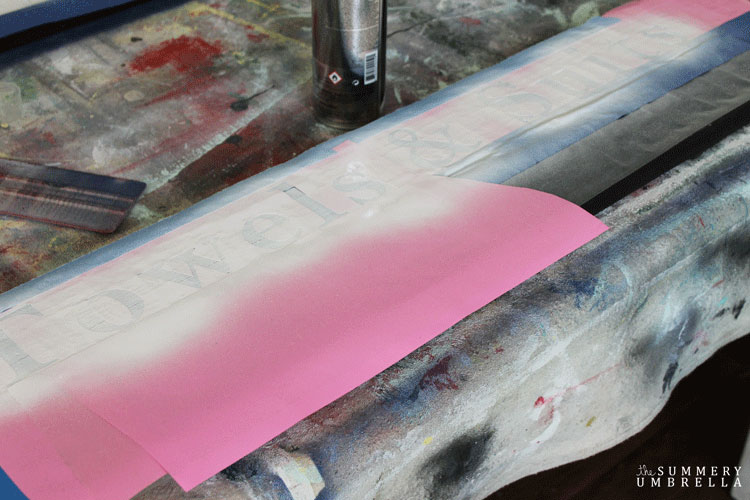
6. After you’ve created your bathing suit rack sign go ahead and tape it down.
Since I used my CAMEO for this project I am using vinyl and transfer paper to allow it to stick to my sign while I paint it up.
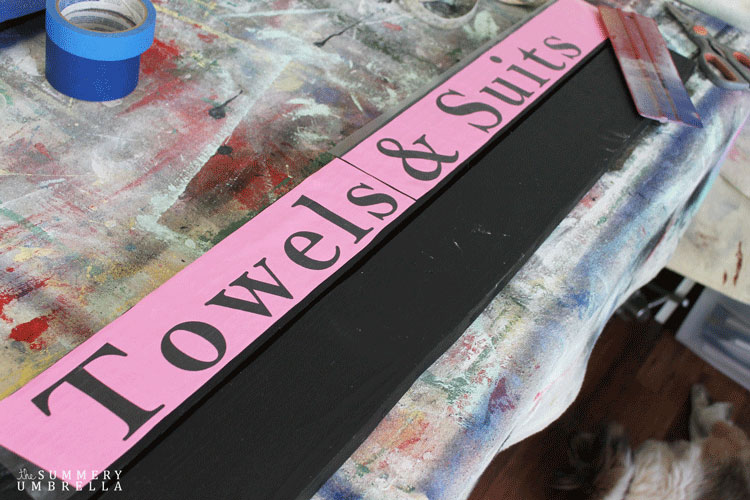
7. Spray paint your sign.
What’s my favorite spray paint to use for signs? Liquitex Professional Spray Paint.
Why? Because it’s created for exterior use (think graffiti artists), and it has low fumes so I can use it indoors. I cannot speak highly enough about this brand!
How to Store Bathing Suits and Beach Towels Outside
Remember: Use multiple, light coats to ensure the best coverage and minimal leakage!
8. Remove all of your vinyl.
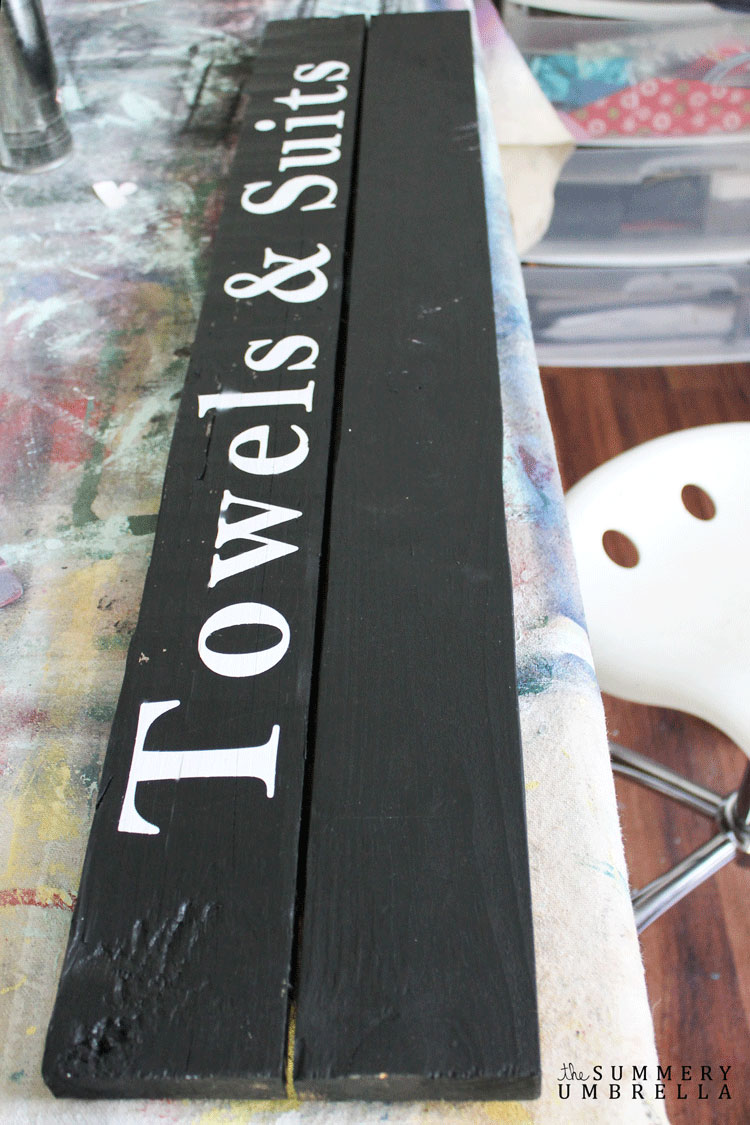
9. Distress the wood to give it an aged look.
I absolutely love all my signs with a distressed finish! You can skip this step if you’re not a fan though.
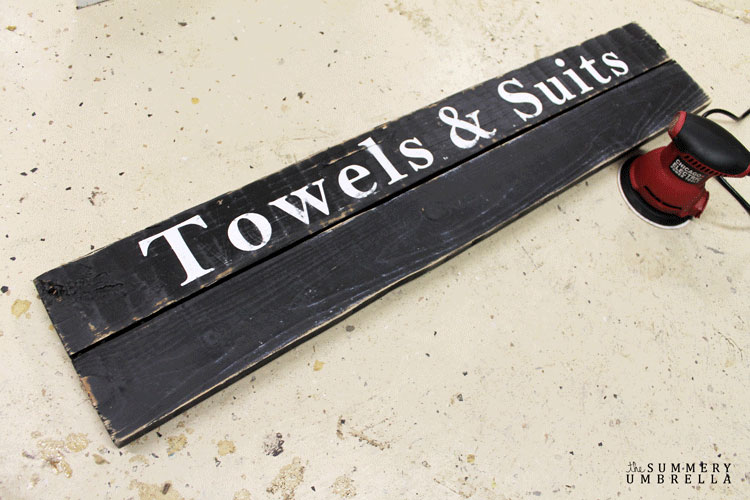
10. Now, use your matte topcoat spray paint over your sign to protect it from the elements (especially if it’ll be directly in the sun!).
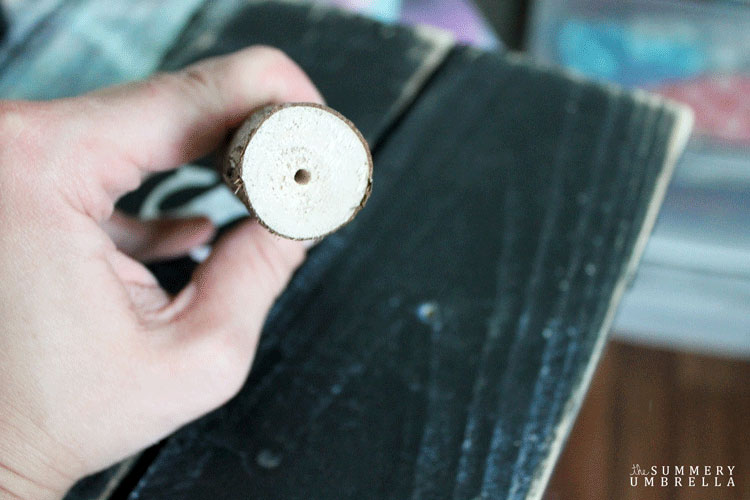
11. Then, cut as many branch “hangers” as you would like. Five was just enough for me, but whatever you’d prefer is also just fine!
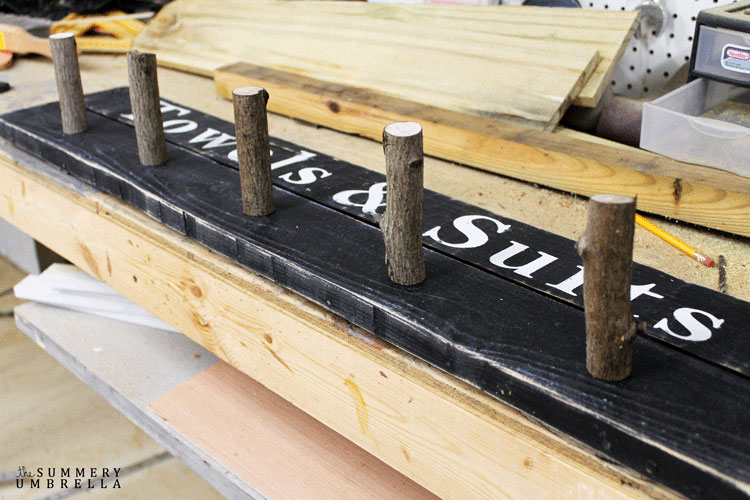
12. Next, drill holes in all of your branch pieces as well as where they will be located on your sign. It’ll just make screwing them in a hundred times easier.
13. Finally, add hangers to the back and hang it up!!
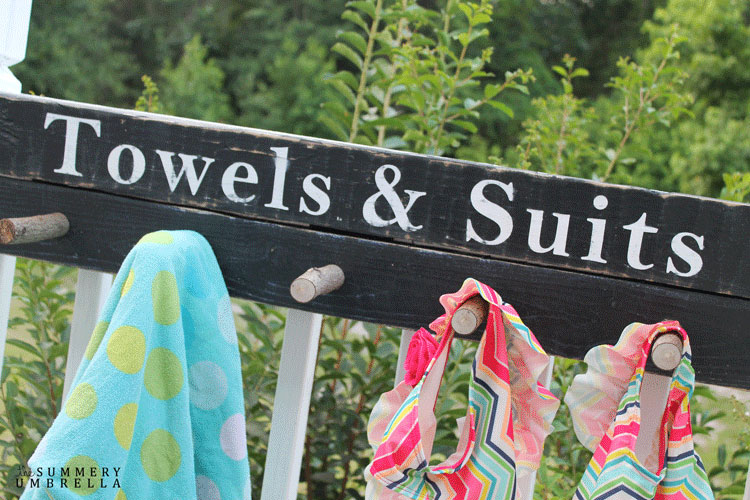
Isn’t this the cutest little thing? You could even use it in your bathroom (or try another one of my bathroom signs) if you’d prefer. I just love how simple and versatile it is! 🙂
If you loved this project then you’ll definitely want to browse some of my other Wood Signs that are full of step-by-step tutorials as well as freebies galore!
Can’t wait to see you again, and Happy Crafting!

Psstt… don’t forget to download this free bathing suit rack SVG file by signing up for my resource library above!
Let’s be Social
Uncover Artistic Treasures: Shop Our Exclusive Prints
-
 Tropical Bouquet Art PrintPrice range: $18.00 through $22.00
 -
 Sunglasses Art PrintPrice range: $18.00 through $22.00
 -
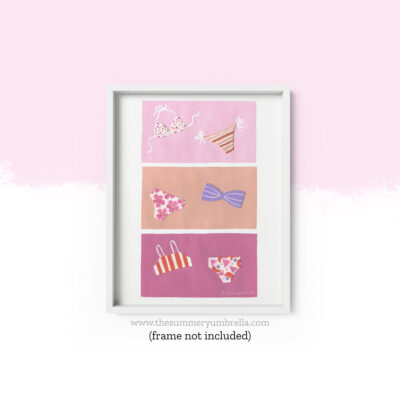
 Feminine Swimsuits Art PrintPrice range: $18.00 through $22.00


This is CUTE! I have been looking for a wet suit solution for my porch~
Thank you so much Jenna! This little sign/rack is definitely a lifesaver (and argument saver!) 🙂
What a great solution for all those wet suits and towels. I think we could use something like this as well. Thank you for sharing at Share It One More Time. Cathy
Thank you for having me, Cathy! Such a great party!
It is definitely a lifesaver Judith! Less cleanup for me at least 🙂
Love, Love, Love! Those hangers (branches!) are awesome!
Thank you for sharing this week at Brag About It link party on VMG206 (Mondays at Midnight). I plan to feature you next week!
~ Megin of VMG206
Thanks, Megin! I just can’t help myself when it comes to using branches in everything and anything that I create. Can’t wait for the feature! Yay 🙂
I need to make me one of these! My kiddios are always just throwing their wet suites where ever! This is perfect! Thank you so much the inspiration!
Dropping in from Brag about It, so glad I click on your link!
Gina from Always Savory
Thanks Gina! It will most definitely make your life much easier 🙂
This is absolutely adorable! Gives me a great idea for my beach place.
Thanks for sharing.
Lisa
That’s awesome! I love spreading inspiration 🙂
Too too cute! I love everything about it – the fact it’s DIY and that all the materials are low cost, that you have it hanging up outside, that it’s usefuly, and of course, that it looks great!
Just ran across your blog – so fun! I’m co-hosting the #HomeMattersParty this month and would love to have you visit. The next link party opens tomorrow! http://www.alaynascreations.co
You’re so sweet Alayna, and I will definitely stop on by 🙂
What a great idea! I love using my silhouette for projects. Thank you so much for sharing on our Living with Style Linky Party. Please come back next Wednesday!
Lisa @ Harmonyandhappiness.com
Thank you so much Lisa, and I most definitely will 🙂
Lz, you’ve got to quit making such cute stuff- my “I’m gonna make this” list is getting longer and longer! 🙂 I love this so much it’s one of my features at Treasure Box Tuesday this week! We get started tomorrow evening (Monday, 7/20)! 🙂 Thanks for linking up with us!
LOL. You’re killing me Joy 🙂 Thank you so very much for the feature and the wonderful party. Always a pleasure!
This is so cute. We’ve just been draping stuff over the rail but this is much prettier. Thanks for posting. Hello from Treasure Box Tuesday.
Hi Melissa and thank you so much 🙂 P.S. I’m loving your More for Less Meal Plan for July!!
Super cute. How did you attach it to the railing?
Hi Nicole, and thank you! I just used D-ring hangers attached to the back of the sign, and then onto screws on the deck railing. 🙂
Where did you find the “branches?”
Hi Kelly! I just used branches I found out in my yard. Nothing special 🙂