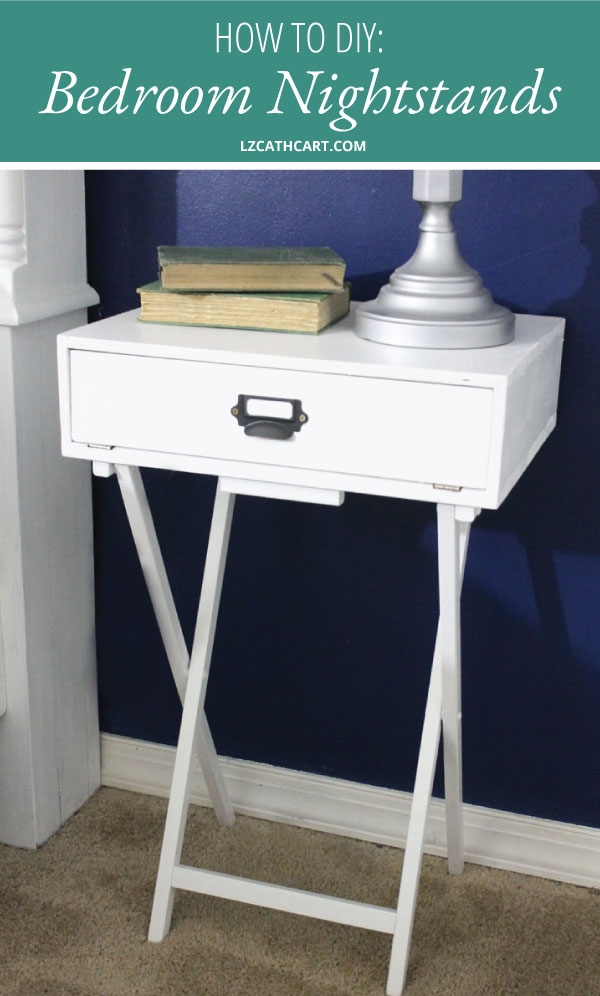
• Disclosure & Privacy Policy
  • Shop Policies
  • Login

LZ Cathcart

Delightful designs and illustrations.

  • About
  • Blog
    • Crafts
    • Decor
    • Holidays
    • Living
    • SVG Files
  • Learn
  • Shop
    • Apparel
    • Art Prints
    • Freebies
    • Mugs
    • Phone Cases
    • Pillows
    • Stickers
    • Tote Bags
    • SVG Vector Art
  • Portfolio
  • Contact
  • 0 items

Living

The Easiest Pottery Barn Inspired DIY Nightstand

This post may include affiliate links. If you purchase something through the link, I may receive a small commission at no extra charge to you. Please read my disclosure policy for more details.

Tweet
Pin529
529 Shares

Create this gorgeous Pottery Barn Inspired DIY Nightstand in a day. That’s right! Super affordable and super easy. Learn how NOW!

Would you love to have a beautiful, but affordable nightstand for your bedroom? Look no further! This DIY project is just for YOU! #diynightstand #diynighstanddecor #diynighstandmakeover #thesummeryumbrella #lzcathcart

It all started one blissful morning at my local Walmart after I dropped Miss Ava off for daycare.

I realized that I had no clue what I wanted to do about nightstands for Mike and I’s master bedroom makeover.

We honestly don’t need them, but I wanted to fill the spaces next to each side of the bed since it looked very plain jane. Plus, the last time I tried to fill the space with window shutters and these lamp shade pendant lights we never even used them. Major bummer, but you live and you learn.

folding tv trays

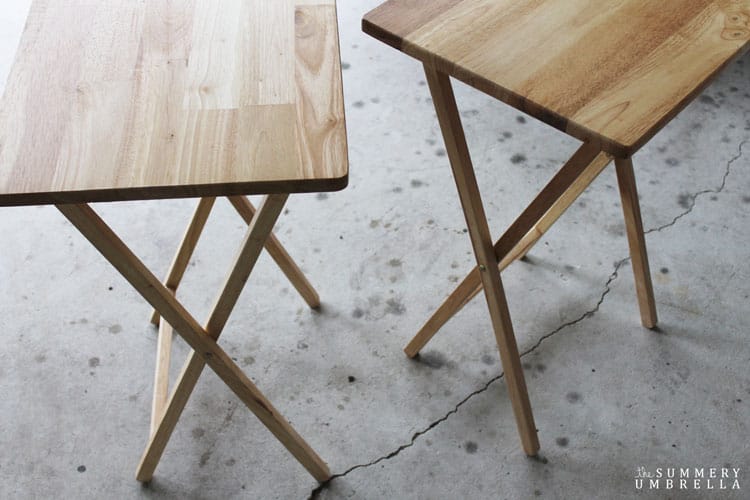
So, what do you know… as I’m perusing the aisles looking for inspiration I see these two folding tv trays for a whopping $10 apiece.

That my friend, is most definitely within my budget even if I had no clue at the time how I would make them look “pretty”.

Anybody else do this?

Learn how to create GORGEOUS signs with
my FREE guide!

    We respect your privacy. Unsubscribe at anytime.

    DIY Nightstand Plans

    As in, you buy stuff you think you can use, and then stare at them for a few hours contemplating the most useful ways to use?

    This is also the point where I usually start rummaging through my humongous stack of home decor magazines (hence how I found a similar Pottery Barn creation!) and mixing/mashing ideas together until I finally find something I like.

    There are probably one hundred and one different ways you could go about creating this gem of a DIY nightstand, but I’m a creature of habit and decided to keep it simple.

    Materials

    • TV Trays (even though I got mine at Walmart these are pretty comparable!)
    • Table Saw
    • 1/2″ plywood
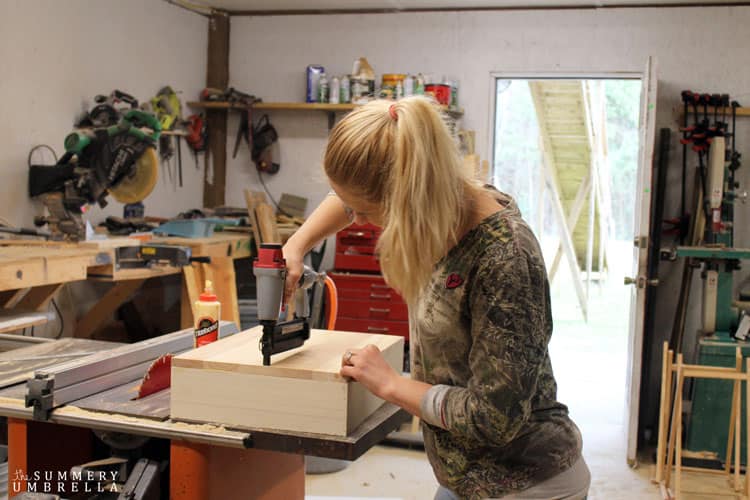
    • 1-3/16″ Brad Nails (or finish nails)
    • Brad Nail Gun (or hammer)
    • Screwdriver
    • Hinges
    • Wood Carving Kit (optional, but helpful!)
    • Satin Exterior Paint (mine is in white)
    • Paintbrush and/or Foam Paint Roller
    • Antique Copper Cup Pull Label Holder

    Steps

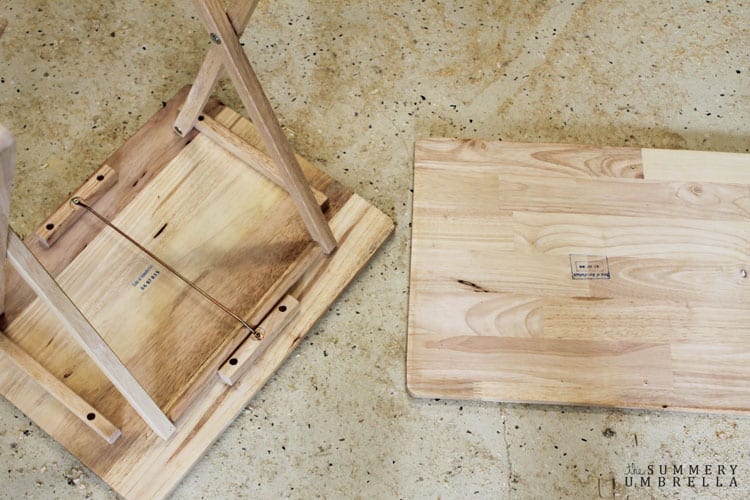
    1. First of all, in order to start these super simple DIY nightstand plans I removed the “legs” from both of my stands

    diy nightstand with drawer

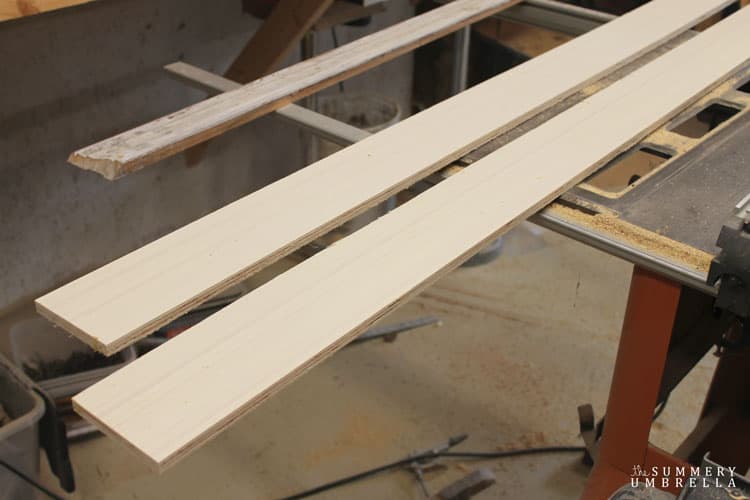
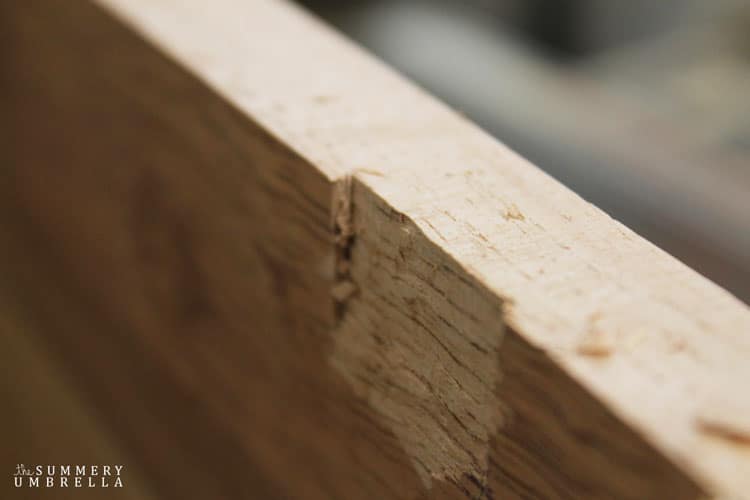
    2. Then, remove the rounded corners with your table saw. This will help keep everything lined up just the way I like it!

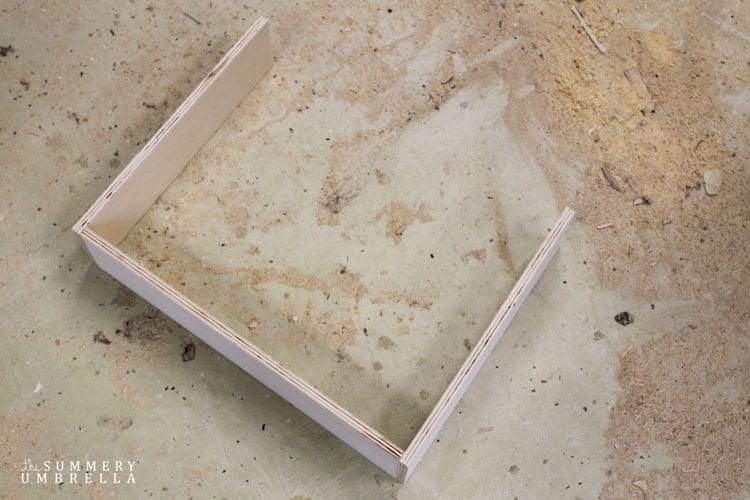
    NOTE: Mike and I tend to be hoarders of wood so I just used some scrap pieces of 1/2″ plywood we had on hand to create the top “box”.

    how to build a nightstand

    3. Also, to keep everything lined up exactly how the pieces arrived I decided to use the “tray” portion as my bottom piece. I could still see the holes for my legs, and like I said… let’s just keep this project easy. 😉

    diy nightstand pottery barn knockoff
    nightstand diy plans

    The Easiest Pottery Barn Inspired DIY Nightstand

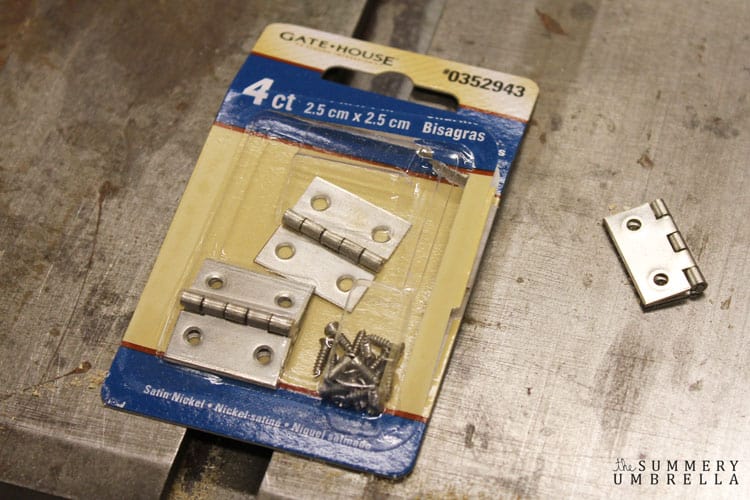
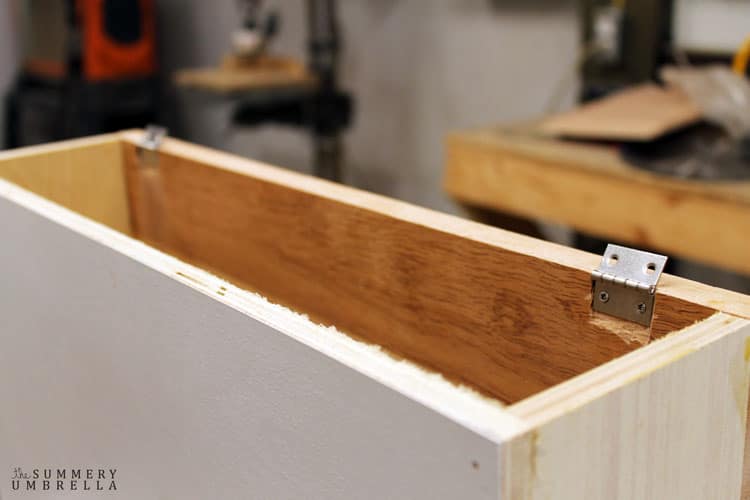
    4. Technically for a project like this you’ll want to use something like a non-mortise hinge (basically a hinge that is hidden), but unfortunately we had no such luck finding any so we decided to use these hinges below instead.

    bedside table diy

    NOTE: The only disadvantage to using a hinge like this is that there can be a small gap in between your door and the connecting bottom.

    how to make a bedside table

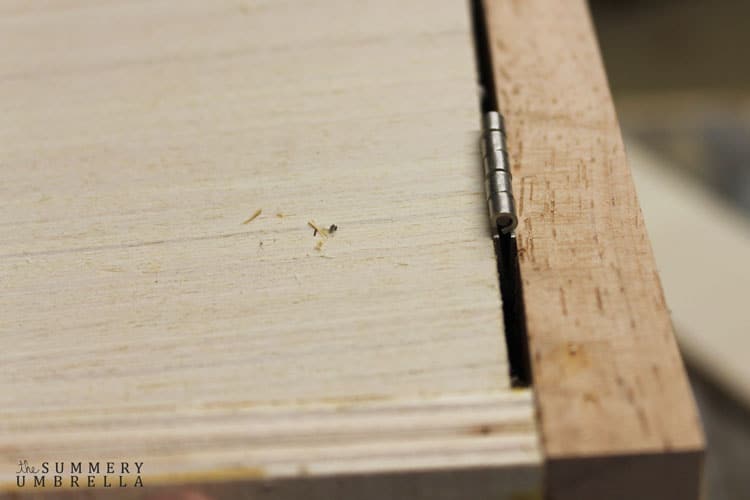
    5. To fix this problem you can carve out a little bit of the wood with a wood carving chisel set as seen below.

    bedside table plans

    NOTE: Since I was kind of winging this project and making it up as I went (huge shocker–I know, again) I would HIGHLY suggest putting your hinges onto your bottom board PRIOR to attaching your box. It just makes life much easier.

    diy nightstand white

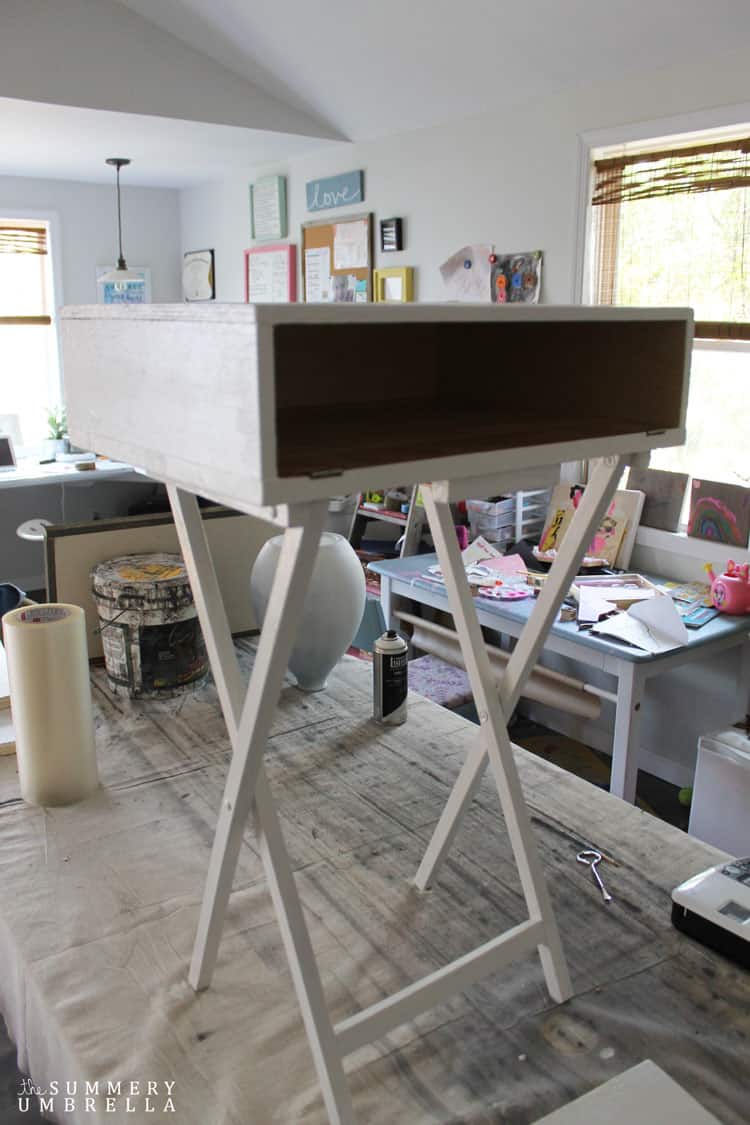
    6. Reattach your tv stand tray legs.

    7. And now it’s time to paint! I have a huge crush on satin exterior paint in just the standard white. I can’t explain it, but it’s just my favorite and go-to.

    Please excuse the mess. Ava and I were making memories.

    nightstand makeover

    The Part of Making a DIY Nightstand

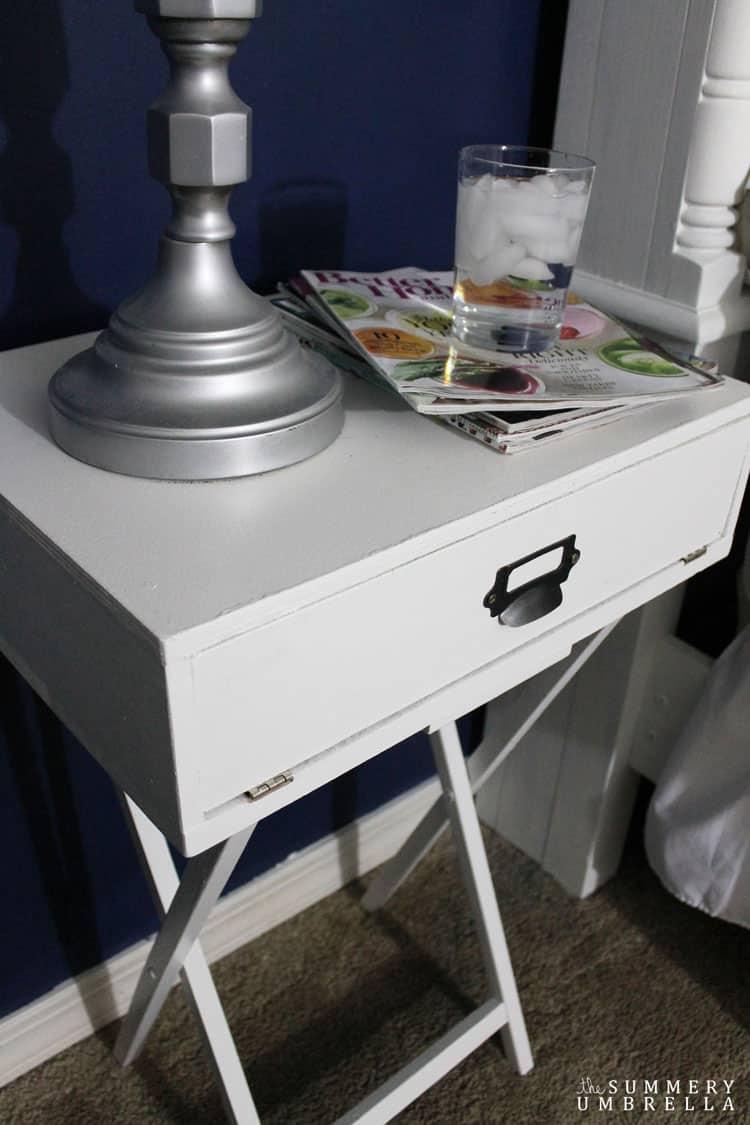
    One of the best things about creating your own furniture is making space for hiding the randomness that you might need.

    What am I going to fill in mine?

    diy bedroom furniture

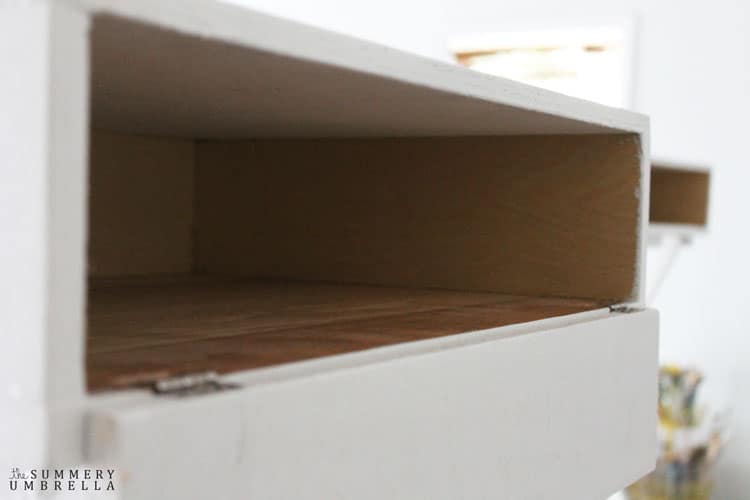
    Well, it’ll start off with magazines. However, I have a feeling it’ll end up with Barbies and leftover graham crackers at some point. Sigh. It’s the thought that counts, right?

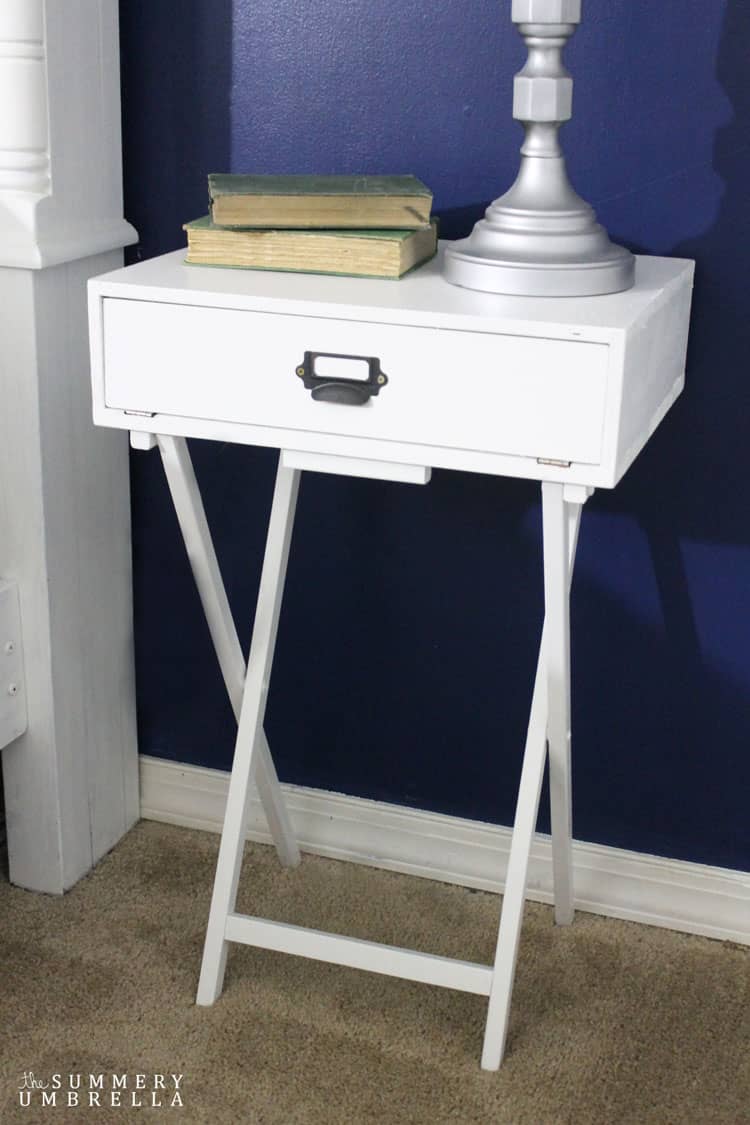
    8. Finally, I added this gorgeous antique copper cup pull label holder to the fronts.

    Create this gorgeous Pottery Barn Knockoff DIY Nightstand in a day. That's right! Super affordable and super easy. MUST PIN!

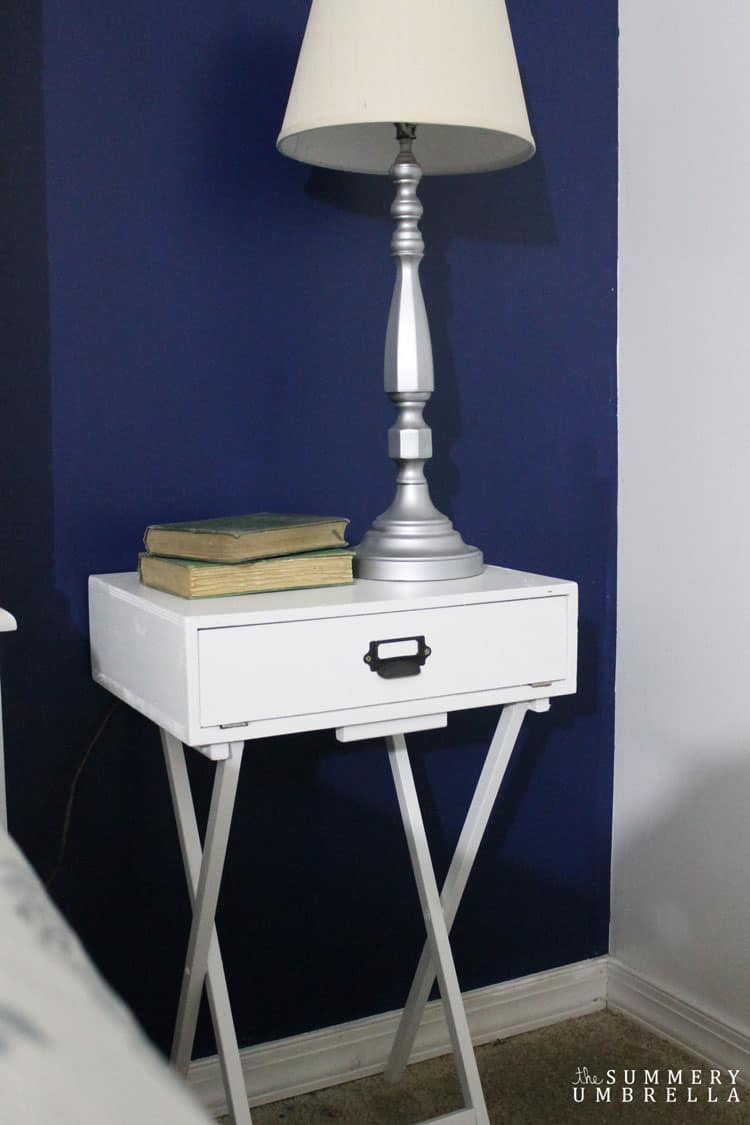
    Not a fan of the white? No problem! All you need is a little bit of paint in the color of your choice.

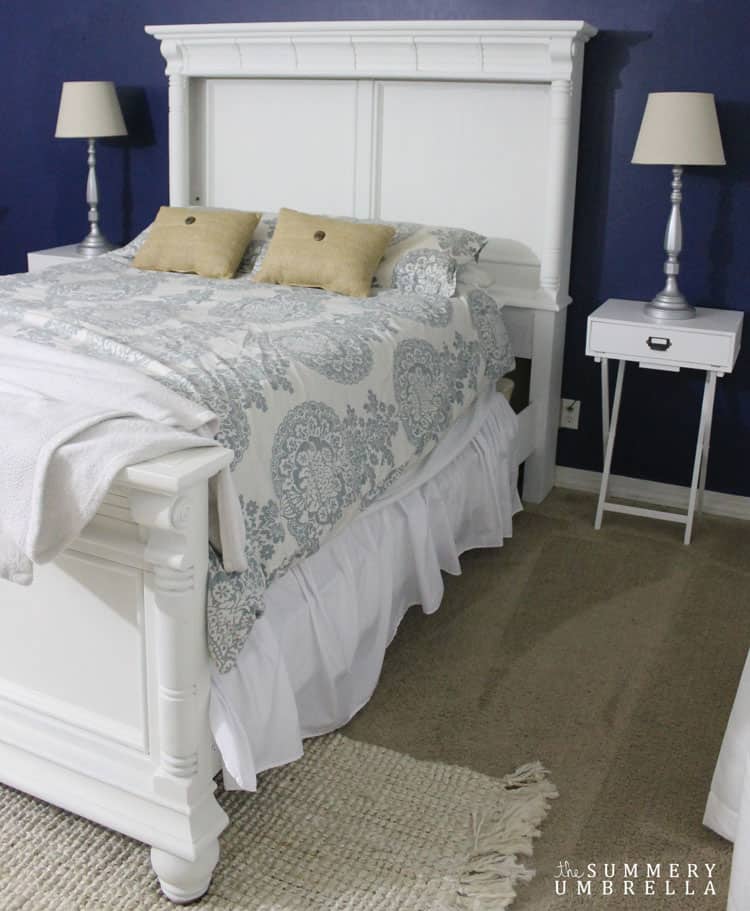
    For instance, I choose white to make these DIY nightstands pop out from my navy walls, but I’m very certain they’d look amazing in just about any color. Only your imagination is the limit!

    Create this gorgeous Pottery Barn Knockoff DIY Nightstand in a day. That's right! Super affordable and super easy. MUST PIN!
    Create this gorgeous Pottery Barn Knockoff DIY Nightstand in a day. That's right! Super affordable and super easy. MUST PIN!

    I can’t tell you how amazing they look in person, and they seriously were sooooo easy to make! Must try? Uhhh.. hell yea!

    Create this gorgeous Pottery Barn Knockoff DIY Nightstand in a day. That's right! Super affordable and super easy. MUST PIN!

    The Easiest Pottery Barn Inspired DIY Nightstand of Your Dreams

    Here’s what I’ve gotten done so far:

    1. come up with a plan
    2. paint bed and dresser
    3. new sheets and bedskirt (keep duvet)
    4. design/create bedside tables
    5. update the ceiling lighting and bedside lamps
    6. add a rug
    7. find new curtains
    8. add a little wall bling

    If you loved these ideas then you’ll definitely want to browse some of my other DIY projects. They’re full of step-by-step tutorials as well as freebies galore! Can’t wait to see you again! – LZ

    Let’s be Social

    • Instagram @thesummeryumbrella
    • Pinterest summeryumbrella 
    • DIY Wood Tilt Garbage Can
    • How to Update Your Fireplace Mantle
    • how to paint kitchen cabinets without sanding
      How to Paint Your Kitchen Cabinets
    • How to Paint Your Metal Front Door
    • how to paint metal bar stools
      How to Paint and Distress Metal Bar Stools
    • How to Create a Pretty and Functional Chicken Coop
    • Easy Hand Lettered DIY Wood Sign
    • diy mason jar pendant light
      DIY Mason Jar Pendant Light
    • DIY Nightstand

    This post was originally created in January 2017, and then updated in October 2020.


    54 Comments

    About LZ Cathcart

    LZ is an artist who loves creating illustrations, custom hand lettering and patterns for gifts, home decor, fabric, and wallpaper. She is also the creative mind behind The Summery Umbrella where she shows you how to make handmade signs, various DIY projects and gorgeous home decor.

    When she’s not dreaming up new projects and designs you can typically find her drinking her fair share of coffee, hanging out with her super handy husband and her sweet and sassy daughter. They all have a hard time sitting sit so this family is constantly on the go!

    Don’t Miss Out!

    Learn how to create GORGEOUS signs with my FREE guide. It's the perfect source for getting started and moving forward!

    « How to Stencil Faux Tile Around Your Fireplace Mantle
    Learn How to Create a Rustic DIY Bathing Suit Rack for Your Pool! »

    Comments

    1. Keri says

      January 13, 2016 at 9:56 am

      LZ, these are awesome nightstands!!! Love the white! His and her labels are a great idea! Nice job on these nightstands!!

      Reply
      • LZ Cathcart says

        January 13, 2016 at 8:10 pm

        Thank you so much, Keri! I am very excited for these new additions and so happy to hear that you like them too 🙂

        Reply
    2. Lynn says

      January 14, 2016 at 6:46 am

      LZ, love your creativity in imagining and then bringing your creation to fruition. It’s fantastic. And so much better that you have such a great assistant. She’ll be a creator too.

      Happy Thursday, Lynn

      Reply
      • LZ Cathcart says

        January 16, 2016 at 9:42 am

        Thank you so much, Lynn!! I completely agree. Having an assistant always helps 😉

        Reply
    3. Angela says

      January 22, 2016 at 12:25 pm

      I’m wandering over from The Creative Circle. I really love your nightstand! Nice blog. I will be back.

      Reply
      • LZ Cathcart says

        January 23, 2016 at 10:42 am

        Thank you so much, Angela! This is definitely a favorite project of mine, and I’m so happy that you love it too 🙂

        Reply
    4. Kandis says

      March 23, 2016 at 11:55 am

      Very cute nightstands! Off the subject, but did you know that it’s very bad for children to sit with their legs in the position your daughter’s are in, in that photo?

      Reply
      • LZ Cathcart says

        March 25, 2016 at 3:57 pm

        Hi and thank you for your sweet words! I will definitely make sure Miss Ava doesn’t sit like that in the future 🙂

        Reply
    5. creativejewishmom/sara says

      March 27, 2016 at 11:49 am

      Love it and so happy to have a handy woman contributing on Craft schooling sunday, great inspiration!

      Reply
      • LZ Cathcart says

        March 31, 2016 at 3:08 pm

        Yay! So happy you love it too 🙂

        Reply
    6. Heather @ Viral Upcycle says

      March 28, 2016 at 8:27 pm

      Very clever LZ! Great job!

      Reply
      • LZ Cathcart says

        March 31, 2016 at 3:08 pm

        Thanks for the sweet words and stopping by, Heather 🙂

        Reply
    7. Cindy Eikenberg says

      March 29, 2016 at 5:58 am

      Hi Lz – wow, this looks fabulous! Visiting from Create Link Inspire and pinning! Thanks for sharing – have a happy week!

      Reply
      • LZ Cathcart says

        March 31, 2016 at 3:05 pm

        So happy you love it, Cindy! Thank you so much for dropping by 🙂

        Reply
    8. Terry says

      March 29, 2016 at 1:41 pm

      Oh My Goodness!! Brilliant idea and they turned out amazing! i like how your mind works! You did a lovely job! I hope you have a great week!
      Smiles!
      Terry
      The Curator’s Collection & Making Broken Beautiful
      http://thecuratorscollection.wordpress.com

      Reply
      • LZ Cathcart says

        March 31, 2016 at 3:03 pm

        You are too kind, Terry!! I was so happy how awesome this project turned out, and it’s so great to hear that others love it too. Win, win, right?! 🙂

        Reply
    9. Cristina Mandeville says

      April 1, 2016 at 6:59 pm

      If I haven’t done so, I would love to invite you over at Blogger Spotlight Link and Pin-it Party! It runs every Thursdays, 7pm PST until Tuesdays, 7pm. We pin all the entries and you will be seen on five blogs. Hope to see you there!

      Reply
      • LZ Cathcart says

        April 9, 2016 at 1:40 pm

        Thank you so much, Cristina!! I’ll stop on over 🙂

        Reply
    10. Lisa @ Fun Money Mom says

      April 2, 2016 at 2:28 pm

      Wow…I have to admit that I’m pretty jealous of your craftiness…LOL! This turned out amazing! Thanks so much for sharing your project with us at Share The Wealth Sunday! xoxo

      Reply
      • LZ Cathcart says

        April 9, 2016 at 1:54 pm

        Aww thanks, Lisa!! You’re too sweet 🙂

        Reply
    11. Susie from The Chelsea Project says

      April 3, 2016 at 7:51 am

      Hi LZ,
      Thanks so much for linking to Frugal Mommas. We love having you share this awesome DIY nightstand with us.
      Susie from The Chelsea Project

      Reply
      • LZ Cathcart says

        April 9, 2016 at 5:19 pm

        Thank you so much, Susie!!

        Reply
    12. Krystal says

      April 3, 2016 at 10:45 am

      I never knew what to do with mine! We actually just sold them at a yard sale yesterday! Wish I would have seen this first. 😉 Thanks for sharing on the #BloggersGetSocial Get It Together link party!

      Reply
      • LZ Cathcart says

        April 9, 2016 at 5:26 pm

        Isn’t that funny how that happens?! I don’t know how many times I’ve wished I’ve kept a piece of furniture after I’ve seen inspiration somewhere. Thanks for stopping by 🙂

        Reply
    13. Emmy says

      April 4, 2016 at 12:04 am

      You did an awesome job! Seriously they look great! I used to live in Durango Colorado and while there were a ton of cute touristy shops there wasn’t a lot of real shopping, we did have a Walmart through where everyone in town shopped at. I was definitely grateful for it, but really happy when we moved and there were more options too.
      Thanks for linking up with the Best of the Blogosphere!

      Reply
      • LZ Cathcart says

        April 9, 2016 at 5:34 pm

        Thank you, Emmy! Oh good, so you know my pain?! Lol. If I didn’t enjoy living in the country so much I’d definitely move closer to the city again, but… I guess I’ll just have to “suffer” through it for now 😉

        Reply
    14. Frugal Hausfrau says

      April 4, 2016 at 12:20 am

      What a great diy idea~ Love it! Thanks for bringing this by Throwback Thursday!

      Mollie

      Reply
      • LZ Cathcart says

        April 5, 2016 at 9:15 pm

        Thank you, and no problem! 🙂

        Reply
    15. Theresa @DearCreatives says

      April 4, 2016 at 1:02 am

      What an awesome knock off / DIY! Love it. Pinned & shared.Thanks for sharing at the Inspiration Spotlight party!

      Reply
      • LZ Cathcart says

        April 5, 2016 at 8:58 pm

        Thank you so much for sharing!! I am still so excited how well it turned out 🙂

        Reply
    16. Christine | Mid-Life Croissant says

      April 6, 2016 at 9:30 am

      Fantastic and love all the in-progress shots. They’re so helpful. Thanks for joining us at #SaucySAturdays.

      Reply
      • LZ Cathcart says

        April 9, 2016 at 5:35 pm

        You’re very welcome! I’m such a visual person so I try to take as many as possible. Thanks for having me again 🙂

        Reply
    17. swayam says

      April 8, 2016 at 10:10 am

      Wow!! I can’t ever imagine making something so beautiful! It looks like you bought it from an expensive store. Gorgeous.. Thanks for joining us at #SaucySaturday. Pinned!! Please join us tomorrow too 🙂

      Reply
    18. Christie says

      April 11, 2016 at 6:45 pm

      This is super cute!! I bet I could find those tables at a thrift store, too. Can’t wait to make a pair of these for my bedroom. Thank you for linking up with #FoodieFriDIY

      Reply
      • LZ Cathcart says

        April 17, 2016 at 10:32 am

        That’s a great idea too! Probably could make this project even cheaper 🙂

        Reply
        • Lynn says

          November 29, 2019 at 3:54 pm

          A few years late but I’m glad I found myself checking out your site!
          I love the white tables, and the fact that they were old tv trays make them even more awesome in my opinion.
          I’m looking forward to seeing other creative projects that you’ve been working on.

          Reply
          • LZ Cathcart says

            January 1, 2020 at 8:45 am

            Thank you so much, Lynn! I’m so happy that you found my site too 🙂 Have a wonderful New Year and thanks again!

            Reply

    Trackbacks

    1. The Creative Circle Link Party - Domestic Charm says:
      January 21, 2016 at 7:01 am

      […] Pottery Barn Knockoff DIY Nightstand | 12 DIY Lighting Ideas for the Bedroom | Princess Castle Loft Bed […]

      Reply
    2. The Creative Circle Link Party 49 - The Striped House says:
      January 21, 2016 at 9:02 am

      […] Pottery Barn Knockoff DIY Nightstand | 12 DIY Lighting Ideas for the Bedroom | Princess Castle Loft Bed […]

      Reply
    3. 15 Home Decor Splurges That Are a Lot Cheaper to DIY Than Buy | Industry Standard Design says:
      March 20, 2016 at 11:56 am

      […] Tutorial: thesummeryumbrella.com […]

      Reply
    4. Great Ideas -- 16 Spring Home Ideas Part Three! says:
      April 3, 2016 at 3:24 am

      […] Pottery Barn Knockoff DIY Nightstand @ The Summery Umbrella […]

      Reply
    5. Easy Crafts for Spring | Our Holly Days says:
      April 5, 2016 at 9:11 am

      […] la Vida Holoka How to Make a Cheap Marble Background from Sunny Sweet Days DIY Nightstand from The Summery Umbrella Yarn Wrapped Monogram from The Logbook Lily Pulitzer Inspired Beach Pail from Simply Darrling Beach […]

      Reply
    6. Easy Crafts for Spring says:
      April 5, 2016 at 9:32 am

      […] la Vida Holoka How to Make a Cheap Marble Background from Sunny Sweet Days DIY Nightstand from The Summery Umbrella Yarn Wrapped Monogram from The Logbook Lily Pulitzer Inspired Beach Pail from Simply Darrling Beach […]

      Reply
    7. DIY’s Galore! says:
      April 6, 2016 at 8:00 am

      […] DIY Nightstand | Spring Ribbons & Bows Table Runner | Preppy Distressed Mason Jar | DIY Confetti Cups […]

      Reply
    8. Share It One More Time Inspiration Party #28 - The Everyday Home says:
      April 9, 2016 at 6:02 am

      […] Pottery Barn Knockoff DIY Nightstand By The Summery Umbrella […]

      Reply
    9. Share It One More Time #28 says:
      April 9, 2016 at 6:05 am

      […] Pottery Barn Knockoff DIY Nightstand  { from The Summery Umbrella } […]

      Reply
    10. Saucy Saturdays Link up Party #39 | The Flavor Bender says:
      April 9, 2016 at 8:02 am

      […] DIY Nightstand – The Summery Umbrella […]

      Reply
    11. #FoodeiFriDIY - Some Spring Inspiration - A Kitchen Hoor's Adventures says:
      April 26, 2016 at 6:56 am

      […] Pottery Barn Knockoff DIY Nightstand by The Summery Umbrella […]

      Reply
    12. Saucy Saturdays #39 - La Petit Chef says:
      July 7, 2016 at 12:40 pm

      […] DIY nightstand  by Thesummeryumbrella […]

      Reply
    13. Mom Buys Old Tray Table From Thrift Store, Transforms It Into A Gorgeous Piece For Her Bedroom says:
      March 1, 2018 at 2:02 pm

      […] Source: The Summery Umbrella […]

      Reply
    14. DIY Nightstands and Bedside Tables - I wish I was Crafty says:
      August 24, 2018 at 10:59 am

      […] The Easiest Pottery Barn Inspired DIY Nightstand from thesummeryumbrella.com […]

      Reply
    15. DIY Pottery Barn Projects To Make Your Home Gorgeous • DIY & Crafts says:
      November 22, 2018 at 1:27 am

      […] thesummeryumbrella […]

      Reply
    16. Super Easy DIY Herringbone Coffee Table with Hairpin Legs | The Summery Umbrella says:
      January 16, 2019 at 5:14 pm

      […] Pottery Barn Inspired DIY Nightstand […]

      Reply
    17. How to Create a Rustic Coffee Station | LZ Cathcart says:
      March 19, 2021 at 6:58 pm

      […] then you’ll definitely want to browse some of my other DIY projects. For instance, a gorgeous DIY Nightstand that is full of a step-by-step tutorial! Can’t wait to see you again! – […]

      Reply

    Leave a Reply Cancel reply

    Your email address will not be published. Required fields are marked *

    Recipe Rating


    This site uses Akismet to reduce spam. Learn how your comment data is processed.

    Hi! I'm LZ, and welcome to my humble abode! Don't be shy. Come on in! This is my happy place where I share my life, creativity as well as my quirky and country sense of humor on a daily basis. So, grab yourself a tall glass of something yummy, and let me introduce you to my realm. :)

    I want to find…

    Post Categories

    Featured On

    Let’s be social

    Last, but certainly not least, this final piece of Last, but certainly not least, this final piece of the "Kate the Spunky Sheltie" collection is my favorite look of all... "What?"
    We've had several ducklings over the years, but th We've had several ducklings over the years, but this is the first year for Miss Kate. She wasn't so sure how to act, but the ducklings were convinced that she was their new mama and followed her all around the yard wherever she went. In fact, they still do it to this day!
    Believe it or not, Katie is a water-loving dog! Ev Believe it or not, Katie is a water-loving dog! Ever since she was a puppy she's loved to swim in the pool, river, and even on a surfboard. She's not the only one looking forward to warmer weather in our household!
    I just love when Katie stares out the window. Some I just love when Katie stares out the window. Sometimes it's the window in my room (where she watches for squirrels) while other days she stares out the front window (where she also watches for squirrels as well as stalks our active neighbors on their morning walks). Don't worry. She always sees everythinggggg... even if I don't! 😂
    A few weeks ago I caught Katie all cuddled up on t A few weeks ago I caught Katie all cuddled up on the couch as she kept bobbing her head up and down while trying to stay up for just a few more minutes. So sleepy, but still convinced she needed to stay vigilant.
    This is totally a posed photo. I wish it was all K This is totally a posed photo. I wish it was all Katie, but nope, I definitely had to bribe her with a favorite treat to pose oh-so-sweetly!
    Follow on Instagram

    Copyright © 2021 · LZ Cathcart of The Summery Umbrella, LLC

    Log in