My Favorite Tips and Tricks for Making Reclaimed Wood Signs
Today I’m sharing My Favorite Tips and Tricks for Making Reclaimed Wood Signs. It’s not as hard as it looks & all you need to do is follow a few simple steps.

A few days ago I went LIVE on Facebook for the second time (EVER) and decided to use the below video as inspiration to do a blog post for you today about Tips and Tricks for Making Reclaimed Wood Signs.
Would you like this FREE SVG file for your own project? Sign up below to get access to this file and my resource library!
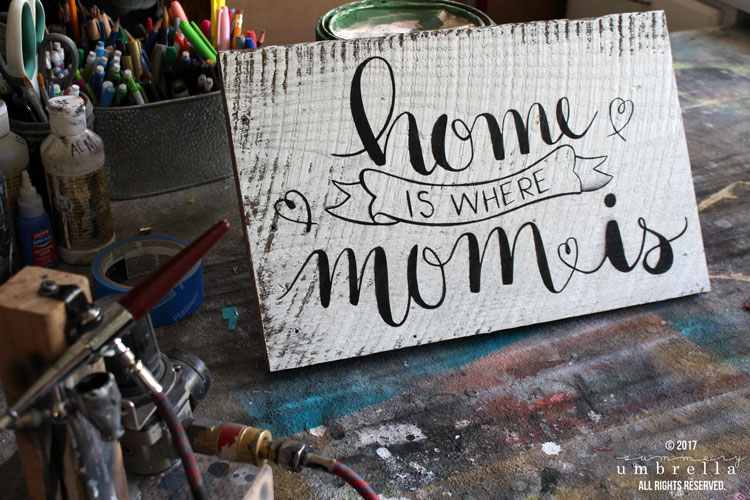
Plus, I figured I would show you another super, superrrr easy Mother’s Day gift that you could create today!
Win-win, right? Some answers, a gift idea, and then of course… a little bit of my quirky and country sense of humor! It’s a good day to be alive 😉
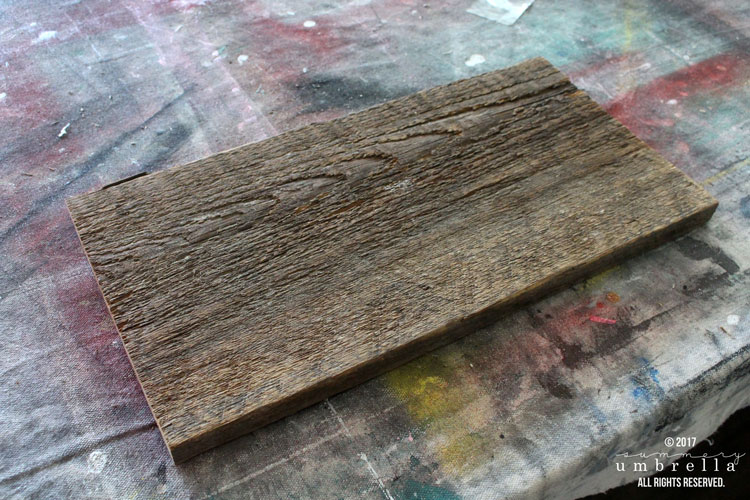
So, obviously, you’ll need a piece of reclaimed wood.
Do you know what reclaimed wood is?
My Favorite Tips and Tricks for Making Reclaimed Wood Signs
Reclaimed Wood is essentially any wood that you are “saving” from its previous use, and repurposing it for your own. From my experiences, it can be found in countless locations no matter where you live. While a lot of people think reclaimed wood is just from pallet wood this is not always the case. It can take a variety of forms such as old siding, fence panels, barns as well as decking.
CLEANING
- The only reason I’ve ever washed my wood boards is if they looked a little scary. Typically a bucket of hot water with dish soap and a stiff brush will do the trick. HOWEVER, most dirt can just be sanded off and will save you a lot of time by not having to wait for it dry.
- If your board looks questionable due to undesirables upon it or not being structurally sound it is better to just toss it. There’s no point putting in the effort of cleaning a piece of wood that could cause problems during the designing process.
- UNLESS it can be fixed with wood glue and a staple gun (see the example in the video below).
PREPPING
- Regardless if your board was dirty or not I highly recommend sanding it down. Sanding the surface will not only get rid of any loose dirt and splinters but also will provide a smoother surface to work with. Typically I use my Ryobi Cordless Orbital Sander with 60-Grit Orbital Sandpaper.
NOTE: Need help uploading, converting, and cutting out SVG cut files with your Silhouette CAMEO? Check out this tutorial that’ll walk you through the steps!
Need help making your own signs? Visit these tutorials too!
- Silhouette CAMEO Video Tutorial
- Make Your Own Fairy Tale Reclaimed Wood Signs
- Ultimate Guide to Making Your Own Signs
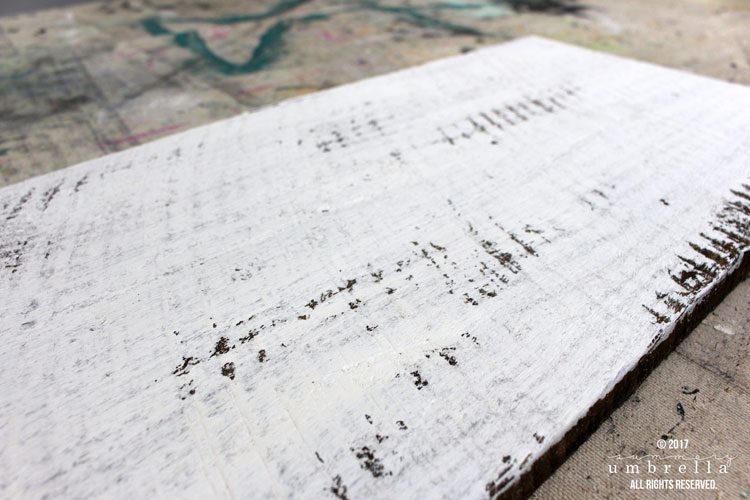
PRIMING & PAINTING
- It’s very possible that you may not even want to paint your board because you want the all-natural beauty of your reclaimed wood to shine through. However, I still stand behind one method to help you with the design process. I always spray my reclaimed wood boards down a few times with a flat top coat spray and let it dry out.
- Why? Because reclaimed wood is very porous. If you plan on hand-painting your text onto your sign you might have to paint and repaint it several times to get the paint to show up properly. However, when you have a few coats of finishing spray on it first you’ll be amazed how much time (and paint!) it will save you.
Tips and Tricks for Making Reclaimed Wood Signs
And… those are my tips and tricks for this week! Definitely check out the video tutorial above. It’s about 20-25 minutes of me showing you what can go wrong and how to fix the problem plus a little bit about airbrushing. Nothing’s perfect, but you know what? The mass majority of the time you can find a solution. Let me show you how in this video!
Have a wonderful weekend!

Pssttt…. Don’t forget to check out my DIY signs page chocked full of DIY and decorating goodness!

This post was updated in April 2022.


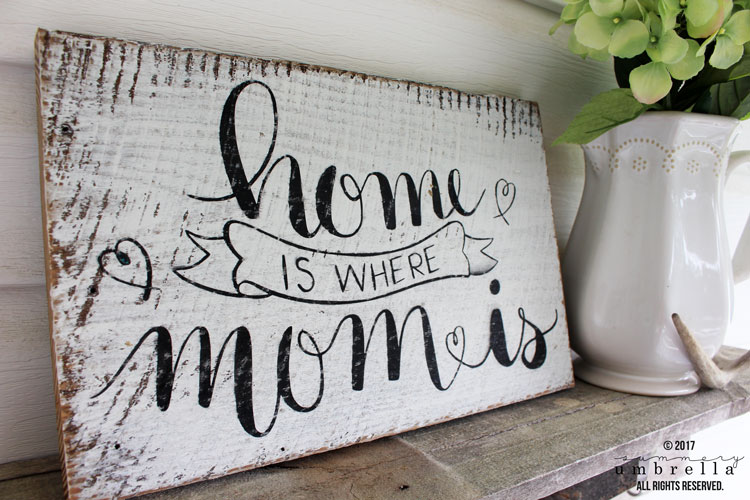
I love that “home is where mom is” design! We have some reclaimed wood in our backyard and I thought of doing something useful to them just like what you’ve done with yours. I would definitely recommend this to my friends too! Thanks for sharing.
Hi Bobby! That sounds like a wonderful idea, and I’m sure your mom (and friends’ moms!) will love it too 🙂