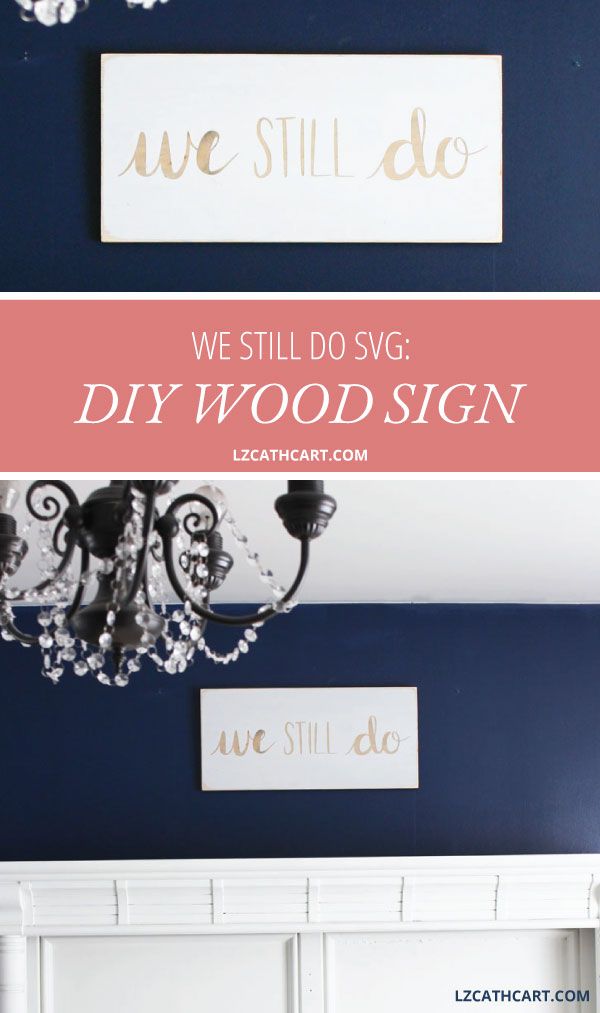
Create an Easy DIY We Still Do Sign (plus Video Tutorial!)
Are you looking for a gorgeous, DIY anniversary gift? This We Still Do sign is not only incredibly easy but will make a lovely handmade gift for yourself or your friends!
I tend not to be a very romantic or sappy type of person. It’s just not my style. Obviously, there are a few movies, songs, phrases, etc. that have resonated with me, but they are few and far in between.
For instance, there’s a song by the band Paramore called “The Only Exception”, and I’ll tell you what, it always chokes me up! It’s kind of my theme song for my husband and daughter, and I’m quite certain that even when I’m old and moldy it’ll still have the same effect on me.
Want this freebie? Sign up for access to my resource library below.
With all that being said, it’s the same thought process for why I like this phrase on my We Still Do sign as well. It’s not the first promise, but the forever after that keeps a smile on my face and I’m sure yours as well too!
Alright, enough about me. Let’s get started creating this anniversary gift!
Materials
- 1 – Stained Piece of Pine Board (24”x12”)
- Vinyl (this is my favorite brand!!)
- Transfer Tape
- Squeegee (a sturdy credit card will work great too)
- Cutting Machine (Silhouette or Cricut — your choice!)
- White paint (latex or acrylic paint)
- Small Round Brush
- Stain
- Top Coat Spray Paint
- We Still Do SVG (sign up above for my free resource library!)
Steps:
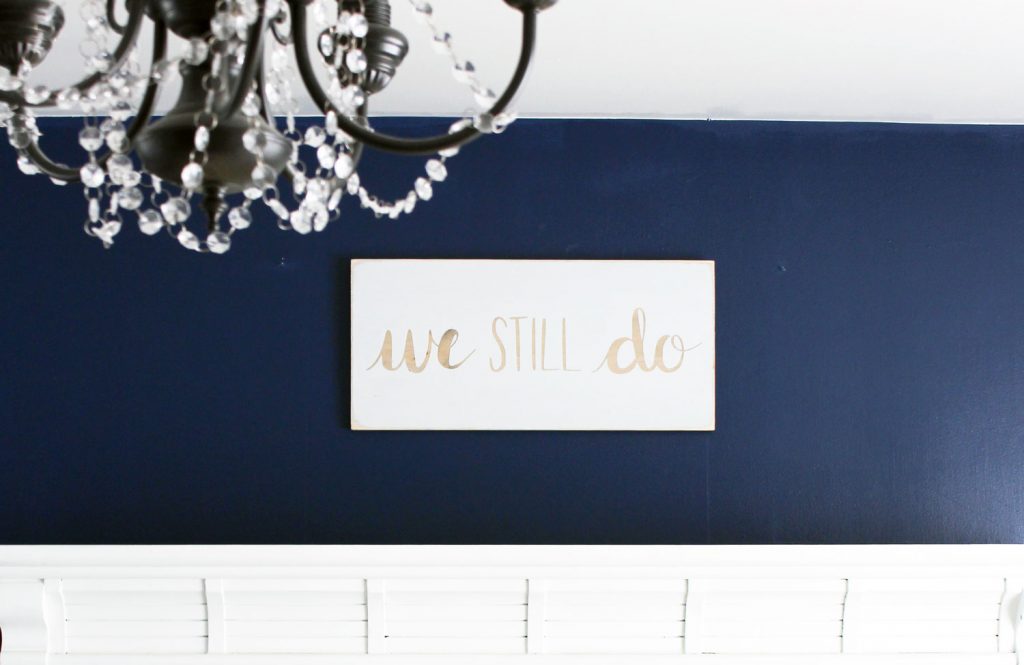
1. Stain your pine board with your favorite stain. My sign was stained using Minwax Wood Stain in Special Walnut.
TIP: Make sure that your pine board has thoroughly dried for an entire night prior to putting on your vinyl stencil.
2. Using your Silhouette CAMEO (or your preferred cutting machine!) cut out the project template with the vinyl on your mat.
3. Remove the vinyl from your mat, and apply your transfer tape.

4. Now, remove the backing from your vinyl, and carefully take out the vinyl pieces of your design that you will be painting.
NOTE: Leave the “letters” and remove everything else (see the below image).
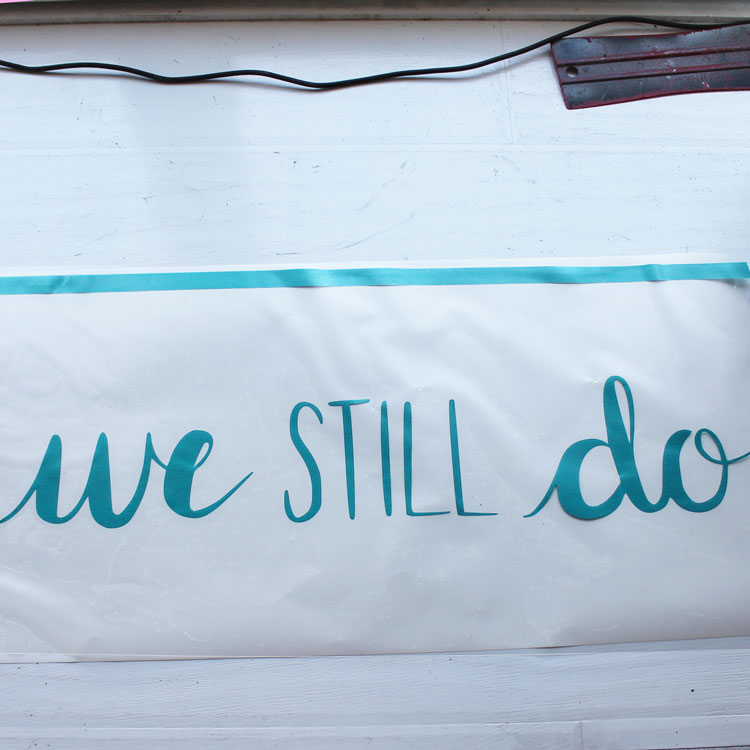
5. Once you have removed all of your vinyl pieces it is now time to apply them to your signboard. Line up your vinyl with your board so it will be applied evenly, and using your squeegee firmly push it down.
6. Next, slowly remove your transfer tape so that only your vinyl is left on your board.
Create an Easy DIY We Still Do Sign (plus Video Tutorial)
7. The key to using any stencil is all about the application. It’s extremely important that you do not apply too much paint, or it will go underneath your stencil creating a less-than-perfect design. Remember, always use several, light layers.
Start with very little paint on your brush, and wipe some of it off on a separate piece of paper.
Gently dab or swirl little circles all over your design.
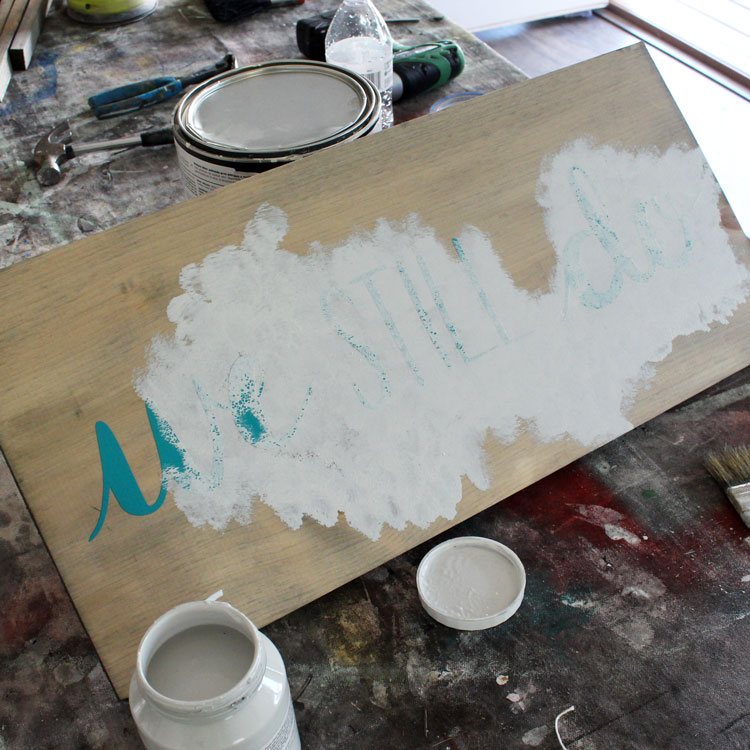
8. Once your paint has completely dried remove your vinyl.
TIP: If you’re having a hard time pulling up small pieces of the vinyl this weeder tool is very handy for removing vinyl.
9. Last, add a light layer of your topcoat spray paint for protection and let it dry.
10. Once it’s dry, add hangers, and enjoy this beauty!
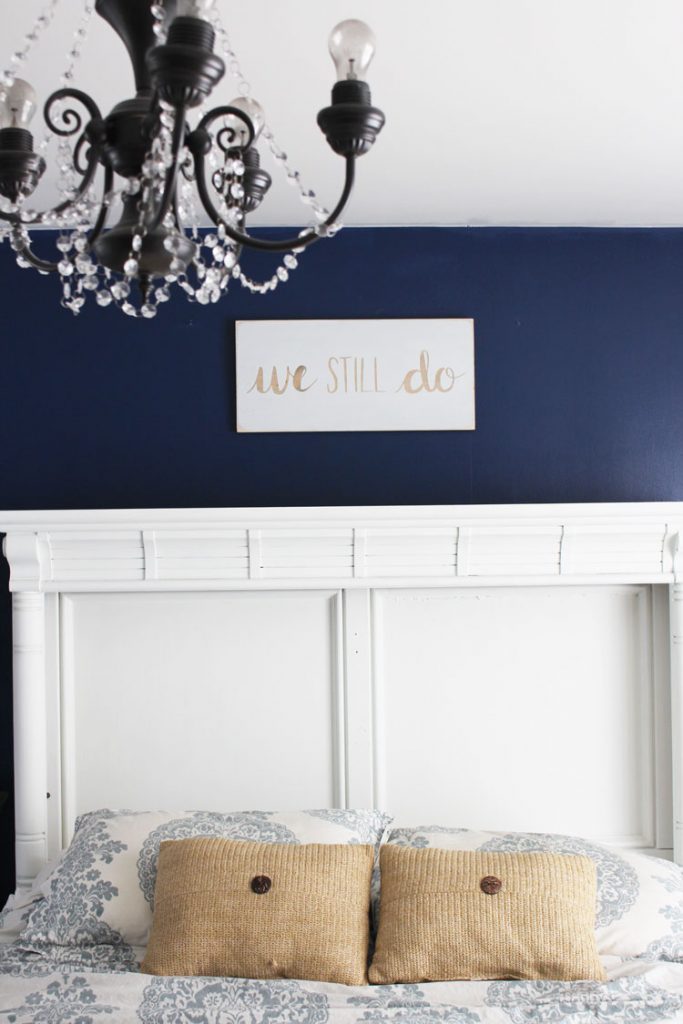
What do you think? Not too shabby, right? A little different, but still as fun and easy! And just think, you can use the same method with various other stain and paint colors so you can create this anniversary gift for all your friends and family.
If you loved this project then you’ll definitely want to browse some of my other Wood Signs that are full of step-by-step tutorials as well as freebies galore!
Can’t wait to see you again, and Happy Crafting!

Pssttt… don’t forget to download the file before you go!
Let’s be Social
This post was updated in June 2022.