How to Paint Metal Patio Furniture So It Looks Like a Million Bucks
Ready to revamp your outdoor space? Learn how to paint metal patio furniture like a pro with this easy-to-follow tutorial. Say goodbye to rust and hello to a fresh new look for your backyard oasis!
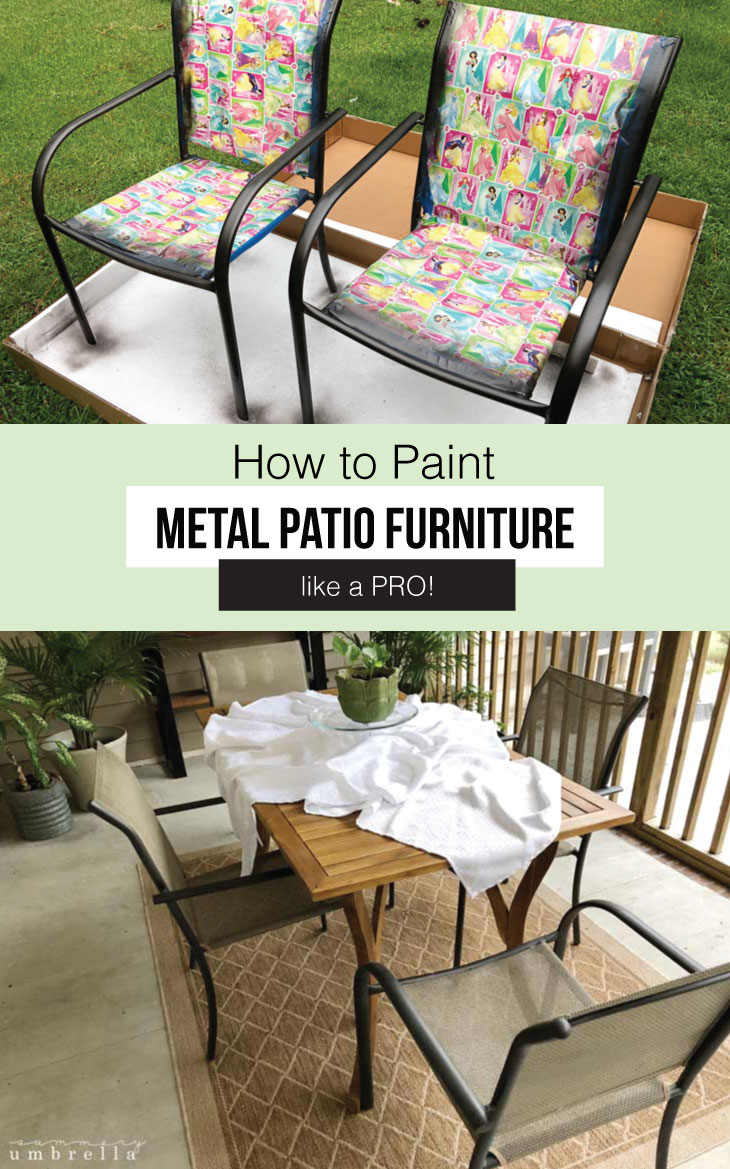
Painting Gives New Life To Decor
Isn’t paint wonderful? Not only does it come in a wide variety of colors and textures, but it truly can make a world of difference with even the most unappealing items. In fact, I would dare to say that over half of the items I own end up getting a few different coats of paint every few years. Yikes!
For instance, I’ve only been living in this new house my husband and I purchased back in March, and I’ve already painted my kitchen cabinets. I’m crossing my fingers I won’t get that bug to repaint them anytime soon because it was a HUGE project!
Anyways, with all of that being said, I found myself wanting a new patio set since it blended in wayyyy too much with our house siding. However, after looking at my budget and then the prices I saw for the sets I liked… it was quite apparent that my good ol’ trusty friend paint, would need to rescue the day!
How to Paint Metal Patio Furniture Like a Pro
All you need to do is follow these easy instructions, and you’ll have a new-looking patio!
Tools and Supplies
- Metal Patio Furniture
- Mineral Spirits
- Paper Towel
- Old Cardboard or Tarp
- Rust-Oleum Metallic Oil Rubbed Bronze
- Top Coat Varnish (in Satin)
- Kraft or Wrapping Paper
- Painter’s Tape
- Scissors
Instructions
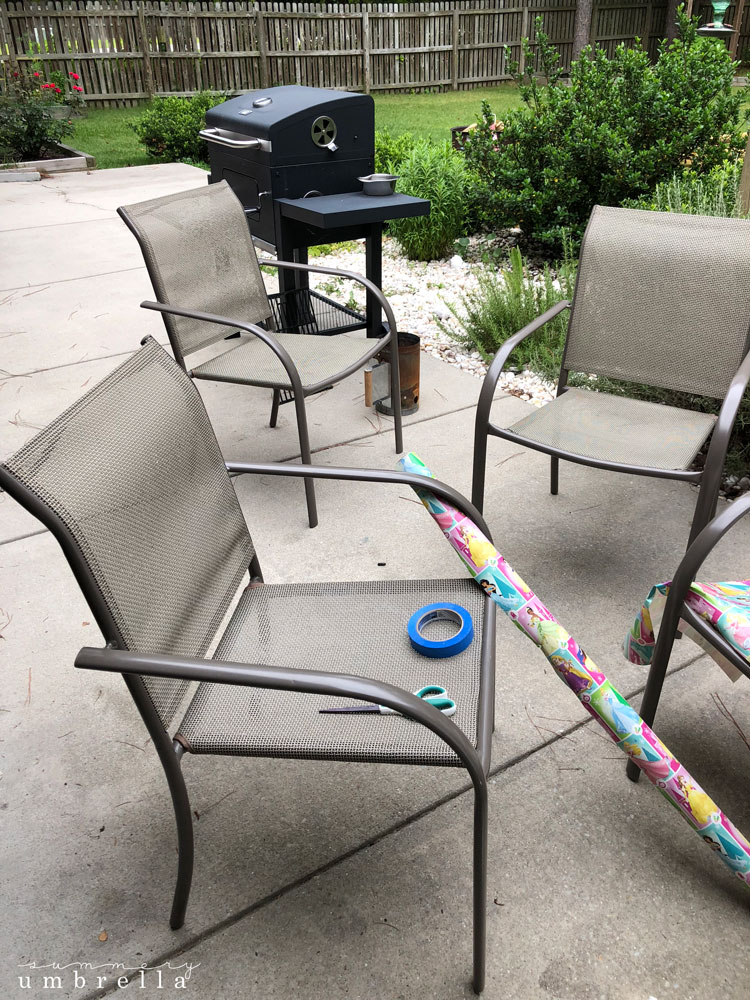
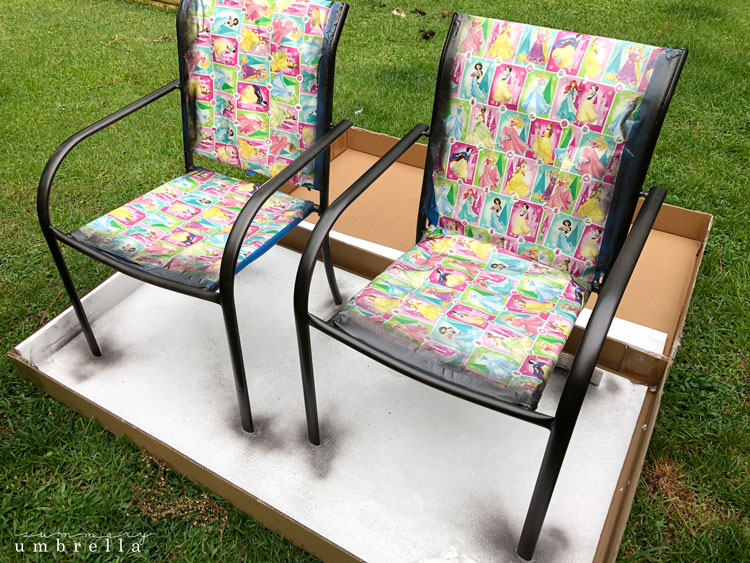
- First things first, you’ll want to clean your metal patio furniture with a paper towel and Mineral Spirits (or another similar cleaner) to ensure that your paint will stick.
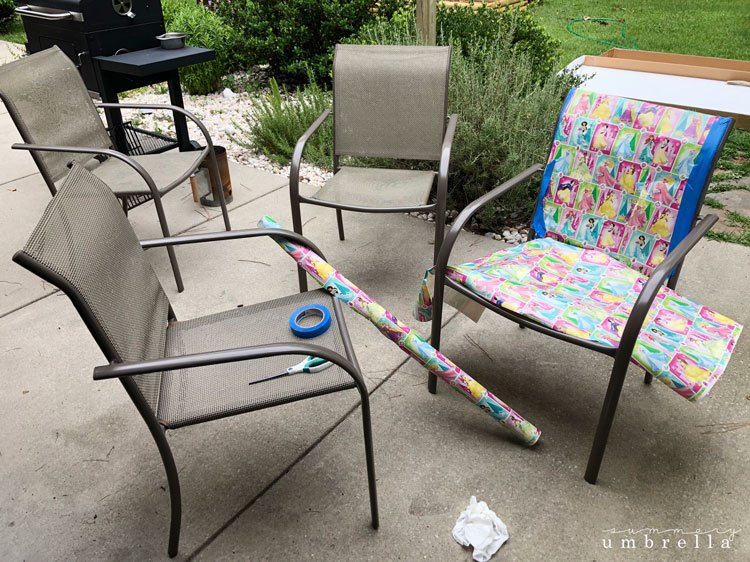
- Once it’s dry go ahead and tape up all of the areas of your furniture that you do not want to get painted.
- Don’t laugh. I used Disney princess wrapping paper because I couldn’t find my kraft paper! Believe it or not, it worked out really well.
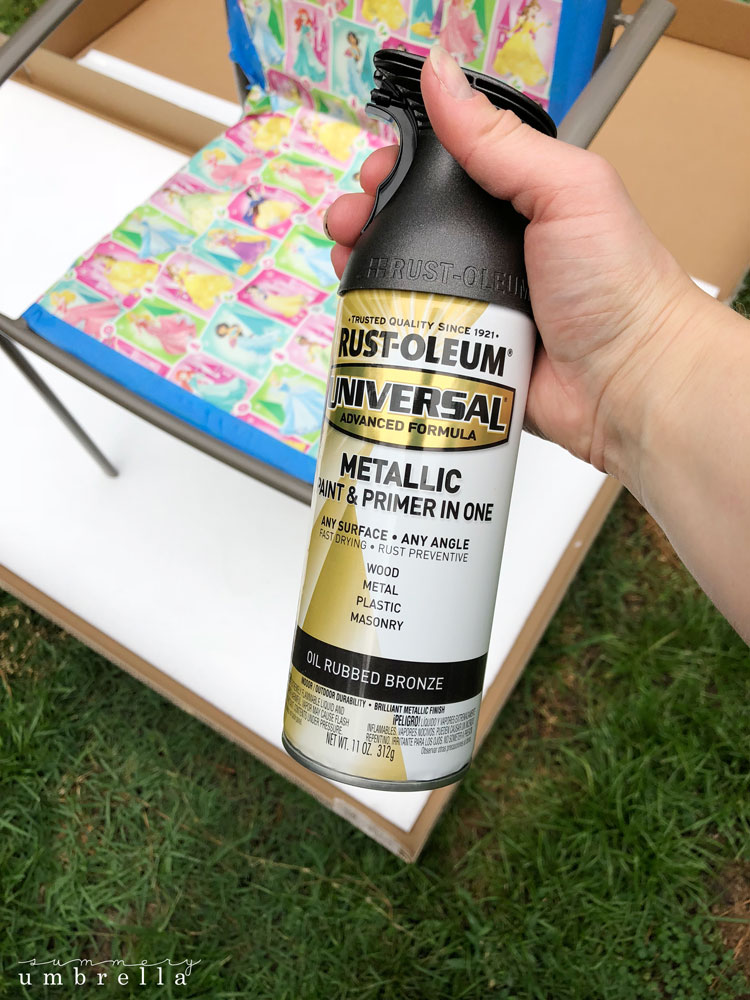
- Next, it’s time to paint. I used my all-time favorite Rust-Oleum Metallic Oil Rubbed Bronze and lightly sprayed one coat on my metal patio furniture.
- Don’t forget to do this step on an old piece of cardboard or tarp!
- NOTE: While there are a wide variety of paints you can use for this outdoor project I’ve found that spray paint is 100% my favorite outdoor patio furniture paint of choice!
Looking for more inspiring DIY projects?
- How to Paint and Distress Metal Bar Stools
- How to Paint a Metal Front Door
- Mason Jar Pendant Light
- Repurposed Table Turned Wood Tilt Out Trash Can
- 14 Industrial Home Decor Ideas
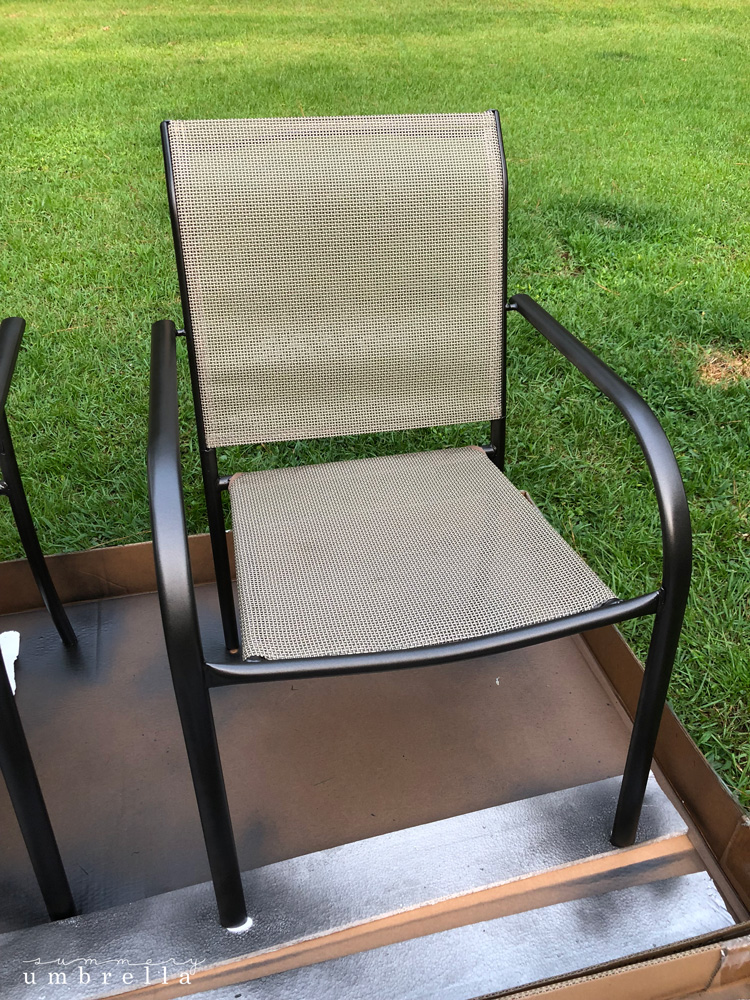
- I needed three coats to cover every inch of my chairs evenly, but just make sure you give your paint plenty of time to dry before adding a new layer.
- Last but not least, add two coats of your top coat varnish to protect your paint from wearing off too quickly.
- In fact, if you plan on using your chairs on a daily basis I would probably add another two coats of your top coat on top of those to give it as much protection as possible!
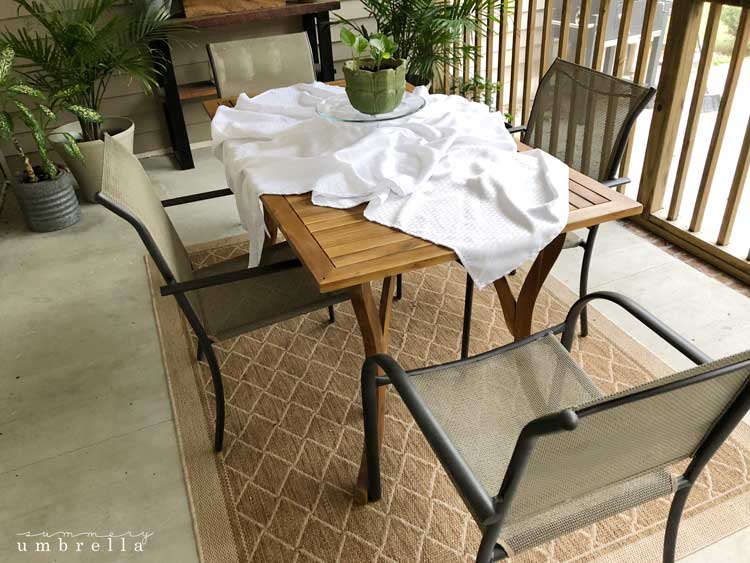
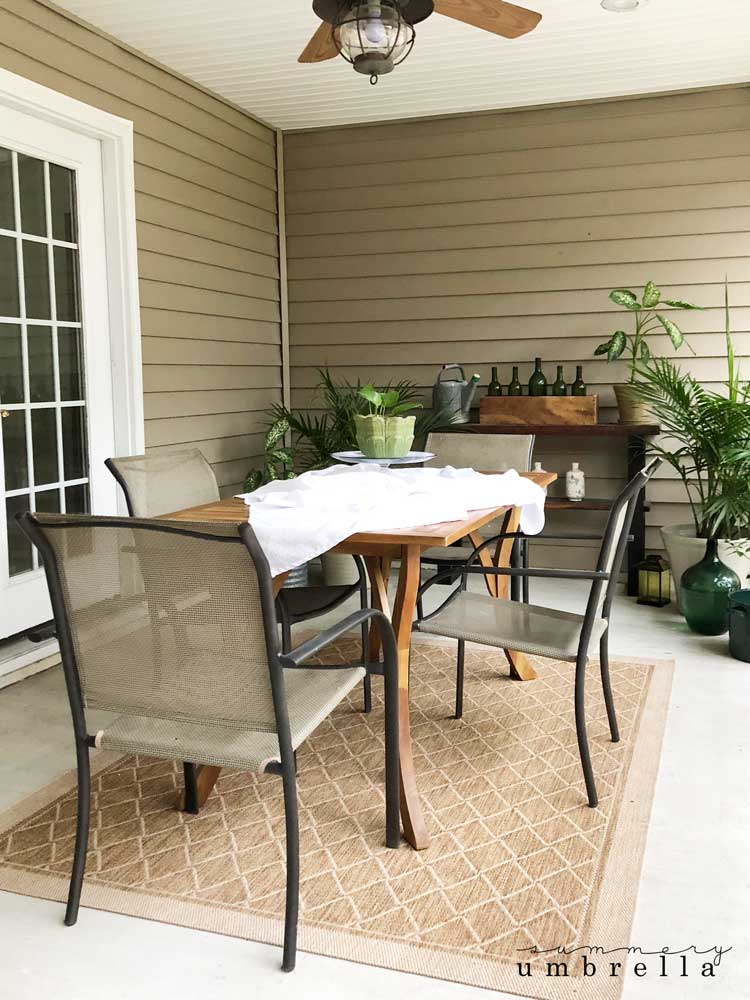
And that’s all! I still have a long way to go with my back porch, but at least I’m one step closer to figuring it all out.
What kind of projects have you guys been creating lately?
I hope you have a great week, and chat with you soon 🙂
If you loved learning how painting patio furniture can be super easy then you’ll definitely want to browse some of my other DIY projects! They are full of step-by-step tutorials as well as freebies galore! Can’t wait to see you again!


Thank you for your step by step on spray painting outdoor furniture. I purchased an outdoor metal couch that said it was gold but it was more of a dull gray. Do you think Rustoleum in Gold with a clear gloss top coat(s) will do the trick? Does it actually come out a shiny gold? Thank you!
Hi Gianna and I’m so glad this post has been helpful 🙂 A clear gloss topcoat will definitely help you achieve a shiny gold color. Best of luck, and send me a photo when you’re all done. I bet it’ll look amazing!!
YOUR INSTRUCTION IS VERY HELPFUL AND THE IDEA TO GIVE A NEW LIFE TO OUR FURNITURE IS GREAT. THANK YOU FOR SHARING YOUR IDEAS.
Thank you so much, Christina! So happy this tutorial has been helpful 🙂
This is just what I was looking for! Question….if my metal patio furniture has some rust do I need to do something extra to prep that?
Thanks!
Marla
Hi Marla and what a fantastic question! I would definitely first remove any loose rust and then apply a primer. It doesn’t need to be perfectly removed, but the best that you can would be great. Feel free to add a few coats of primer on top of it as well so your paint will adhere to the surface. Best of luck and happy DIY’ing 🙂
Hello. I understand you used the rust-oleum spray for the border of the chair . How about if I need to restore the seating and back part ? What do you recommend? Rust-oleum spray too? My chairs are very similar to yours. What color should I use? I appreciate any kind of information. Thank you!
Hi Silvvia and great questions! I personally wouldn’t spray paint that particular material unless your chairs are just for “show”. If your chairs are like mine, I’m guessing the seating and back part is very flexible and I’m afraid that the paint would peel off super quickly with much use. However, if you wanted to use them I would suggest buying a cushion or even possibly creating custom cloth coverups to hide any of the mesh/color that you do not like. Please let me know if you find a solution that works better than my suggestion(s). I’d love to know about it!! Hopefully this helps and best of luck 🙂
Hi, there LZ! Great tips! I have these exact outdoor dining chairs! I wanted to ask, what size is the outdoor rug? Saw yours and now I need one for my outdoor dining table!
Hi Martie! Thank you so much and that’s a great question. This particular rug is a 5′ x7′, but I truly wish I had bought a 8′ x 10′. 🙂
Liz thank you for sharing. How did you get the crisp edges on the back, where the mesh meets the frame?
Hi Elda and great question! The key to getting the crisp edges is using painter’s tape. It’ll allow you put down multiple layers if the first one (or two!) don’t cover everything. Trust me, I’ve had to add little bits of the tape in certain places if it doesn’t initially go down where I want it to. Best of luck and have a great weekend!
Great instructions. What would you use to remove flaking paint, and could you then follow the above?
Hi Catherine and thank you! I’d use one (or a combination) of the following methods for removing flaking paint, and then follow it up with this tutorial.
1.) Use a scraper or putty knife to remove loose paint.
2.) Try a wire brush for stubborn flakes and to roughen the surface.
3.) Sand the area with various grits of sandpaper to smooth it out.
Hope this helps with your project. Let me know if you need any more tips! 🙂
Hi Linda-
Thank you for this article, your chairs look great. It’s inspired me to give my old tired patio chairs a fresh look.
I think I have the same chairs as you (or at least very similar). How many cans of spray paint and varnish would I need to cover a set of 4 chairs?
Thank you!
Nick
Thank you, Nick! Honestly, it would ultimately depend on the size of your chairs. If they’re about the same size as mine I think a safe estimate would be one can of spray paint for each chair. The varnish should be a little less than this, but I’d probably still get one can per chair. I’d rather have too much and not need it than vice versa. Have fun 🙂