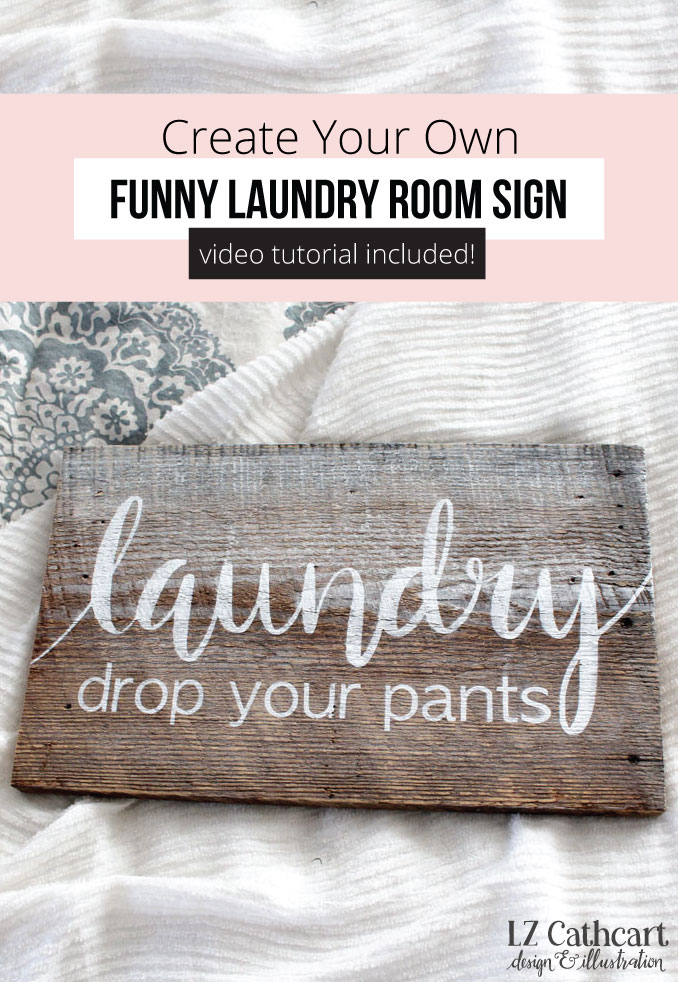
Create Your Own Funny Laundry Room Sign (plus Video Tutorial)
Your laundry room is greatly in need of a humorous sign created just by you! Learn how to DIY this funny laundry room sign today.
Laundry sucks, doesn’t it? It’s not only never-ending but also seems to rear its ugly head most frequently at the end of a long day or week. Ugh.
I think that’s why I’ve created a few of these sarcastic and silly laundry room signs to lighten my mood (and yours!) when it comes to entering this dreaded room of terror.
Ok, ok, ok, oooo-k. I know I’m being maybe a tad bit dramatic, but seriously, I’m just not a fan.
Want this freebie? Sign up for access to my resource library below.
And that my friends, is exactly why I’m going to show you how to make your very own funny laundry room sign on a reclaimed piece of wood using a whitewash method.
Let’s get started!
Supplies
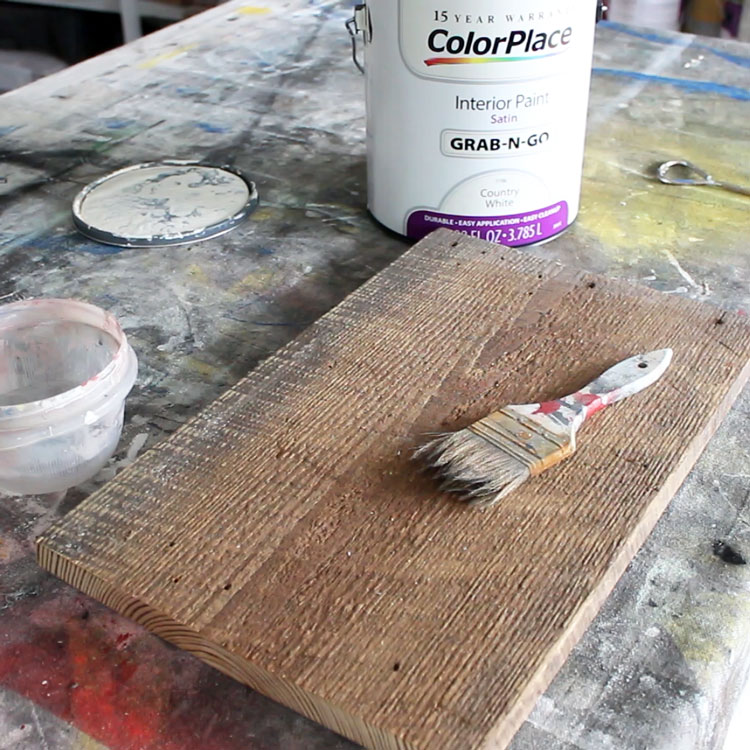
- 1 – Prepped Reclaimed Wood (16”x9”)
- Latex Paint (white is my go-to)
- Small Bowl
- Vinyl
- Transfer Tape
- Squeegee (or a credit card)
- Laundry SVG Template (sign up for my resource library above for this freebie!)
- Silhouette CAMEO and Mat
- White Satin Spray Paint (or Airbrush and Lacquer Paint)
- Sander
- Top Coat Spray Paint
Step By Step Instructions
1. Apply your wash.
The wash can be created by dipping a paintbrush (with a little bit of paint on it) into a bowl of water. Gently stroke your brush all over your sign. Wipe off any extra color that you do not want, or where it is too thick.
NOTE: A paper towel or another dry paintbrush works well for taking off extra paint.
2. Allow the paint to dry overnight.
Once your wash has been applied, and you are satisfied with the results allow it to dry overnight.
3. Cut out Funny Laundry Room Sign Template.
Using your Silhouette CAMEO (see tutorial) cut out the project template with the vinyl on your mat.
4. Remove the vinyl template from the mat.
Remove the vinyl from your mat, and apply your transfer tape.
Video Tutorial Below:
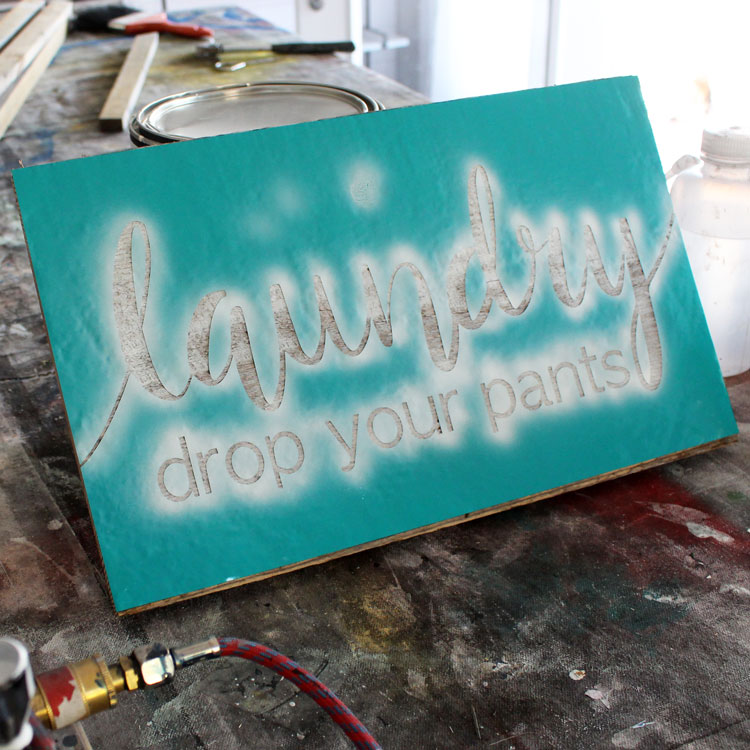
5. Remove interior vinyl pieces.
Now, remove the backing from your vinyl, and carefully take out the vinyl pieces of your design that you will be painting.
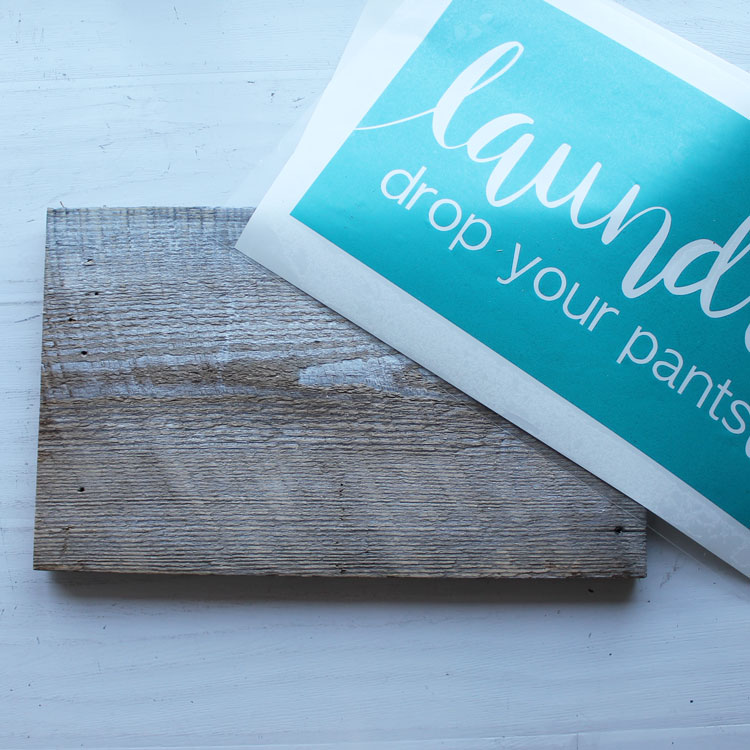
6. Apply the vinyl template to sign.
Once you have removed all of your vinyl pieces it is now time to apply them to your sign board. Line up your vinyl with your board so it will be applied evenly, and using your squeegee firmly push it down.
7. Remove the transfer tape from the vinyl template.
Next, slowly remove your transfer tape so that only your vinyl is left on your board.
Create Your Own Funny Laundry Room Sign (plus Video Tutorial)
8. Paint your vinyl template.
In a ventilated area, evenly apply a light coat of spray paint (or use your airbrush) to your vinyl. Allow it to dry and then apply your next coat. Repeat this step until your desired color has been achieved.
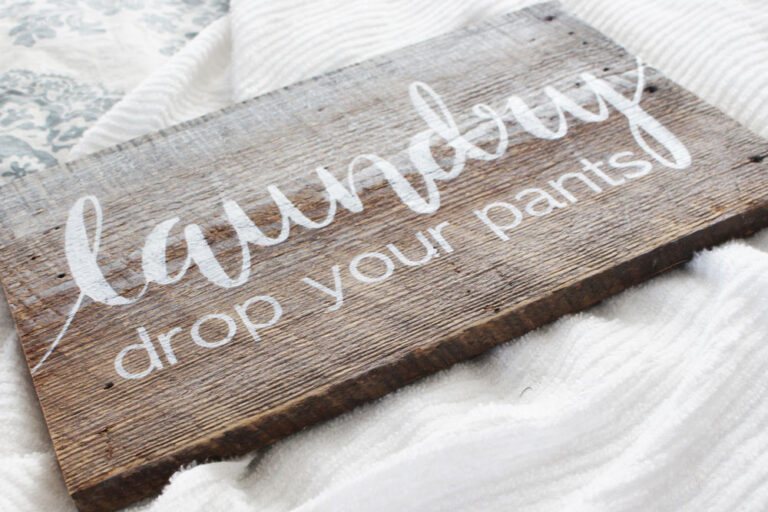
9. Remove the vinyl template once the paint has dried.
Once your paint has completely dried remove your vinyl.
TIP: If you’re having a hard time pulling up small pieces of the vinyl this weeder tool is very handy for removing vinyl.
10. Lightly sand/distress your sign.
Using your sander lightly distress the edges, and all over the entire sign to give it even more of an aged look to it.
11. Spray your sign with top coat spray paint.
Last, add a light layer of your topcoat spray paint for protection and let it dry.
That wasn’t too bad creating your very own funny laundry room sign, was it? The worse part is definitely waiting for the paint to dry, but overall relatively easy!
Thanks again for stopping by my little nook of the blogosphere, and don’t forget to check out the rest of my DIY projects too!
Happy Crafting!

Need help making your own signs? Visit these tutorials too!
- Silhouette CAMEO Video Tutorial
- Make Your Own Fairy Tale Reclaimed Wood Signs
- Ultimate Guide to Making Your Own Signs
This post was updated in June 2022.