Craft Your Own Rustic Charm: A Simple Guide to Creating a DIY Farmhouse Sign
Would you love to learn how to make your own DIY Farmhouse Sign using chippy paint and reclaimed wood? Join me now for the full tutorial!
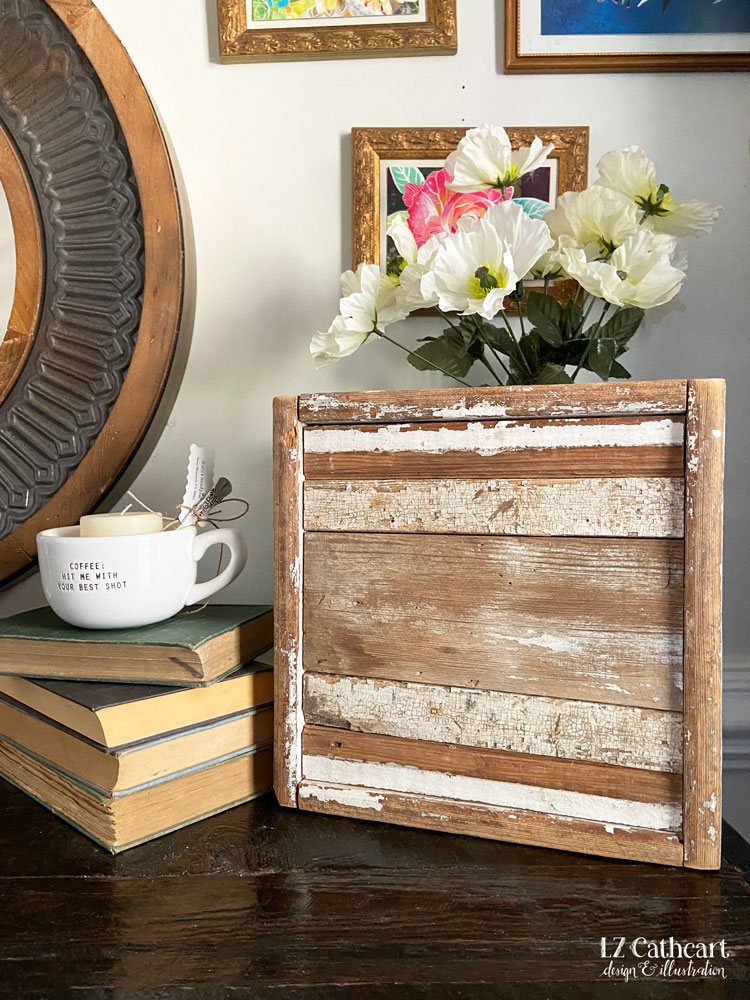
DIY Farmhouse Sign
Who doesn’t love a gorgeous farmhouse sign, right?! They come in so many different sizes, colors, shapes, and typography.
Not to mention, they practically fit within the theme of just about any type of home. That alone is amazinggggg! Because you know me, I absolutely L-O-V-E to change around the furniture in my home for every season, and having a few timeless pieces are a must-have to ensure that I always have enough.
One of my favorite aspects of this DIY farmhouse sign is that since it doesn’t use typography it allows it to be used in any room of the house.
Bathroom? No problem!
Guest room? Use it to layer on a shelf.
Kitchen? It could even be used as a tray!
Ok, enough of the small talk. Are you ready to see how this shining beauty is made? Let’s get started!
Materials
- 1 – 1/2″ Cabinet Grade Plywood (12”x12”)
- Wood Glue
- Miter Saw
- Reclaimed Wood
- 1-3/16” Brad Nails (or Finish Nails)
- Brad Nail Gun (or Hammer)
Steps
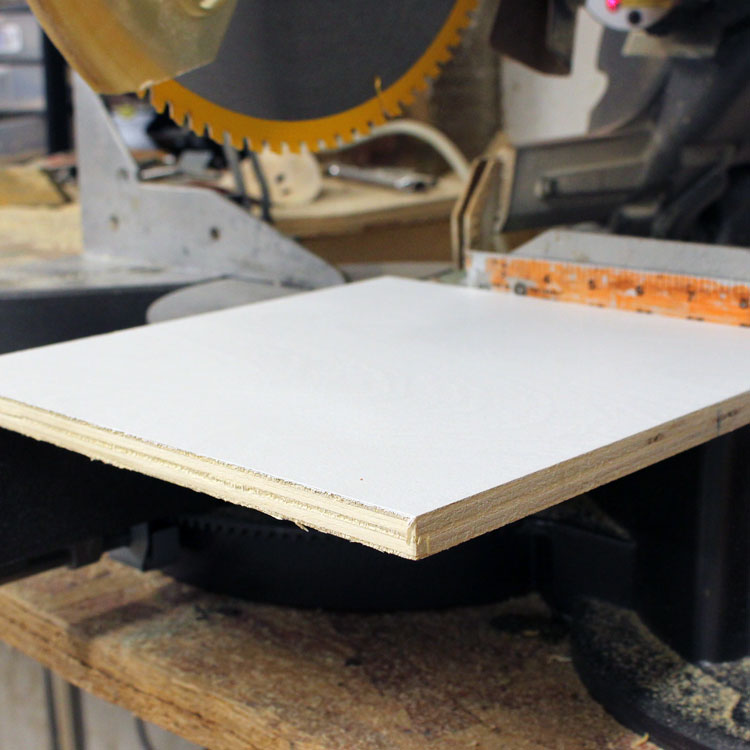
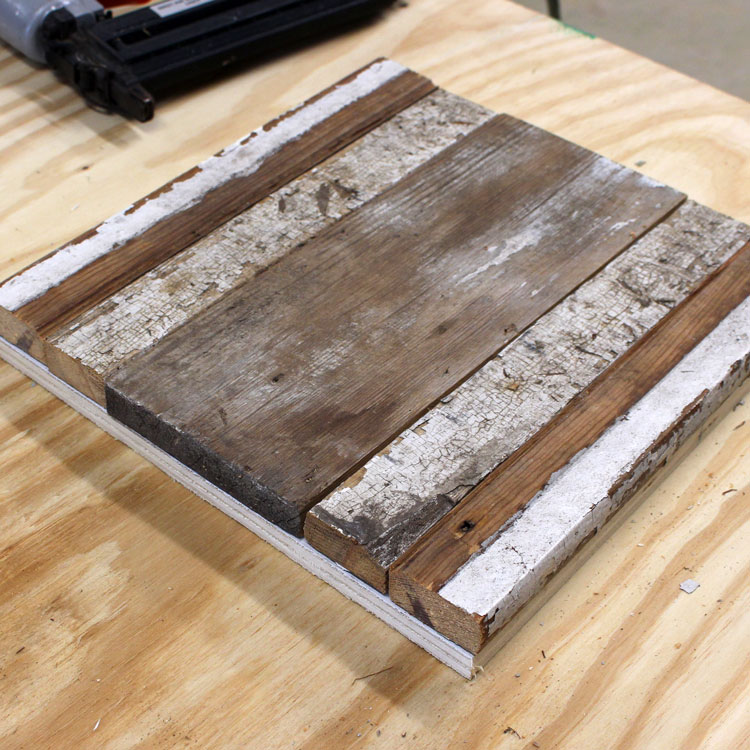
1. For this project, you can either have a pattern in mind or just go with the flow. Use a piece of plywood like this 1/2” cabinet grade so you’ll be able to nail all of your pieces together.
Mine has been cut to 12″x 12″.
NOTE: I’m using a piece of plywood that has been previously painted (it’s what I had on hand), but don’t feel like you have to paint yours. It’s completely up to you!
DIY Farmhouse Sign
2. I like to sort through and prep my potential reclaimed wood pieces, cut them down to fit my plywood, and rearrange them until I find a pattern I like.
3. Once I’ve determined my pattern I add wood glue to the backs and nail them into my plywood.
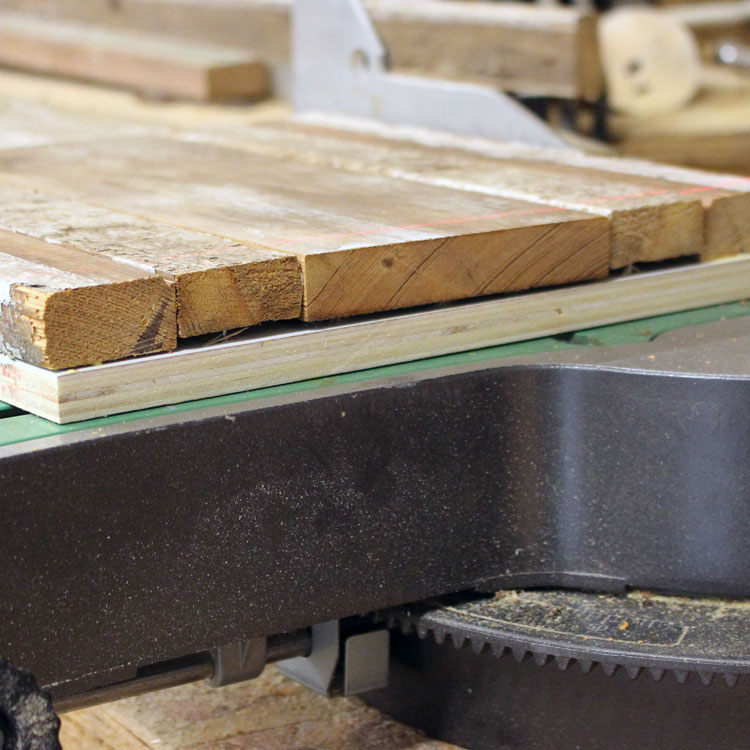
4. Repeat Steps 2 and 3 until you reach the bottom of your board. If for some reason your boards do not line up after you’ve nailed them into your plywood go ahead and trim the sides so you have a nice even edge for your frame using your miter saw.
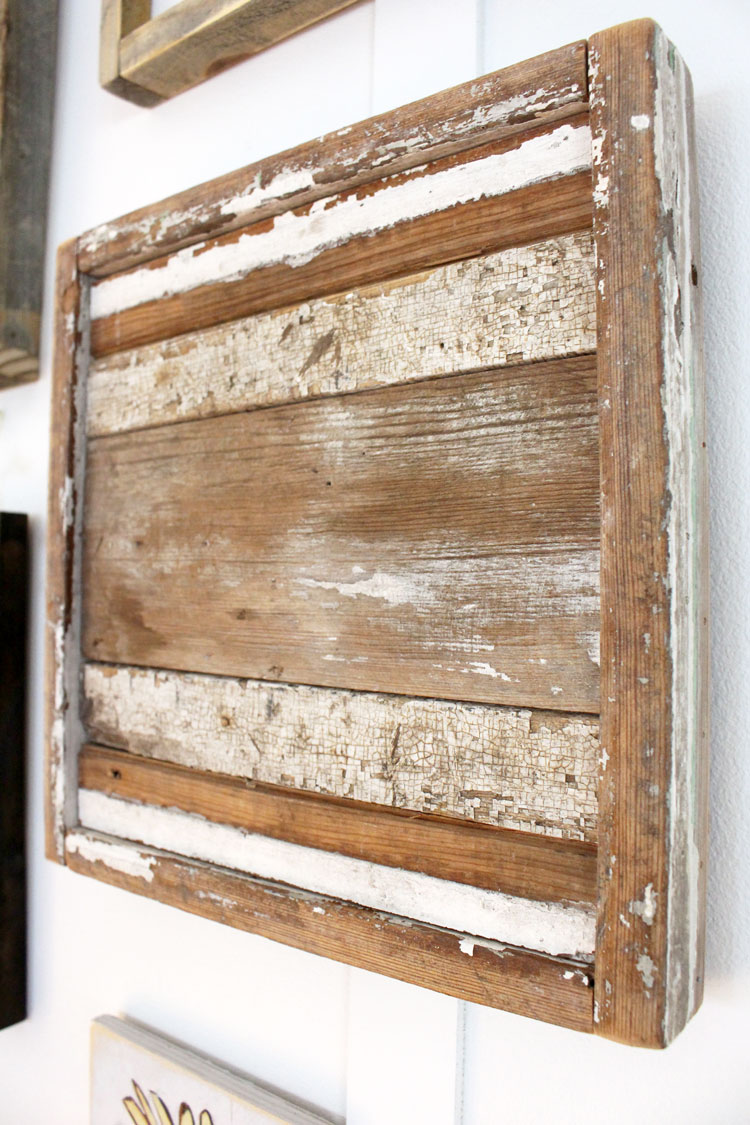
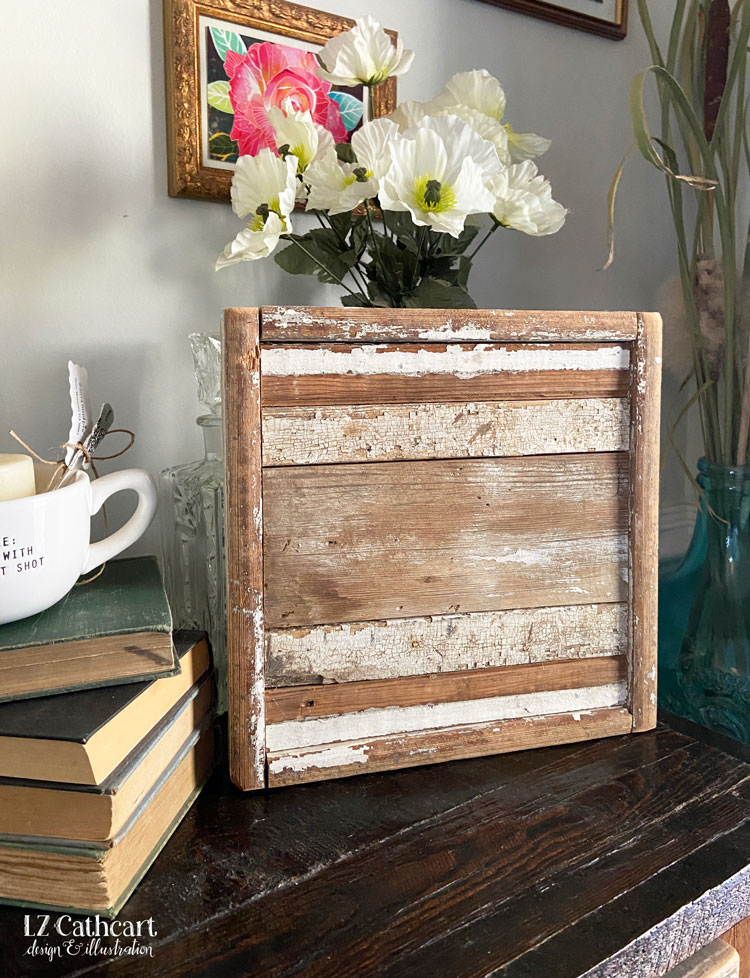
5. Now, frame it up (click on this link to learn how!) using the same type of reclaimed wood that was used to make your pattern so it looks like one cohesive piece.
6. Last, hang it up or set it on a shelf for all to see!
NOTE: When working with reclaimed wood please remember to be careful of the potential of lead being present from older paint substances. It’s always better to be safe than sorry so make sure to use a lead test to put your mind at ease.
If you loved this project then you’ll definitely want to browse some of my other Wood Signs that are full of step-by-step tutorials as well as freebies galore!
Hope you have a wonderful week, weekend, or month. See you soon and don’t forget to be social!