Get Creative with Winter Decor: How to Make a DIY Vintage Snowflake Sign
This DIY vintage snowflake sign is not ONLY gorgeous but super simple as well. Make your own wood snowflake wall art with this easy tutorial!

Good morning and hello!
As you probably already know. I kind of have this “thing” for making signs. I know, I know. It’s pretty shocking to me too! 😉
And you know what? I think you guys like making them as well.
Want this freebie? Sign up for access to my resource library below.
How to Make A DIY Vintage Snowflake Sign
Today I’m going to be showing you how to make one of my favorite holiday ones. In fact, this DIY vintage snowflake sign is perfect for both Christmas as well as keeping it up for the colder winter months as well.
So, let’s get started!
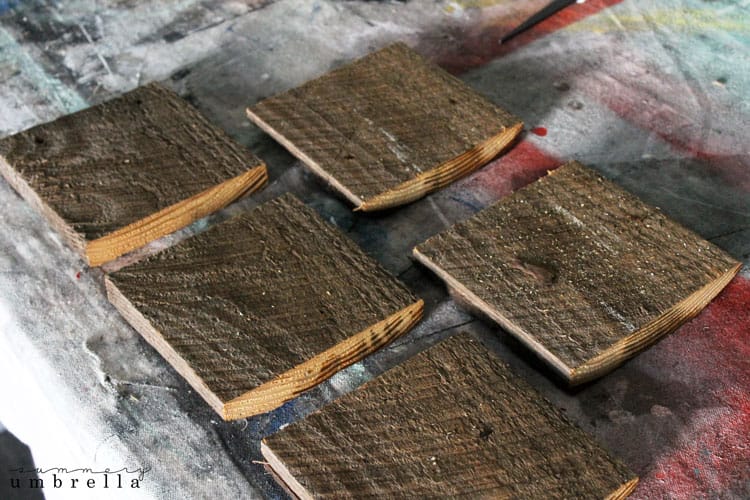
1. Cut Scrap Wood
First, I cut a few pieces of scrap wood that I had on hand into 6″ x 6″ squares. I used barn wood, but it’s not necessary. Just use whatever you have!
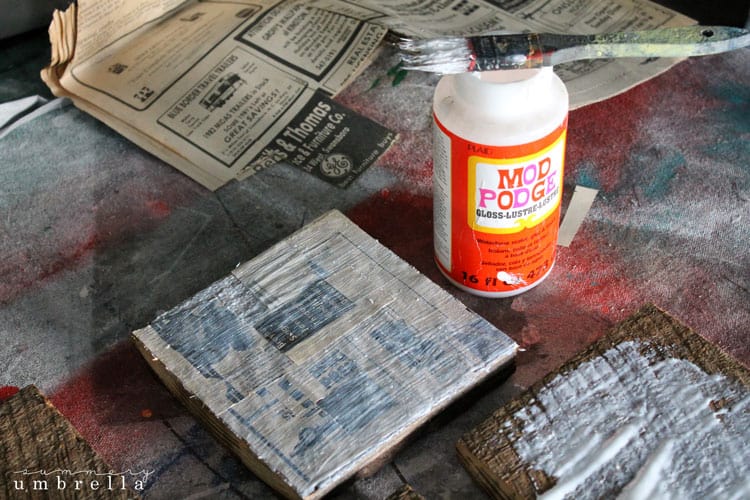
2. Glue Strips of Newspaper to the Boards
Next, using Mod Podge go ahead and glue strips of newspaper haphazardly to your boards. You don’t need to use any particular pattern. Just slap those babies on there. I like to put the glue on the board, stick the newspaper to it, and then add another layer of glue on top of it.
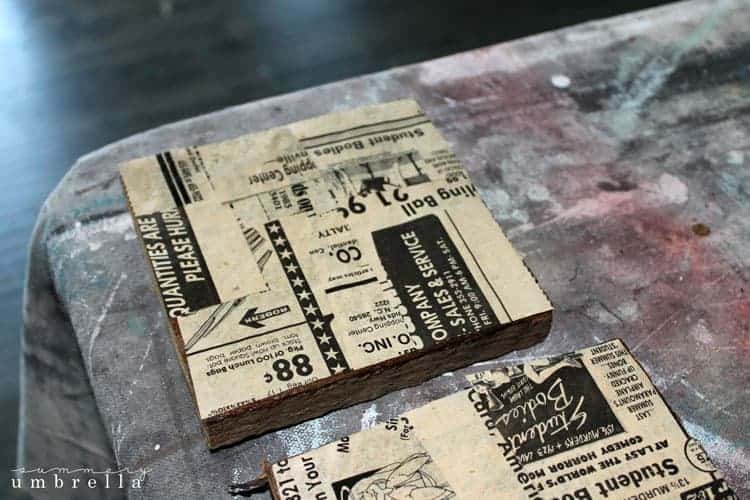
3. Let it Dry for a Few Hours
I let mine dry for a few hours, but that was mainly because I was multitasking. You should be fine with just 20-30 minutes of dry time though.
NOTE: It is not necessary to use the gloss Mod Podge. It was just what I had on hand. Matte would be perfectly fine as well.
After your sign has dried it’ll look something like the photo below.
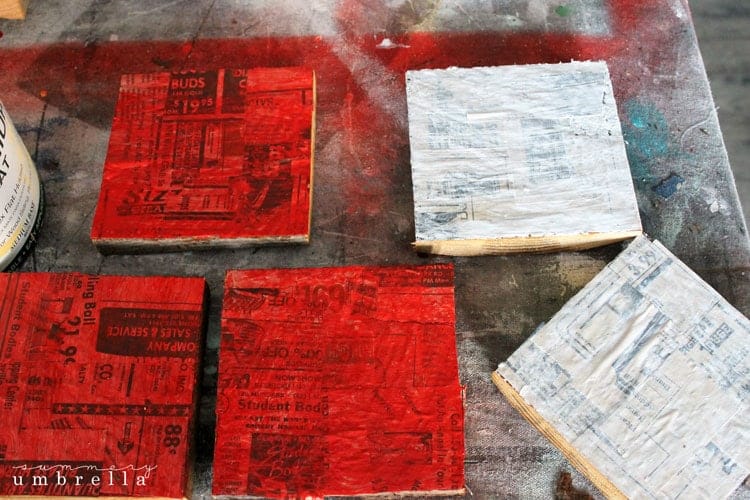
4. Paint the Wood Blocks
For this next step, I decided to do a video for you! Basically, it’ll show you exactly how to use a wash effect over your signs. This technique will allow your newspaper to still show through but give it just a little bit of color as well.
5. Add More Mod Podge and Let Dry Overnight
After you’ve painted your signs allow drying for an hour or so. Then, add a thin layer of Mod Podge to the top. Make sure to let them dry overnight at this point.
Tip: If using vinyl, let your signs “set” for a few hours first
Whenever I’m going to be using vinyl it is always a good idea to allow your signs to “set” for many hours before using the vinyl. I can’t tell you how many times I’ve tried to rush this step and ended up with ruined signs because the vinyl pulled the paint right off.
6. Print Out the Stencil
After they’ve dried it’s time to print out your stencil! Download this FREE Snowflake SVG stencil by signing up for my resource library above (aka. freebies galore!), and cut it out with your cutter of choice.
Mine? It’s gotta be my Silhouette Cameo. OBSESSED with it. I use it for everything. In fact, this is my second one!
Tip: How to use an SVG with a Silhouette Cameo
Just in case you’re unsure how to download an SVG file and put it into your Silhouette Cameo check out this tutorial I did previously in the year. Super helpful for sure!

7. Pull Out the Innards of the Snowflake and Paint
After you cut your stencil, pull out the “innards” of the snowflake, and place it onto your signs. It’s now time to paint!
Personally, I like to use an airbrush to paint all of my signs. However, I totally understand that not everyone has this particular tool, and you can definitely use spray paint or even a sponge and lightly dab paint onto your stencil.
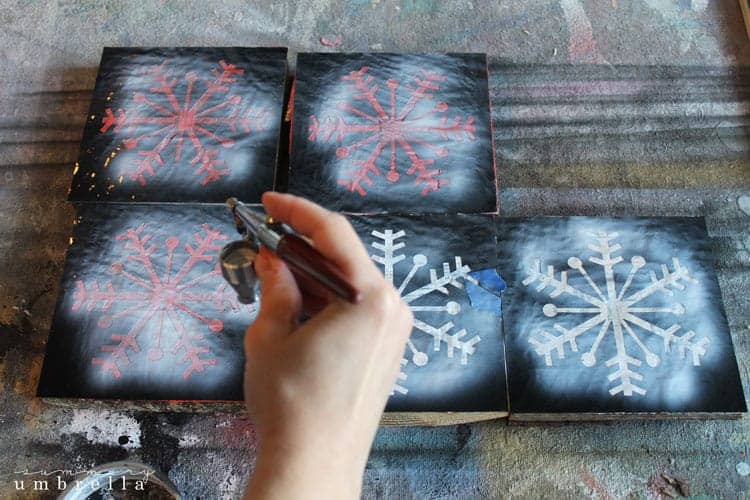
NOTE: Just remember with any of these methods: ALWAYS USE LIGHT AND MULTIPLE COATS. This is key!
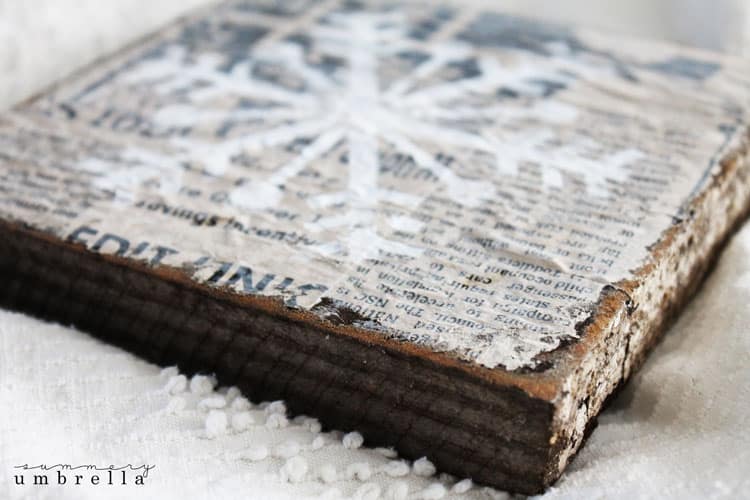
8. Pull off the Vinyl
Once you’re done painting and they have dried go ahead and pull your vinyl off.
I like to give a slightly distressed look to them at this point. I get out my handy dandy Ryobi Cordless Orbital Sander and lightly sand down all of the edges, and even over the top.
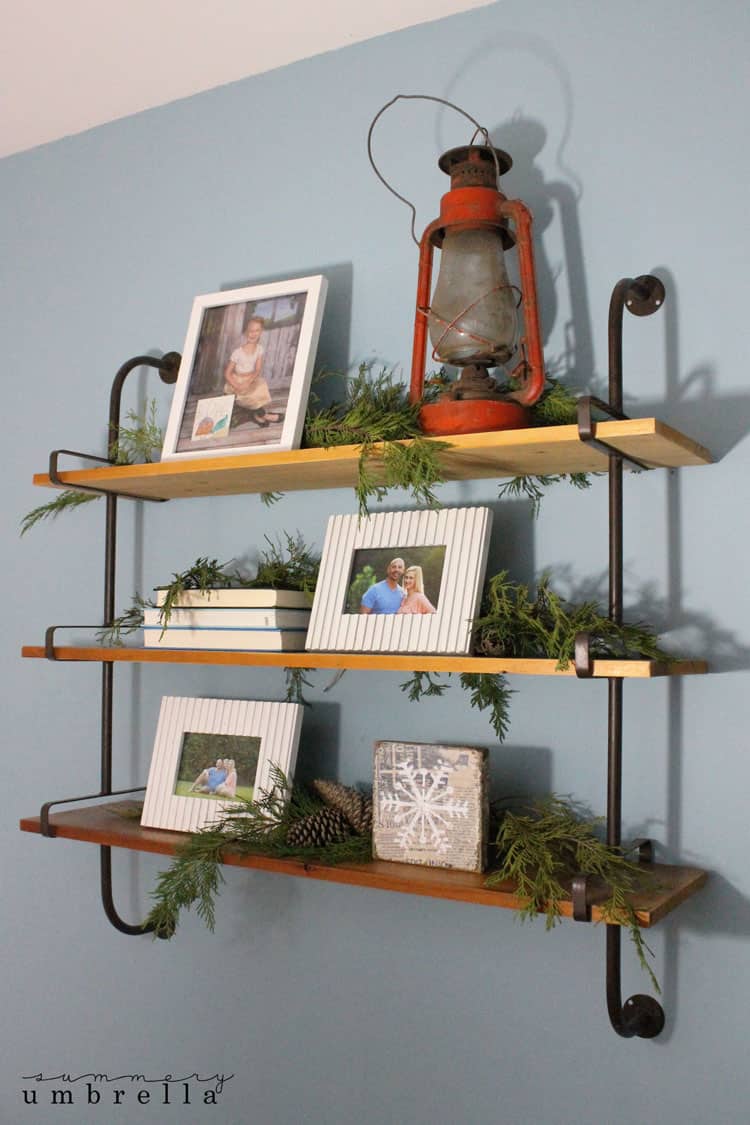
Display Your Wood Snowflake Wall Art
Then…. it’s time to display! 🙂 Show them off in your home and especially on social media! These are pretty easy and they turn out stunning.
I don’t know about you, but I just can’t get enough of seasonal decorating. I’m just not always sure about what to do after Christmas. This wood snowflake art fits the bill perfectly, but if you’re looking for even more ideas, check out these 50 Winter Decorating Ideas for after Christmas.
Psst! Want to keep the festive magic flowing? Hop over to my Seasonal Holiday Decor Projects page for a year-round celebration of creativity! From spooky Halloween hacks to merry Christmas miracles, and everything in between – it’s your one-stop shop for holiday inspiration that won’t break the bank.
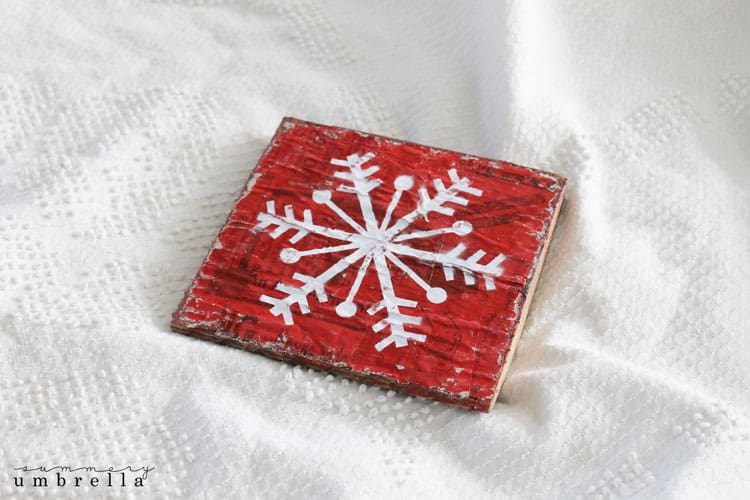
Didn’t this turn out gorgeous?! I just love the simplicity of this project, the easy-to-find supplies, and the vintage-style end result.
More of What You Love: Check Out These Recommended Posts!
- Bargain Bliss: Seasonal Decor That Won’t Break the Bank
- Festive Fusion: Mastering the Art of Year Round Holiday Decor
- 23 Swoon-Worthy Christmas Porch Decorations To Inspire
- Cozy & Charming: Craft Your Rustic Christmas Table Decor Magic!
Psstt… don’t forget to download this free SVG file by signing up for my resource library above!


Hello. What kind of airbrush do you use?
Hi Melodie! Thanks so much for stopping by. I use this particular one: http://amzn.to/2iBDhbn