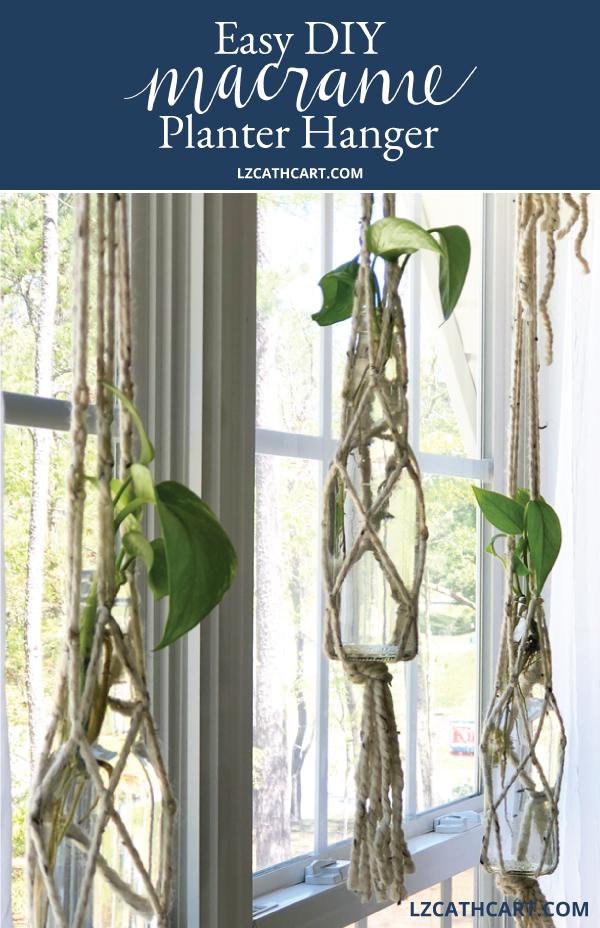
Create a Stunningly Easy DIY Macrame Plant Hanger for Your Home
Did you know that you can create your very own DIY Macrame Plant Hanger? Not only is it easy, but you can use everyday supplies as well!
I’m not sure when my love for plants started, but I’ve definitely become that typical plant lady. In fact, my daughter calls our house a “jungle”. Trust me, it’s nowhere nearrrr where I’d like it to be, but you know how kids are!
Are you the same way? Is your house jammed pack full of live and artificial plants?
One of my favorite ways to add color to my home is with plants. They come in a variety of colors, and they’re relatively low in cost.
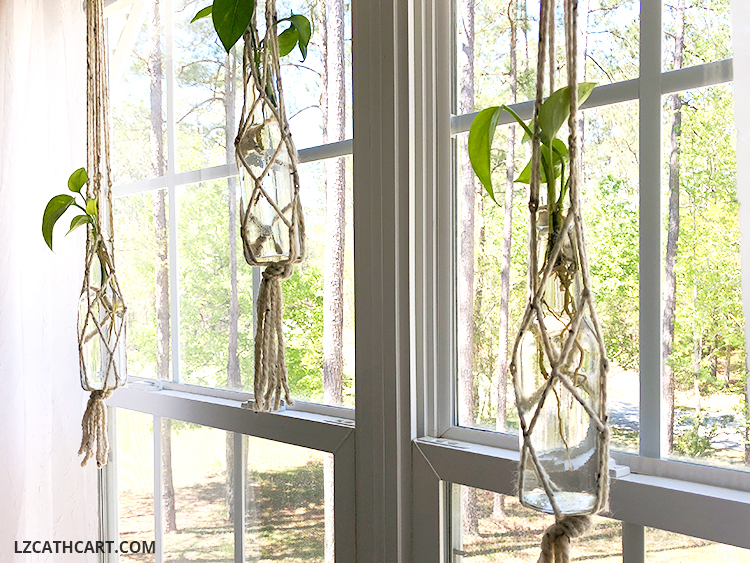
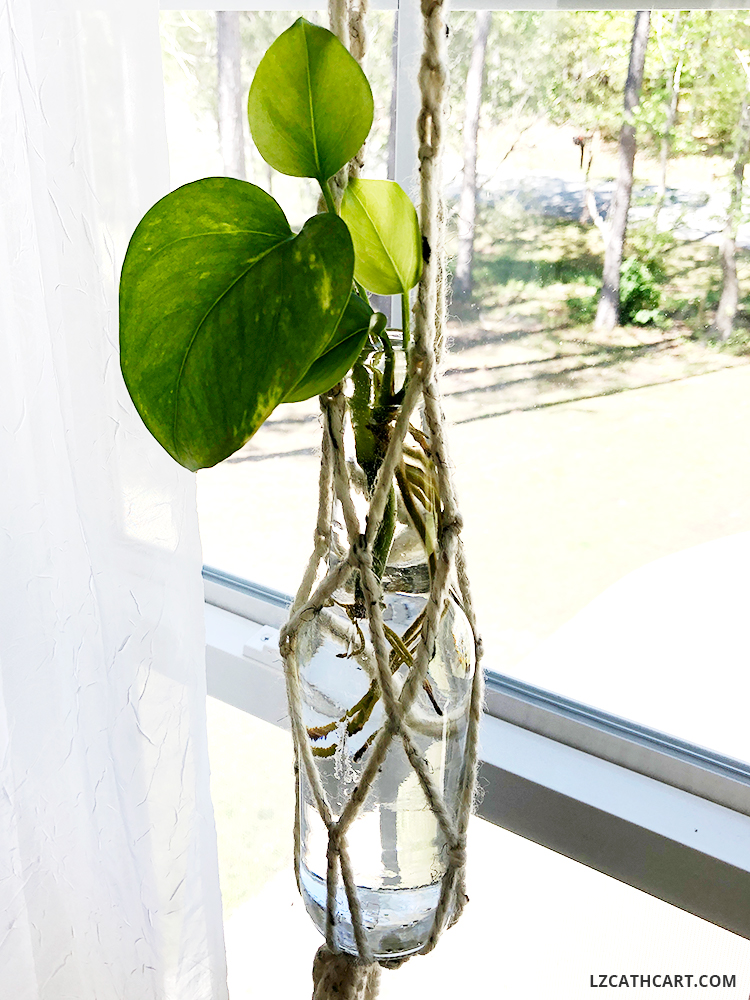
I don’t have much of a green thumb (even though I’m working on it!) so I look for plants that are super, low maintenance. Thankfully I have managed to propagate plants rather well and knew that my devil’s ivy would be the perfect fit for this project.
Create an Easy DIY Macrame Plant Hanger
You might be thinking that macrame is a little intimidating, but trust me, after you create your first one you’ll realize that it’s actually ridiculously easy! Plus, it kind of reminds me of braiding hair. A little tedious at first glance, but then it becomes fairly addicting!
Steps
1. Prepare your glass bottles. Remove the label from your glass bottle, and clean the inside and out with soap and water.
TIP: Use a clear beer or soda bottle in your recyclables. Save your money–repurpose!
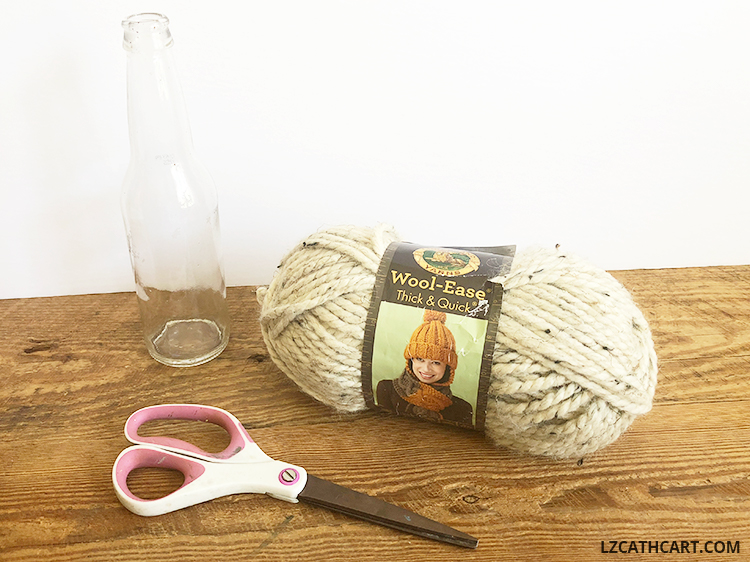
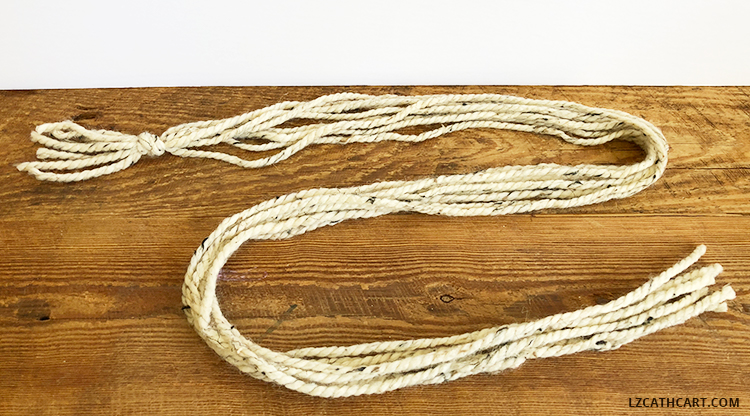
2. Measure out your yarn and tie them together.
You’ll want to measure out approximately 3 – 4 feet for eight pieces of yarn. I know this is very vague, but it really will depend on where you’ll be putting your macrame hanging planters. You might want to add varying lengths as I did or make them much longer than I’m suggesting.
Once you have them all cut, tie them together with a knot on one end.
3. Pull out two strands of yarn and make a square knot (right strand over left, then left strand over right) approximately two inches from your knot.
Then, take the next two strands and do the same thing. Repeat this process with the remaining strands.
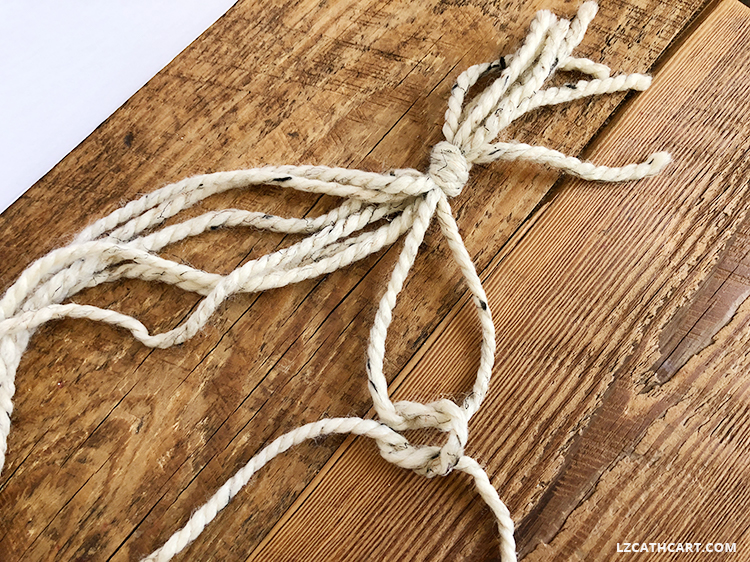
4. For this next step you’ll want to do exactly what you did in Step 3, BUT the two strands of yarn you’ll be using will be completely different (but next to each other) when you’re tying the knot.
Create this knot 2 inches from the previous knot. Repeat this step with the remaining sets of strands.
Create an Easy DIY Macrame Plant Hanger
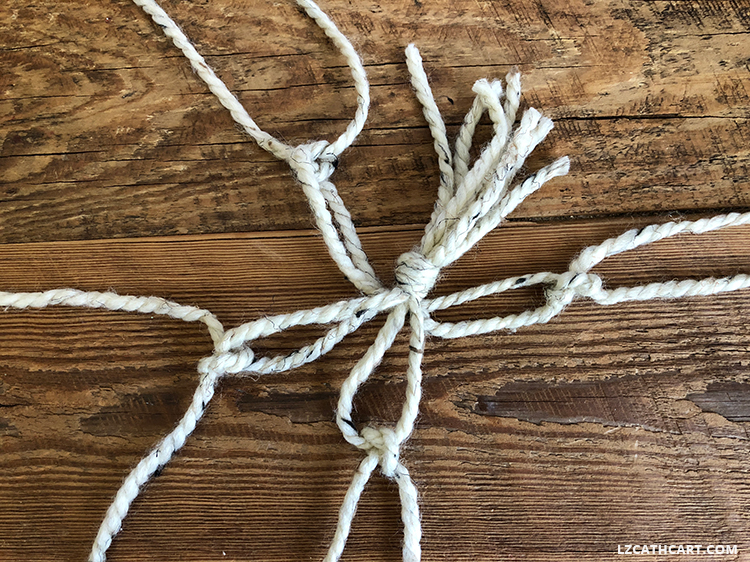
5. Go ahead and repeat Step 4 with alternate strands of yarn. Just like in Step 4, you’ll grab alternate strands of yarn (two each) to create your last row of square knots.
6. Now, repeat Step 5 with alternate strands of yarn.
7. Repeat Step 5 with alternate strands of yarn. Last time! Go ahead and repeat Step 5 just one more time with alternate strands of yarn.
8. Then, create an additional 8 knots.
Now, on each set of yarn strands (that you created from Step 7) create 8 knots approximately 6 inches above the last knot.
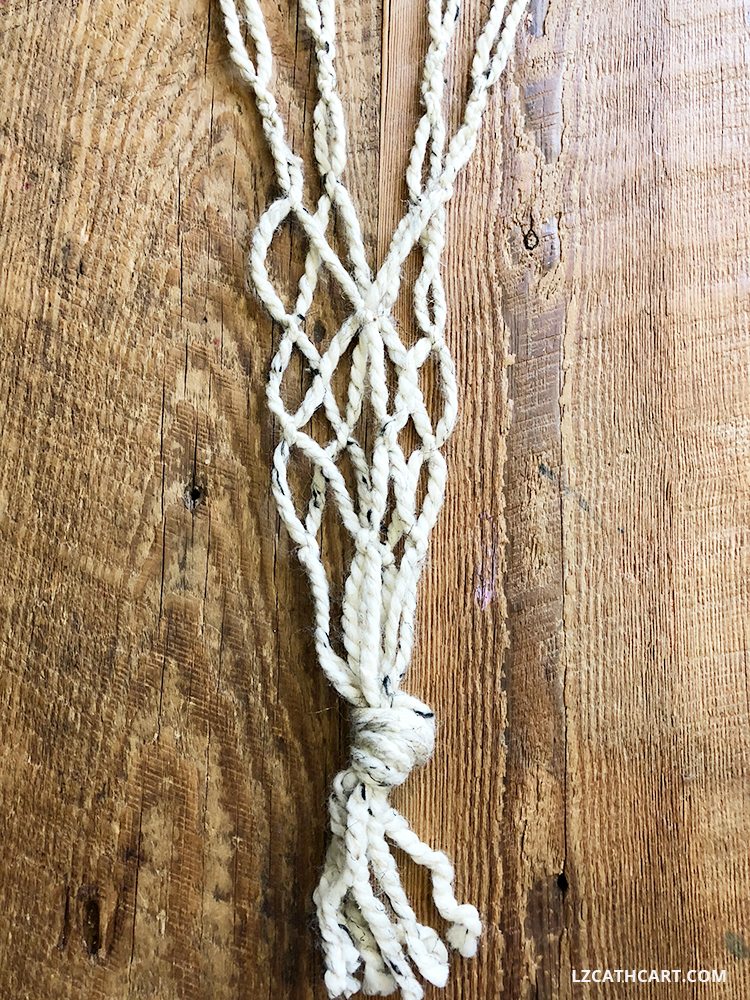
9. At the very end of your macrame plant hanger you’ll want to tie all your strands together but give yourself enough room for a tassel.
NOTE: As you can see below, I have varying sizes for my tassels. Change it up with a variety!
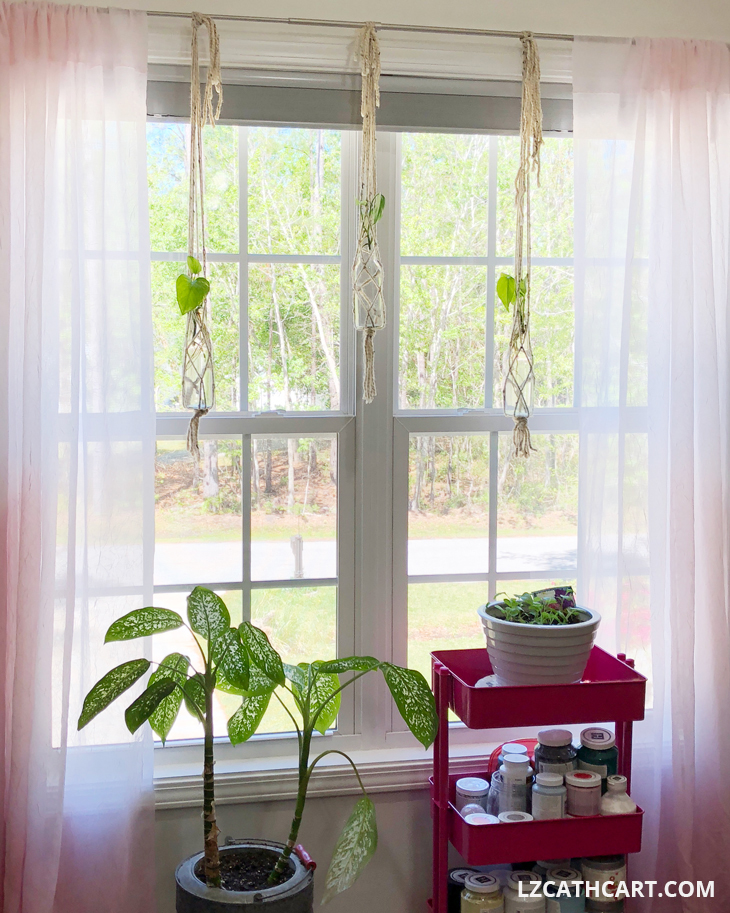
This project is super addicting once you create your first one. I’m not joking when I say that I have them all over my house.
Plus, you can really get creative with the type of plant container you use. For instance, tin cans, mason jars, cups, and more!
Wasn’t that easy?! I just love a good DIY project that’s also super simple. Don’t you?
If you loved this project then you’ll definitely want to browse some of my other DIY projects that are full of step-by-step tutorials as well as freebies galore! Can’t wait to see you again, and Happy Crafting!

Let’s be Social
This post was updated in April 2022.