Easy Vintage Dresser Makeover That Actually Lasts
Alright guys, let me tell you about my adventures in furniture painting! As someone who used to be a total neat freak, life with a creative 4-year-old has been… let’s call it an adjustment. But it led me to this amazing vintage dresser makeover that’s nearly child-proof. No joke!
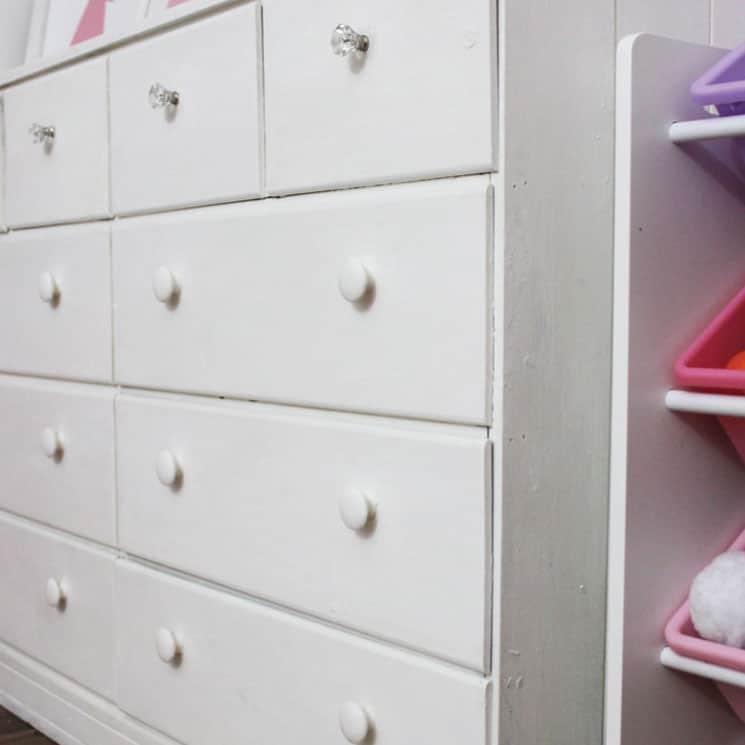
When Good Paint Goes Bad
Picture this: there I was, thinking I was so smart using regular wall paint on this gorgeous vintage dresser. You know what happened next, right? The paint started peeling faster than my sunburn after a beach day, and my little artist decided it was the perfect canvas for her… unique vision. We’re talking stickers, markers, and what I’m pretty sure was an entire art supply store!
The Game-Changing Paint Discovery
However, I finally found THE ONE – Fusion Mineral Paint in Lamp White! (Cue the heavenly choir!) This stuff is like magic in a can. I’m not even kidding – it’s specifically made for furniture and comes with a built-in topcoat. Where has this been all my DIY life?!
Why This Paint is Basically Superhero Paint
- Sticks like your toddler to their favorite stuffed animal
- Has a built-in topcoat (because who has time for extra steps?)
- Tough as nails – brings it on, art supplies!
- Covers like a dream in fewer coats
- Makes your piece look vintage-chic without the vintage problems

The Fun Part – Makeover Time!
Want to know the best part about this vintage dresser makeover? It’s ridiculously easy! Like, “why didn’t I do this sooner” easy. One pint of paint has lasted through multiple projects, which means more money for other fun DIY adventures (or, let’s be real, coffee).
Quick Prep Talk
No need to go crazy here! Just clean it well, and don’t stress about those peeling bits – they actually add character to the final look. How’s that for turning lemons into lemonade?

Making It Pretty (And Practical!)
After this vintage dresser makeover, I’m not even exaggerating when I say it transformed the whole room! It sits there looking all fancy next to my daughter’s rainbow rug and princess loft bed like it’s living its best fairy tale life.
Keeping It Looking Fabulous
- Keep those cleaning wipes handy (because life happens!)
- Pop in some cute drawer liners (organization for the win!)
- Add a pretty tray on top for all those “treasures”
- Try teaching kids about furniture respect (still a work in progress… send help! 😅)
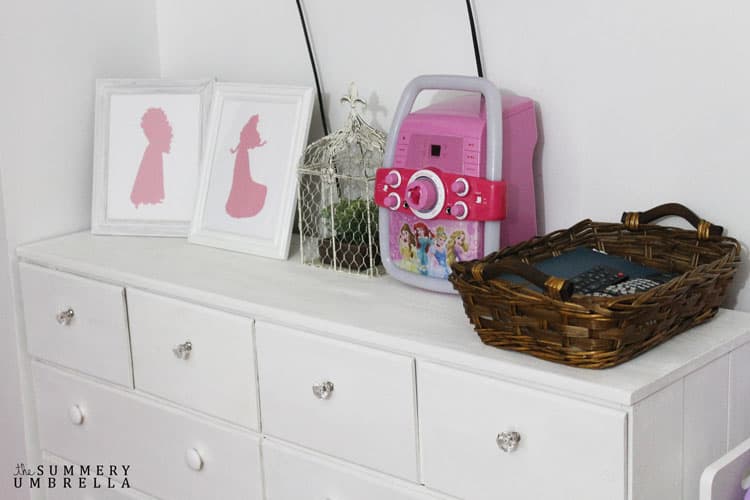
The Room Got Jealous
The dresser looked so good, the whole room demanded a glow-up! We went all out:
- Fresh paint that makes everything pop
- The most amazing toy organization (finally!)
- A swivel TV mount that’s basically magic
- The Great Toy Purge of 2018 (so liberating!)
Craving more budget-friendly home magic? Dive into my Indoor Decorating Projects treasure trove! It’s bursting with DIY inspiration and wallet-friendly wonders to transform your space. Click, explore, and let your creativity run wild!
What’s Next On My Paint List?
You guys, this vintage dresser makeover has created a monster – I’m now eyeing every piece of furniture in my house! There’s something incredibly satisfying about giving old pieces a new lease on life, especially when you know it’ll actually stay looking gorgeous.
Let me tell you – after months of sticky fingers, art projects gone wild, and daily use, this dresser still looks incredible. I’m not even being dramatic here – it really holds up!
Real talk: yes, good paint costs more upfront, but trust your DIY bestie here – it’s SO worth it! Instead of repainting every few months (been there, done that, got the paint-stained t-shirt), you can spend that time planning your next project. Or napping. Napping is good too!
Pro tip: Keep an eye out for vintage pieces at yard sales and thrift stores – they’re just waiting for their glow-up moment. And with the right paint, you can turn any sad dresser into a showstopper. Now if you’ll excuse me, I think I just spotted a coffee table that’s calling my name…!
More of What You Love: Check Out These Recommended Posts!
- Colors, Scents, and the Charm of Seasonal Indoor Decor
- The Art of Seasonal Vignettes: Style, Story, and Seasonal Charm
- Color Me Happy: The Power of Color Psychology in Home Decor
- Using Sensory Design to Create a Sensory Sanctuary All Year Long
- How to Paint Metal Patio Furniture So It Looks Like a Million Bucks


LZ, your daughter’s room is super cute!! The dresser looks great!! I’ll have to try out fusion paint. Thanks for the tip!! 🙂
Thank you, Keri! Slowly but surely it’s getting better 🙂 You will absolutely LOVE Fusion. Definitely a MUST try!