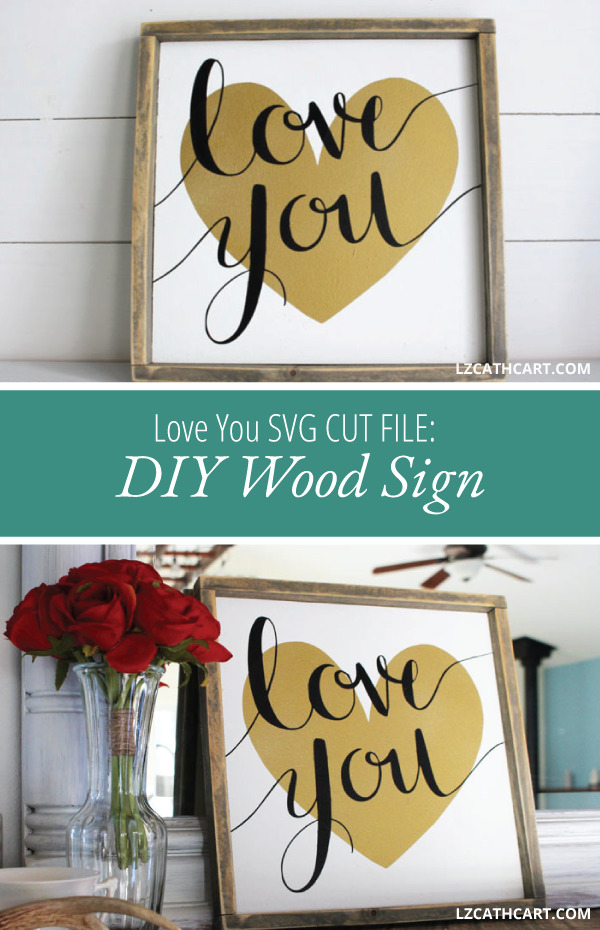
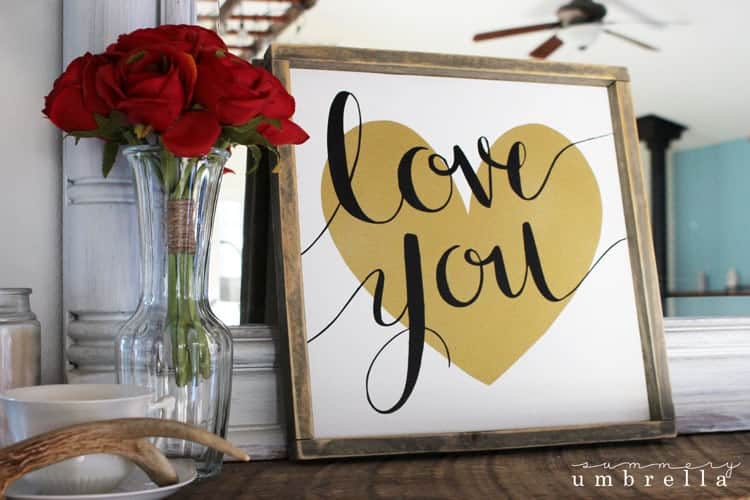
DIY Love You Sign and Printable!
Looking for an easy project for your home decor? Try this DIY Love You Sign that is not only perfect for your home and all year round, but doubles as a gorgeous gift as well! Plus, SVG Cut File Included.
Hello, hello, hello!
I hope your week has been treating you well. Today, I have something extra special in store for you! I’ve been dabbling (and attempting) to get better with my video tutorials and this one… is my best to date. This particular design was created for the upcoming Valentine’s Day holiday, and is one of my own hand lettered creations! **PERSONAL USE ONLY**
Woo woo! Slowly, but surely I’m figuring it all out. BUT, just to get this out of the way, I have skipped over a few parts.
1.) How to download, input, and cut out your stencil
2.) Adding paint and adjusting anything on your airbrush.
However, I’ll definitely go more in-depth on these at a later time. Just wanted to give you heads up first! So, let’s get started.
DIY Love You Sign
Materials
- Vinyl (this is my favorite brand!!)
- Transfer Tape
- Squeegee (a sturdy credit card will work great too)
- Cutting Machine (Silhouette or Cricut — your choice!)
- 1 – sign (to repurpose OR a pre-painted 1/2″ cabinet grade plywood (12”x12”)
- White Interior Paint
- Paint Brush
- Black Spray Paint (or Airbrush and Lacquer Paint)
Want this freebie? Sign up for access to my resource library below.
Steps
The above video goes more in-depth, but here are some basic steps on how to create a sign with a vinyl stencil.
1. First, download the template at the resource library above (aka. freebies galore!!).
2. Using your Silhouette CAMEO (or your preferred cutting machine!) cut out the Love You SVG Template with the vinyl on your mat.
3. Remove the vinyl from your mat, and apply your transfer tape.
4. Carefully take out the vinyl pieces of your design that you will be painting.
5. Once you have removed all of your vinyl pieces it’s now time to apply to your prepped sign board. Line up your vinyl with your board so it will be applied evenly, and using your squeegee firmly push it down.
6. Next, slowly remove your transfer tape so that only your vinyl is left on your board.
7. In a ventilated area, evenly apply a light coat of spray paint (or lacquer paint and your airbrush) to your vinyl. Allow it to dry and then apply your next layer. Repeat this step until your desired color has been achieved.
8. Once your paint has completely dried remove your vinyl.
TIP: If you’re having a hard time pulling up small pieces of the vinyl Silhouette does offer a handy tool kit for removing vinyl.
9. Touch up any areas with paint that need your attention.
If you loved this project then you’ll definitely want to browse some of my other Wood Signs that are full of step-by-step tutorials as well as freebies galore! Can’t wait to see you again, and Happy Crafting! – LZ
Psstt… don’t forget to download this free SVG file by signing up for my resource library above!
Let’s be Social
- Instagram @thesummeryumbrella
- Facebook @thesummeryumbrella
- Pinterest summeryumbrella
- YouTube @thesummeryumbrella
Discover Hidden Gems: Explore Our Art Prints Collection
-

 Flower Vases Art Print$11.00 – $22.00
 -
 Pastel Stars Art Print$18.00 – $22.00
 -

 Where Flowers Bloom Art Print$18.00 – $22.00

24 Comments