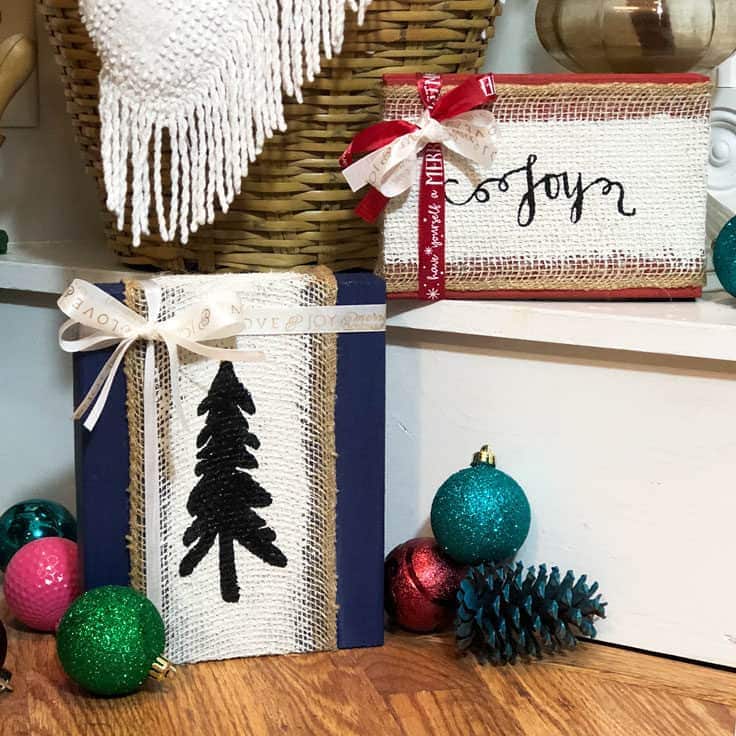
Burlap Bliss: Christmas Signs That Ho-Ho-Hold the Charm!
Discover the charm of burlap Christmas signs—festive flair with rustic allure. Elevate your holiday decor effortlessly.
I’m a planner by nature. I love to calculate and organize what I’ll need, how it’ll happen, when it’ll need to happen, where it’ll happen… and you get the point.
However, it never fails. Every Christmas, I just seem to need a few more gifts for friends, neighbors, co-workers, etc. It’s a little irksome to be completely honest!
Want this freebie? Sign up for access to my resource library below.
But, you want to know my secret?! You’ve probably already guessed it, and you’re absolutely right. I love to create extra handmade signs for just-in-case gifts! They’re creative, handmade, and from the heart. Quite frankly, they’re perfect.
How to Create Your Own Burlap Christmas Signs
Now, let’s get this party started with some DIY Burlap Christmas Signs!
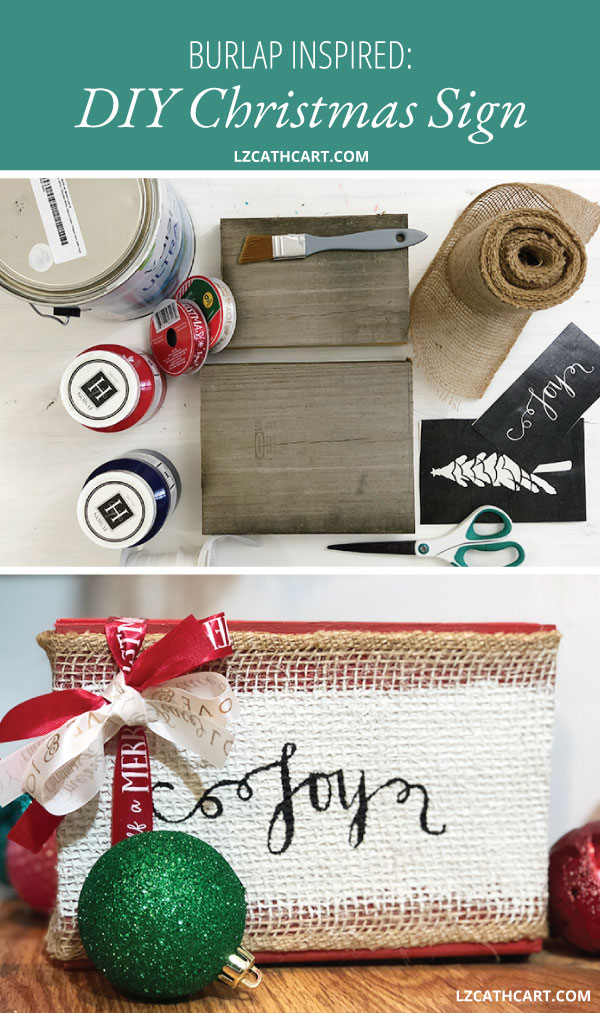
Materials
- Vinyl (this is my favorite brand!!)
- Transfer Tape
- Squeegee (a sturdy credit card will work great too)
- Cutting Machine (Silhouette or Cricut — your choice!)
- 1–Piece of scrap wood (7″ x 9″)
- 1–Piece of scrap wood (5.5″ x 8″)
- Burlap
- Decorative ribbon
- Black paint (furniture paint, latex, or acrylic)
- Red paint (furniture paint, latex, or acrylic)
- Blue paint (furniture paint, latex, or acrylic)
- White paint (latex or acrylic paint)
- Heavy duty staple gun OR super glue
- Paint brushes
Steps:
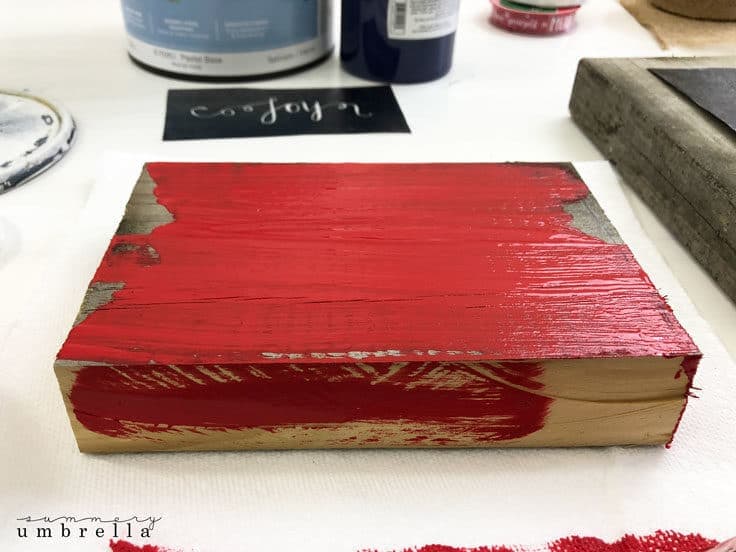
1. Whenever you’re using wood (especially scrap wood!) it’s essential to clean it off to ensure that your paint will adhere to it. You can do this two ways:
a.) with a rough brush or old washcloth OR
b.) sanding down the surface
Ultimately, which method you use will depend on your desired look for the wood. For example, if you want to keep a lot of that gorgeous wood texture you’ll want to use a rough brush.
Note: Please feel free to use any type of wood for this project. I literally used the first piece of wood I found in my garage!
After you’ve cleaned off your wood it’s time to paint. Apply an even coat of red paint to your 5.5″ x 8″ piece of scrap wood, and the blue paint to your 7″ x 9″ piece.
I absolutely love, love, loveeee Fusion Mineral Paint, but please feel free to use any paint you have on hand. I only used one coat on my blocks, but use your own color/thickness preferences for the number of paint coats you use.
How to Create Your Own Burlap Christmas Signs
2. Your paint might need some time to dry (depending on the number of layers you used) so now is the perfect time to download the templated for this project from my resource library above (aka. freebies galore!!).

3. Using your Silhouette CAMEO, Cricut, or whatever you prefer, go ahead and cut out the templates using your vinyl and mat.

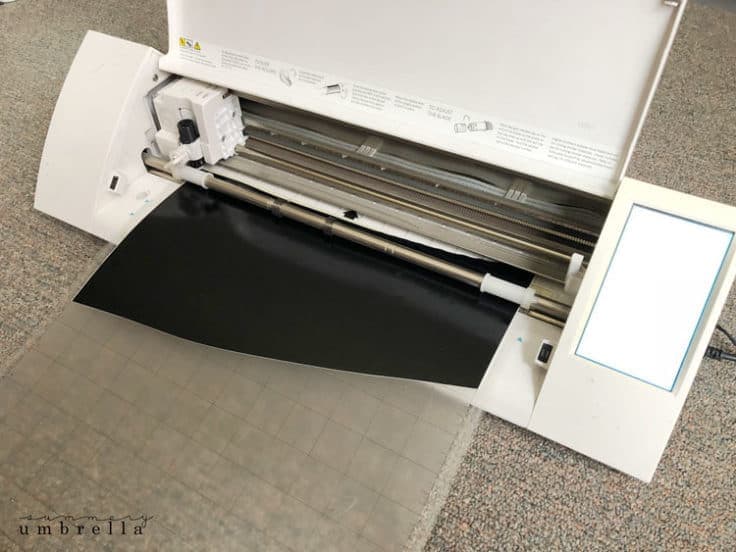
4. Now that the designs have been cut out, remove the vinyl from your mat, and apply your transfer tape. I highly recommend using your squeegee to apply your transfer tape to the vinyl to get a nice firm grip.
After it’s been applied remove your backing from your vinyl, and pull out the pieces of your design that you will no longer need.
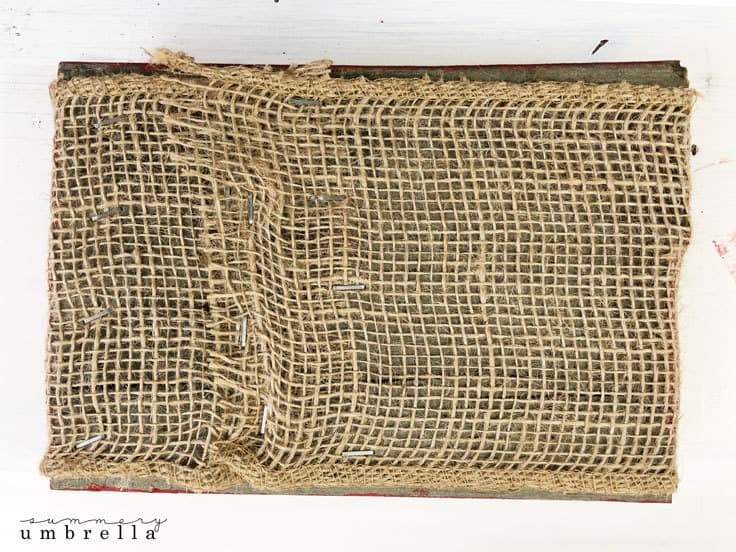
5. In this next step we’re going to apply the burlap to your wood blocks. Make sure to get a snug fit, and then staple or glue it to the backside of your wood.
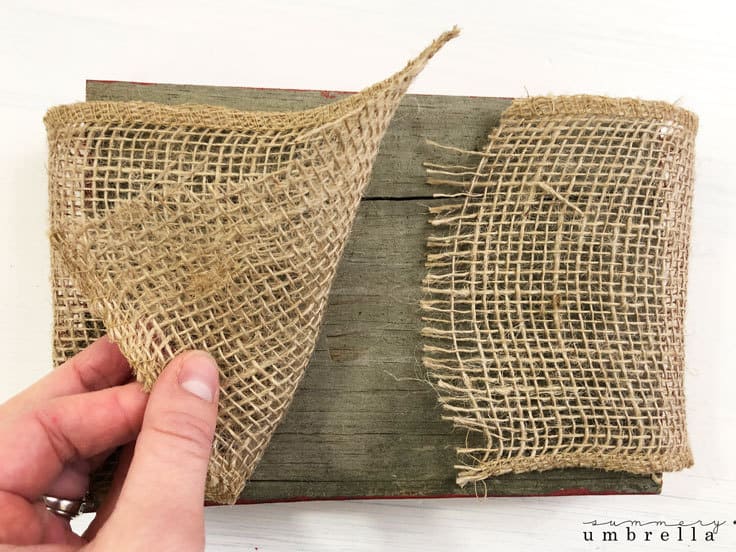
NOTE: If you’re using the super glue method try using rubber bands to hold your burlap in place while it dries.
DIY Burlap Christmas Signs for Your Home
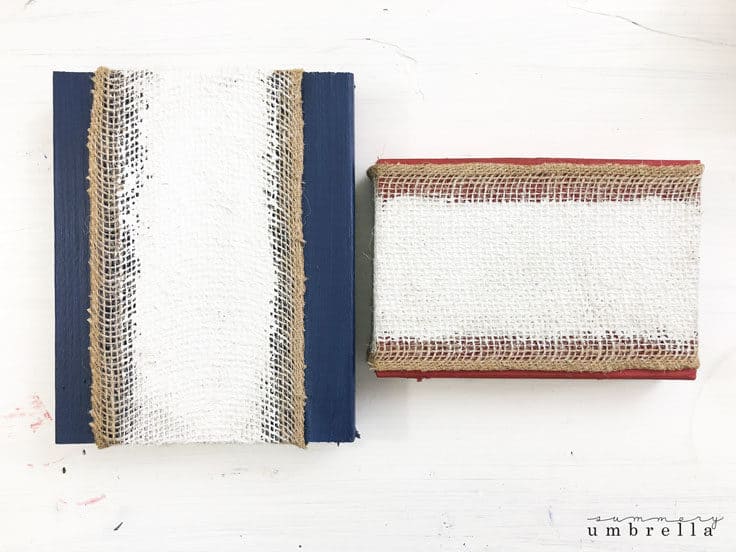
6. Flip your signs back to the front side and apply a coat of white paint down the center of your burlap.
Short on time? Use a blow dryer to speed up your paint drying time.
7. Once your white paint has dried it is time to apply the template designs.
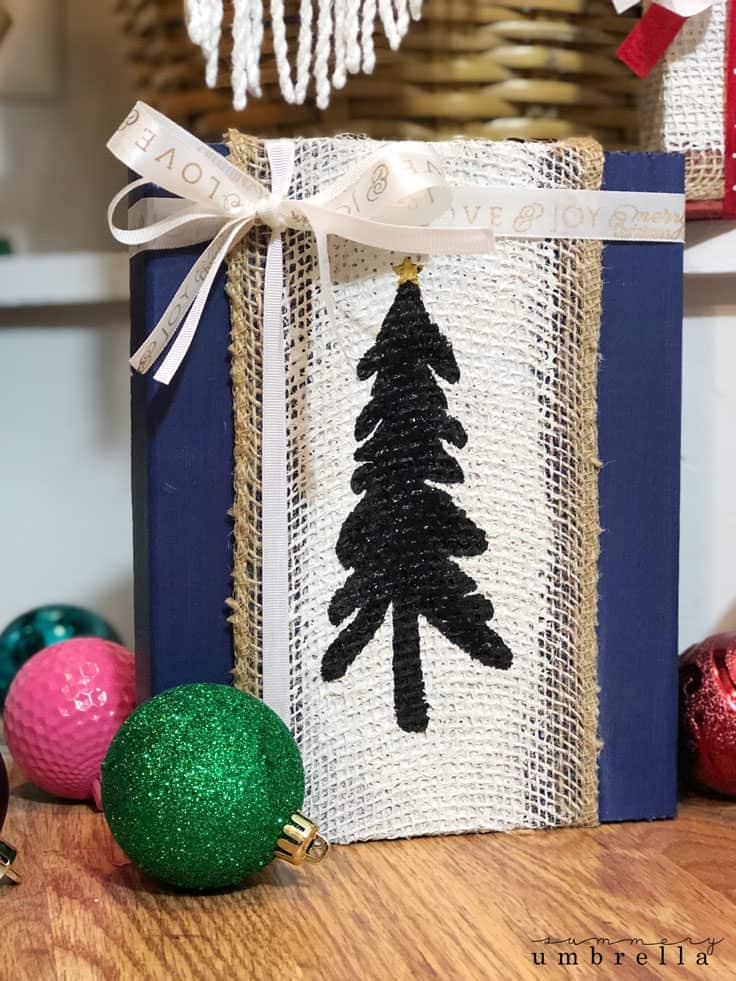
Apply the Joy design horizontally to your red sign, and then the Christmas tree to your blue sign vertically.
Ensure that you measure and line up your vinyl evenly on your sign so it goes on correctly, and then using your squeegee firmly push down.
8. Then, remove your transfer tape so that only your vinyl is on your signs.
9. Can you believe you’re almost done?! All that is left is to paint the inside of your template design. I’m just using a paintbrush to color in mine, but a paint pen could definitely work as well.
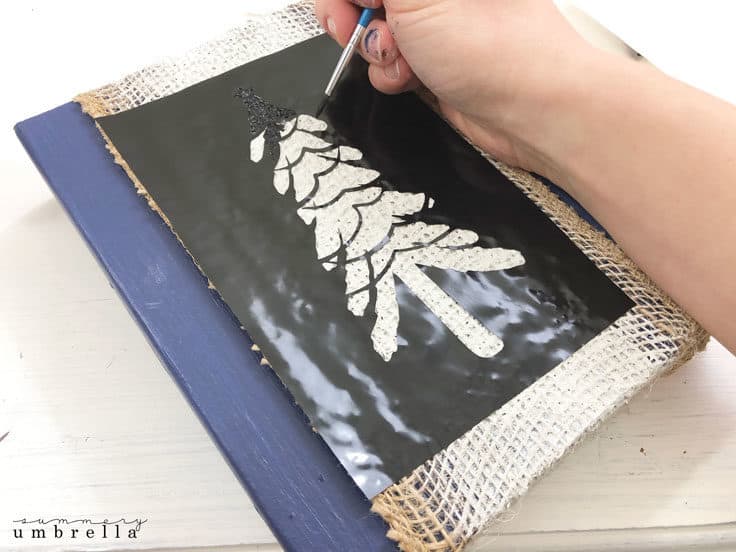
NOTE: You’ll probably need to add a few layers to get your design to look completed. The burlap is bumpy so keep that in mind while you are painting all of the little cracks and crevices within the design.
DIY Burlap Christmas Signs for Your Rustic Home
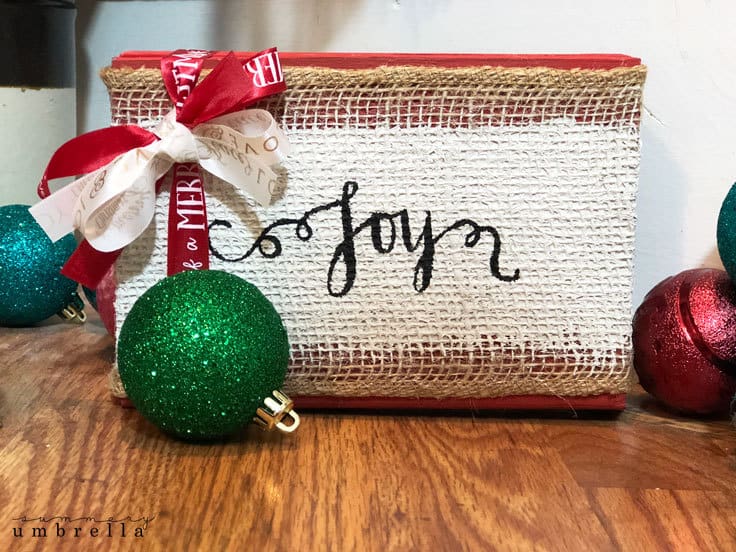
10. Yay!! This is the best part. The final touches!! You can now add twine, colored ribbon, small ornaments, glitter, whatever. Glam your DIY Burlap Christmas Sign up the way you want to see it displayed in your home.
More of What You Love: Check Out These Recommended Posts!
- Cozy & Cheerful: Crafting a Rustic Christmas Front Porch Wonderland
- 25 Rustic DIY Christmas Decorations You’ll Love to Create
- Poinsettia Magic: Crafting the Perfect Christmas Table Centerpiece
- Crafting Cheer: How to Create DIY Christmas Ornaments Out of Wood Signs
Wasn’t that fun and easy? It’s definitely something a little different than the same ol’ Christmas signs you always see ANDDDD not only are they customizable, but also serve as gorgeous decor in your home or a gift.
If you loved this project then you’ll definitely want to browse some of my other Christmas Projects that are full of step-by-step tutorials as well as freebies galore!
Can’t wait to see you again, and Happy Crafting!

Psstt… don’t forget to download this free SVG file by signing up for my resource library above!
Let’s be Social
- Instagram @thesummeryumbrella
- Facebook @thesummeryumbrella
- Pinterest summeryumbrella
- YouTube @thesummeryumbrella


That’s gorgeous, you amaze me with your creativity, So stylish! Thank you for this interesting post and amazing pics.
Hi and thank you, Alina!! Truly appreciate your sweet words 🙂