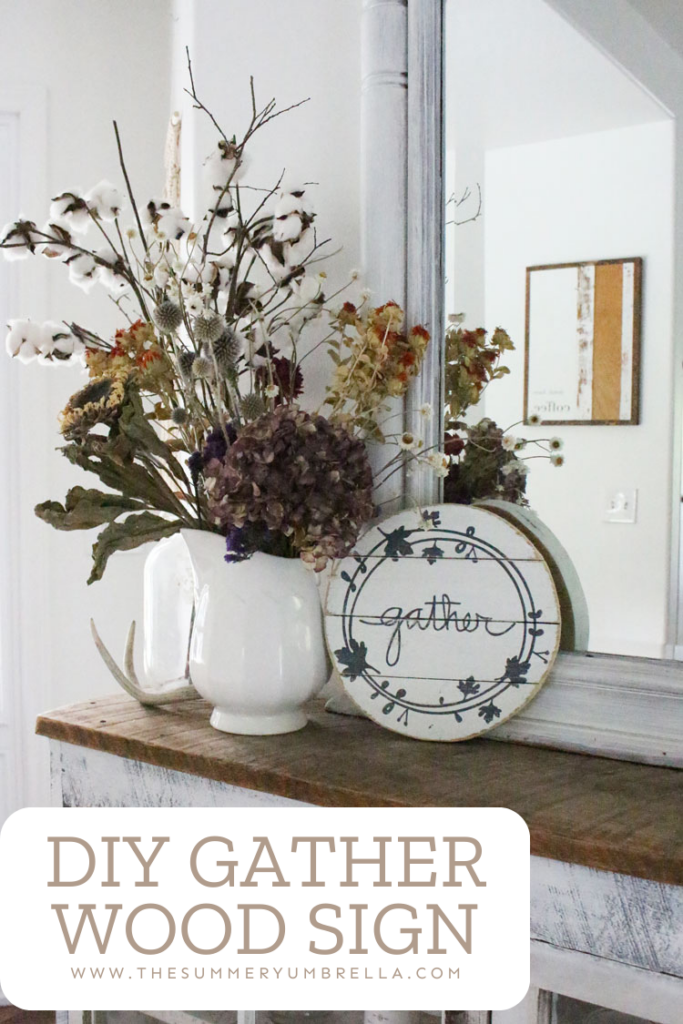
How to Create Your Very Own DIY Gather Fall Sign
Embrace the season’s warmth with our step-by-step tutorial, DIY Gather Fall Sign guide, crafting coziness for your home this autumn.
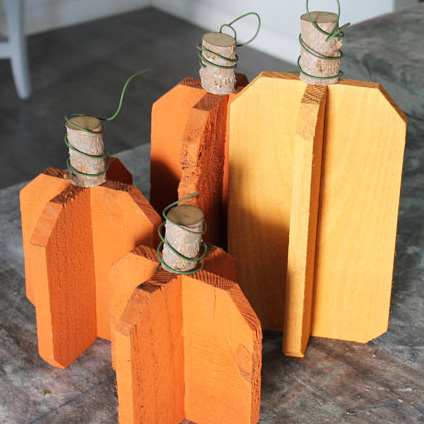
As the air turns crisp and the leaves don their fiery hues, it’s time to embrace the cozy charm of autumn. What better way to welcome this delightful season than by crafting your very own rustic fall wreath? Grab your DIY spirit and a few simple supplies, and let’s embark on a crafting adventure that’s both fun and rewarding.
Gather Your Supplies
Before we jump into the creative process, let’s make sure we have everything we need:
- 2 pieces of fence panel (each 12″ in length)
- 1/2″ plywood piece (approximately 12″x12″)
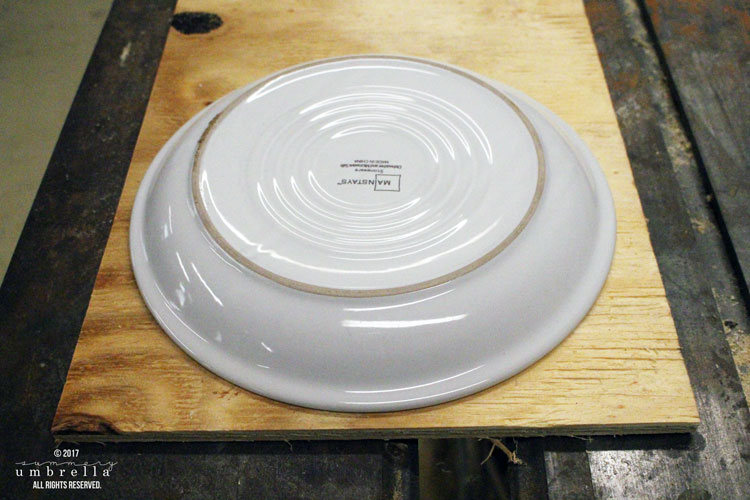
- 1 plate (for tracing a circle)
- Wood glue
- Nail gun
- Jigsaw or bandsaw
- Silhouette CAMEO or Cricut and mat
- Your free “Gather” design (sign up for our newsletter to get it!)
- Vinyl
- Transfer Tape
- Squeegee (or even a credit card)
- Spray paint (or airbrush and lacquer paint)
Note: To download your free “Gather” tea towel design, simply sign up for our newsletter below and let the creativity flow. Cheers to crafting and gathering in style!
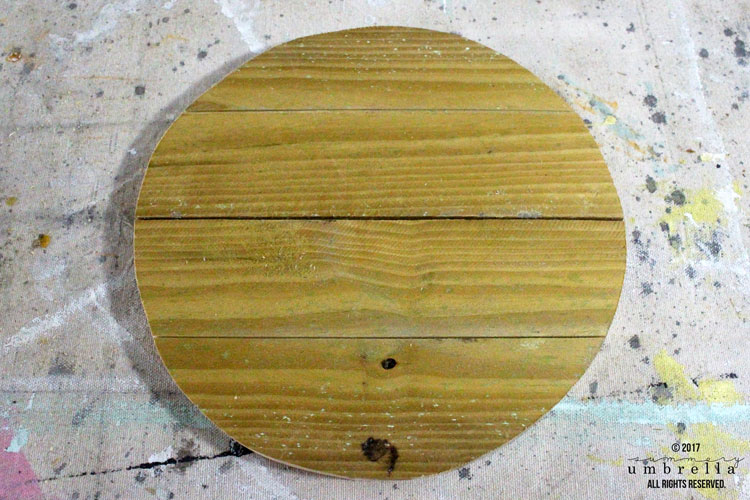
Create Your Sign Base
- Begin by using a plate or any circular object to trace a circle on your plywood piece.
- Carefully cut out your circular base using a bandsaw or jigsaw.
- Now, take your two pieces of fence panel and lay them on a flat surface.
- Place your plywood circle on top of the fence panels, ensuring it’s centered.
- Apply wood glue evenly to your circle and then secure the fence panels in place by nailing them.
- Finally, trim the fence panel pieces to match the shape of your plywood circle.
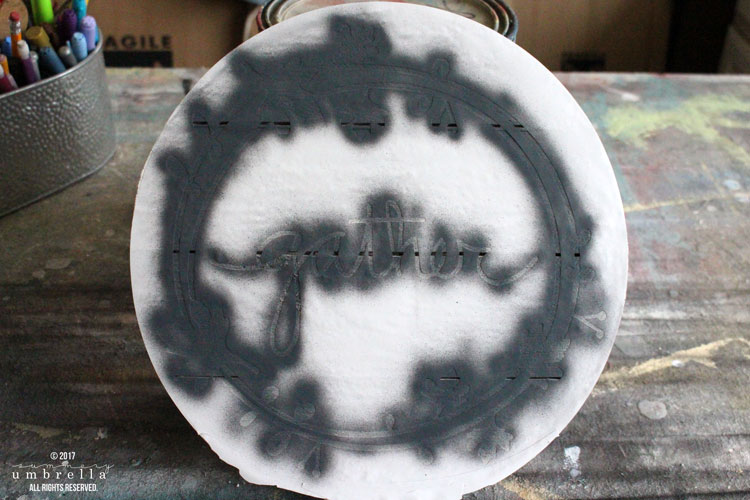
Prep and Paint
- Start by giving your circular fall sign a fresh coat of white paint. A satin interior paint is a great choice when using vinyl, as it provides a smooth surface for adhering to the stencil.
Design and Stencil
- Now comes the fun part: adding your fall sign quote! To achieve a perfect stencil application, remember to use several light layers of paint to prevent bleeding.
- Utilize your Silhouette CAMEO to cut out the project templates provided with vinyl on your mat.
- Carefully remove the vinyl from your mat and apply transfer tape.
- Remove the backing from your vinyl and extract the vinyl pieces of your design that you’ll be painting.
- Apply your vinyl stencil to your prepped sign board, ensuring even alignment.
- Firmly press down with a squeegee to secure the vinyl.
- Gradually remove the transfer tape, leaving only the vinyl stencil on your board.

Add Color
In a well-ventilated area, apply a light coat of spray paint (or use lacquer paint with an airbrush) to your vinyl stencil. Allow it to dry and then apply subsequent light layers as needed until you achieve your desired color depth.
Reveal Your Design
- Once your paint has thoroughly dried, it’s time to unveil your design. Gently remove the vinyl. If you encounter any difficulty with small vinyl pieces, consider using Silhouette’s handy vinyl removal tool kit.
Need a visual? Check out my fall sign video tutorial below!
More of What You Love: Check Out These Recommended Posts!
- DIY Trust Your Heart Sign
- 100 DIY Signs You Can Create
- Fall Decor Ideas
- How to Use Stamps to Create a Sign
- DIY Fairy Tale Signs
- DIY Snowflake Sign
Distressed Beauty
- To give your rustic fall wreath that charming, distressed look, use a sander to sand down the edges.
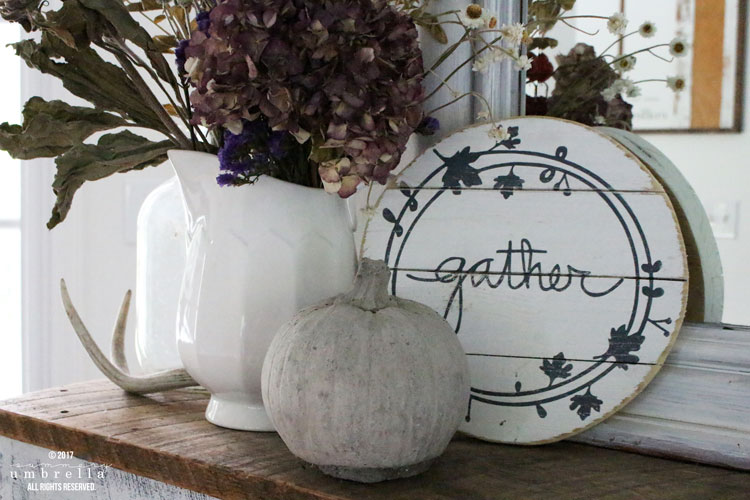
Creating your own rustic fall wreath is not just about crafting decor; it’s about infusing your home with the spirit of the season and the warmth of your heart. It’s a craft that combines creativity, nature, and a dash of humor, making it an unforgettable experience.
So, gather your supplies, unleash your inner artist, and craft a wreath that not only welcomes fall but also celebrates the joys of crafting. Remember, it’s not about perfection; it’s about the journey, the laughter, and the memories you create along the way.
As a bonus, check out the video and photos in this post for a step-by-step visual guide to creating your own rustic fall wreath. It’s like having a crafting buddy right by your side!
Happy crafting, my fellow artisans of coziness!

Psttt… looking for other amazing craft posts? We have soooo many options on our Crafts page.
Let’s be Social
- Instagram @thesummeryumbrella
- Facebook @thesummeryumbrella
- Pinterest summeryumbrella
- YouTube @thesummeryumbrella
- Instagram @thesummeryumbrella
- Facebook @thesummeryumbrella
- Pinterest summeryumbrella
- YouTube @thesummeryumbrella