Outdoor Living Space: Creative Tips for Updating Your Deck
Do you plan on updating your deck this spring or summer? Check out these 5 quick steps that’ll definitely help you accomplish a beautiful deck that you’ll always love!

Updating your deck is one of those tasks that can totally change the entire look of your home. Not to mention, if you have one in the front of your home (like me!) it can either add or take away from the appeal of your house.
Before, our deck just took, took, took! It wasn’t pretty to look at, it creaked and leaned in places, but now, it shines, it shimmers and it speaks kindly when we walk by.
5 Quick Steps for Updating Your Deck
Let me walk you through these five steps my husband and I took in order to bring back life to both our front and back decks.
Step 1: Assess the problems
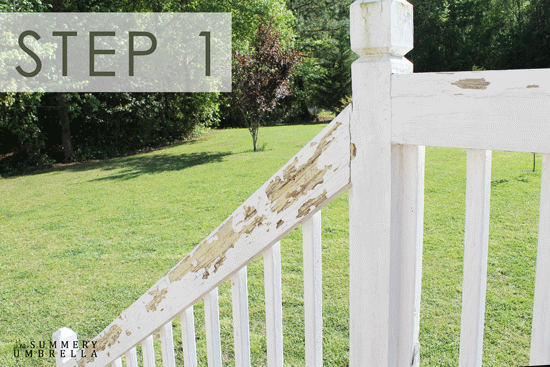
First things first, you’ll need to assess the shape of your deck. Determine if you’ll need to do the following:
- replace boards–if so, how many?
- caulk to fill in cracks
- buy deck paint (or stain if you’re taking this route) and how much
- scrub brush for cleaning
- cleaner to clean your deck
- sandpaper for your sander
- a scraper to remove old paint
- then of course, rollers, brushes, and the like to apply your deck paint
Mike and I decided to do both our front and back decks at the same time. After having done this I wish we had done each on separate weekends. I’ll explain more in just a second!
Our actual deck portion wasn’t even in that horrible of shape, but both staircases were pretty horrendous!
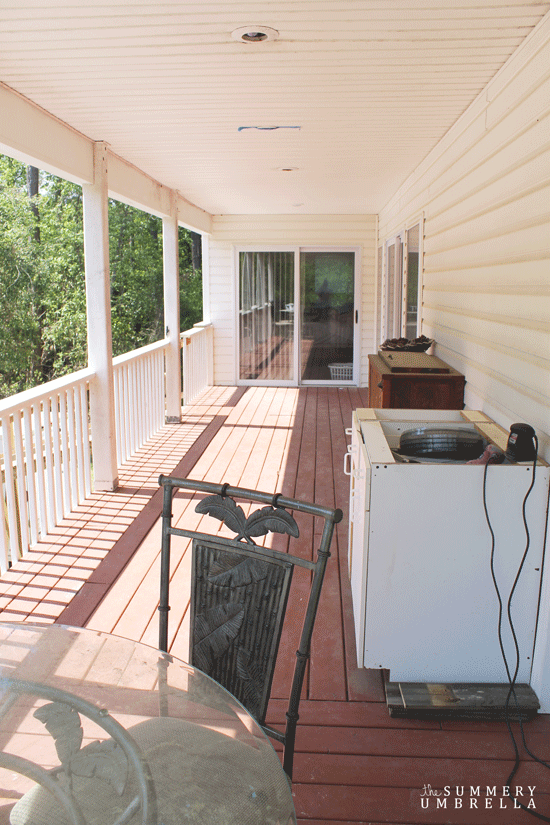
These next three pictures are our back deck. It’s a giant L-shape, and I’ll be honest. It’s a hot mess. I’ve been using it for all of my projects until the new studio is finished, and we’ve all been really hard on it.


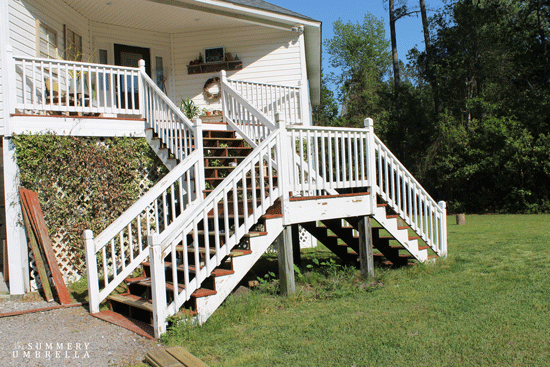
And here are a few of the front deck.

Step 2: Replace boards and stability issues
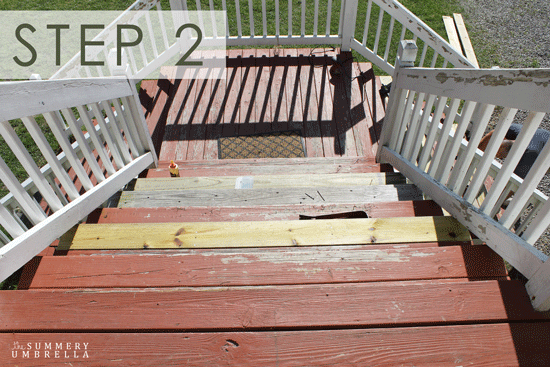
Ok, so you’ve determined the damage and you’ve bought your necessary supplies. Good on ya mate! Now, is the fun part. Er… well, I don’t know about fun, but this is when it all goes down y’all.
Wait for it…. pause for effect… now, you get to replace the boards and fix any stability and railings issues you might be having.
Step 3: Sanding
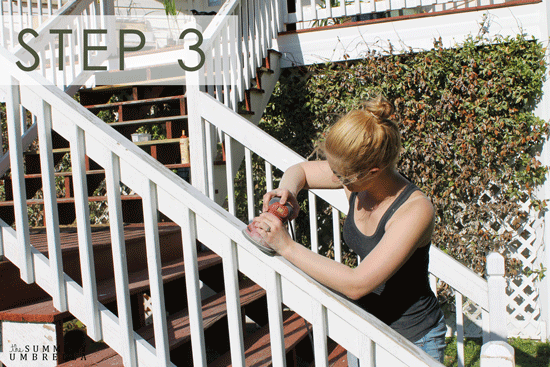
Next, get your sand on!
There are a variety of ways you can actually do this step. Originally I tried just scraping the paint off where it was chipping and flaking, but the damage was too great. Our front deck will need to be replaced within the next 5 years so we decided to do our best, but we’re not going to kill ourselves removing every single flake, chip, or patch of old paint.
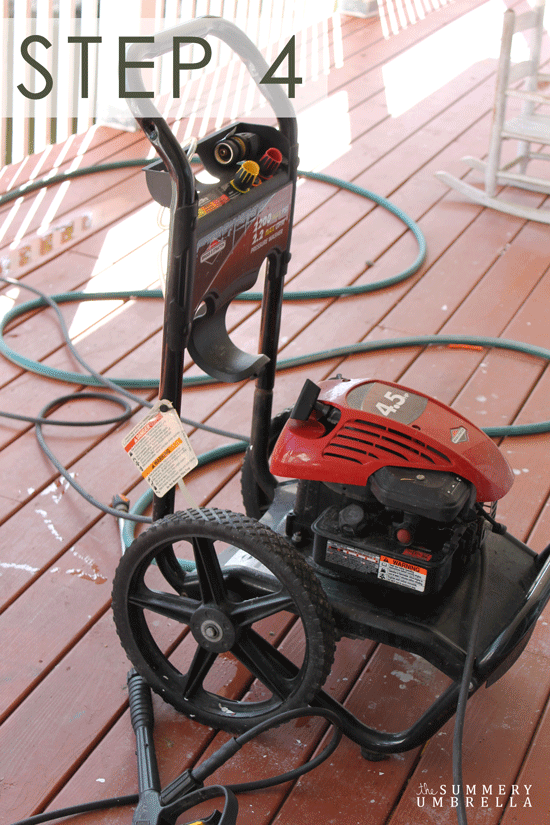
Step 4: Clean up
Clean up, clean up! Everybody clean up, clean up!
Yes, this is most definitely a toddler song, but it is also the next step in the process. Depending on what brand of deck paint/stain you purchased will ultimately depend on what they recommend will work best with their product.
Obviously, you should always follow the directions of any product (especially if this is your first time accomplishing such a project), but we just so happen to have a friend who is in the painting business and he told us he just uses bleach and a power washer. So… we took this route.
DISCLAIMER: I am by no means recommending this method. This is just what we decided to do instead to save ourselves some money.
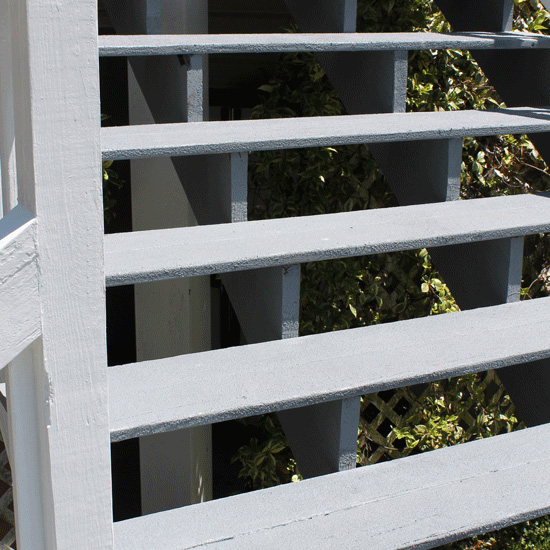
Step 5: Paint

Now, we paint! I’m sure you’re wondering what kind of paint we used. We actually used a few different types of paint to get this job done:
1.) Rustoleum Deck and Concrete Restore 10x in Slate.
2.) Olympic Rescue It! Wood and Concrete Resurfacer (we had Lowe’s color match to the Slate color that we liked for the Rustoleum Restore).
3.) Glidden Exterior White Paint in Gloss
5 Steps for Updating Your Deck
We used white paint for the railings, but we used two different types of deck paint due to the different textures of each. During the winter our stairs can get quite slick. This can be quite the conundrum (isn’t this a fun word?) considering we have two flights of stairs to go up and down every single day, several times a day.
So, the Restore is extremely thick and textured and works fantastically on our steps to prevent neck breakage and other horrible medical conditions related to falling down the steps.
Meanwhile, we used the less textured deck paint (Rescue It!) on the areas where we would most frequently walk barefoot.

Let me tell you. This was no easy project, and I’m not going to sugarcoat it for you. Painting a deck isn’t really my cup of tea. However, both of our decks desperately needed this TLC so it had to be done, but I definitely whined a little bit.
Ok, ok, a lot bit! 😉
Tips and Tricks for Updating Your Deck
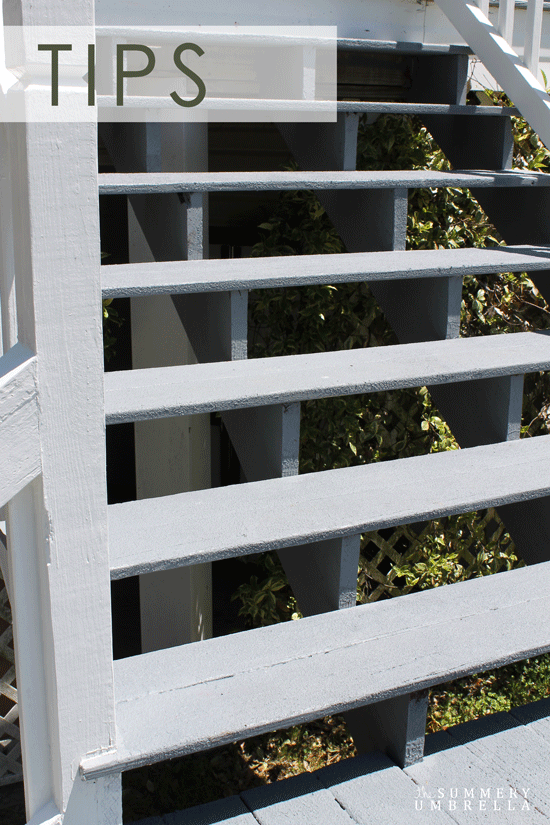
1.) Please, please, please read the directions on each container of paint that you buy. Some recommend a drying time of 2 days!
2.) Some recommend a drying time of 2 days! I know, I said that twice. Even though we did the front deck one day and the back deck the next day we struggled with being patient on this task, and unfortunately we paid for it. We had to go back over certain areas that pulled up paint when we had walked on it prior to the two days.
3.) Paint your deck on a warm, sunny day, and make sure there is no rain in the forecast for a few days. Why? The paint will dry a little bit faster, and then you won’t run into the problem we had… rain fell on day two for the back deck. Not cool.
4.) Use masking tape around your railings. You might think that you can paint around it, but trust me, you’ll thank yourself in the long run when you don’t have to fix as many spots.


In the end, though, I’m so happy we did this project, and I know we will be able to enjoy this color (and the decks!) for many, many more years to come! Now all I have to figure out is how to decorate…. Yay! 🙂

More of What You Love: Check Out These Recommended Posts!
Looking for other outdoor projects? Check out my two-tiered herb planter and also why I prune.
Let’s be Social
- Instagram @thesummeryumbrella
- Facebook @thesummeryumbrella
- Pinterest summeryumbrella
- YouTube @thesummeryumbrella
- Instagram @thesummeryumbrella
- Facebook @thesummeryumbrella
- Pinterest summeryumbrella
- YouTube @thesummeryumbrella
This post was updated in April 2022.


Wow, it looks great, I love the grey!!! A lot of work, I love a good deck but after seeing all the work you did perhaps I am glad that I don’t have one! LOL! I know that you won’t have a problem decorating, and I can’t wait to see what you come up with! BTW, if you had to wait 2 days how did you get out of the house? LOL!
I love your question… Let’s not go there! HAHA. It was definitely not one of our brighter moments. Not to mention, the rain kind of made the situation a little worse. Oops! Oh well, you live and you learn 🙂 Now on to decorating!
Gyah! I’m so jealous of your deck! My 8×8 concrete patio is looking super lame right now. Love how you spruced yours up, LZ!
Thank you, Lauren! You know, I’ve never looked at your Home Tour before, and I must say… I’m totally drooling. It is absolutely stunning! You know what I love the most? That you did a lot of Craigslisting, repurposing and making your home out of nothing (which is btw… not nothing, but truly gorgeous). That is so awesome!! I am definitely a mega-fan. 🙂
Love your deck!!! I totally shouldn’t be drooling but wish ours had that view! Thanks so much for sharing at our party! Featuring you tmorrow 🙂
I’m so excited! Thanks for the feature Kendra, and I will definitely an eye out for it. 🙂
You have a lovely deck! I can’t believe how much the whole appearance changed just after repainting it! My deck is in a horrible condition. I live in England and here it rains a lot and it is not so easy to maintain the outside part of the house but I am planning to clean up everything and repaint too! Thanks for sharing! Cheers!
Thank you so much, Gloria! It is amazing how much paint can change the entire look of … well, anything! Good luck to you as well 🙂
I was wondering how the paint has held up after a year? We are trying to decide weather to paint or stain our deck!
Hi Ashton, and thanks so much for stopping by! I’ll be honest. My husband and I have been very disappointed with these particular deck paints. Granted, we use our decks/stairs a lot! However, within months we saw a lot of wear, and now there are places where the paint has completely worn through! Unfortunately we will need to find a new deck paint this year. Best of luck, and if you find something you really like I’d love to know! 🙂
The decks and steps look great. Would you rate the rustoleum or the Olympic paint a little better than the other?
Hi Marsha–Thank you so much!! Honestly, I think so. We have three dogs and I feel that the Olympic paint did hold up very well to their constant running around on it.